How to Make Reels from Long Video That Get Watched
You’ve got a podcast, webinar, or product demo packed with useful moments, but the recording is too long to publish as-is. How to make reels that get watched is less about chasing trending audio and more about extracting one clear idea, tightening its pacing, and designing every frame for silent mobile viewing.
The repeatable workflow is simple: choose a moment with a strong payoff, cut to a result-first hook, reframe it to 9:16, place captions and calls to action inside safe zones, export correctly, then schedule several variations from the same source. Reels launched in August 2020 as Meta’s response to short-form video, and industry coverage reported by 2026 that they represented about 50% of time spent on Instagram, with some reports citing more than 140 billion daily plays and roughly 2 billion monthly users. That scale is why Reels have become a discovery format, not merely a way to reach existing followers.
For teams building a broader content engine, a LinkedIn content creation tool can help extend the same source material beyond Instagram. The practical system below focuses on clip selection, hooks, framing, captions, safe zones, and publishing without rebuilding every edit from scratch.
Table of Contents
- How to Make Reels That Get Watched Right Now
- Choose the Clip and Engineer the Hook
- Frame for Vertical and Design Inside Safe Zones
- Add Captions and On-Screen Text That Works on Mute
- Export Publish and Schedule Without Losing Reach
- Key Takeaways to Make Reels Faster Every Week
- Frequently Asked Questions About Making Reels
How to Make Reels That Get Watched Right Now
A strong Reel in 2026 is a short, single-idea vertical clip built for discovery and repeat viewing. Start with one useful moment from a longer recording, remove the setup that delays the value, and put the result or question on screen immediately.
Use this five-part repurposing flow:
- Select the moment: Find a payoff, sharp opinion, useful answer, or surprising demonstration.
- Reframe vertically: Convert the source to the native Reel canvas and keep the speaker or product visible.
- Design for mute: Add readable captions and on-screen text that carries the promise without audio.
- Close with an action: Tell viewers what to do next, such as save, comment, follow, or watch the full discussion.
- Export and schedule: Check the mobile preview, then queue multiple clips from the same recording.
Reels now reward intentional sequencing and tight pacing more reliably than decorative effects alone. The best repurposing system treats a long video as a source library, not as one oversized post. You’re looking for several independent clips, each with its own hook and payoff.
The next steps show how to find those moments, cut the opening, protect the message from Instagram’s interface, caption for silent viewing, and build a publishing queue that keeps production manageable.
Choose the Clip and Engineer the Hook
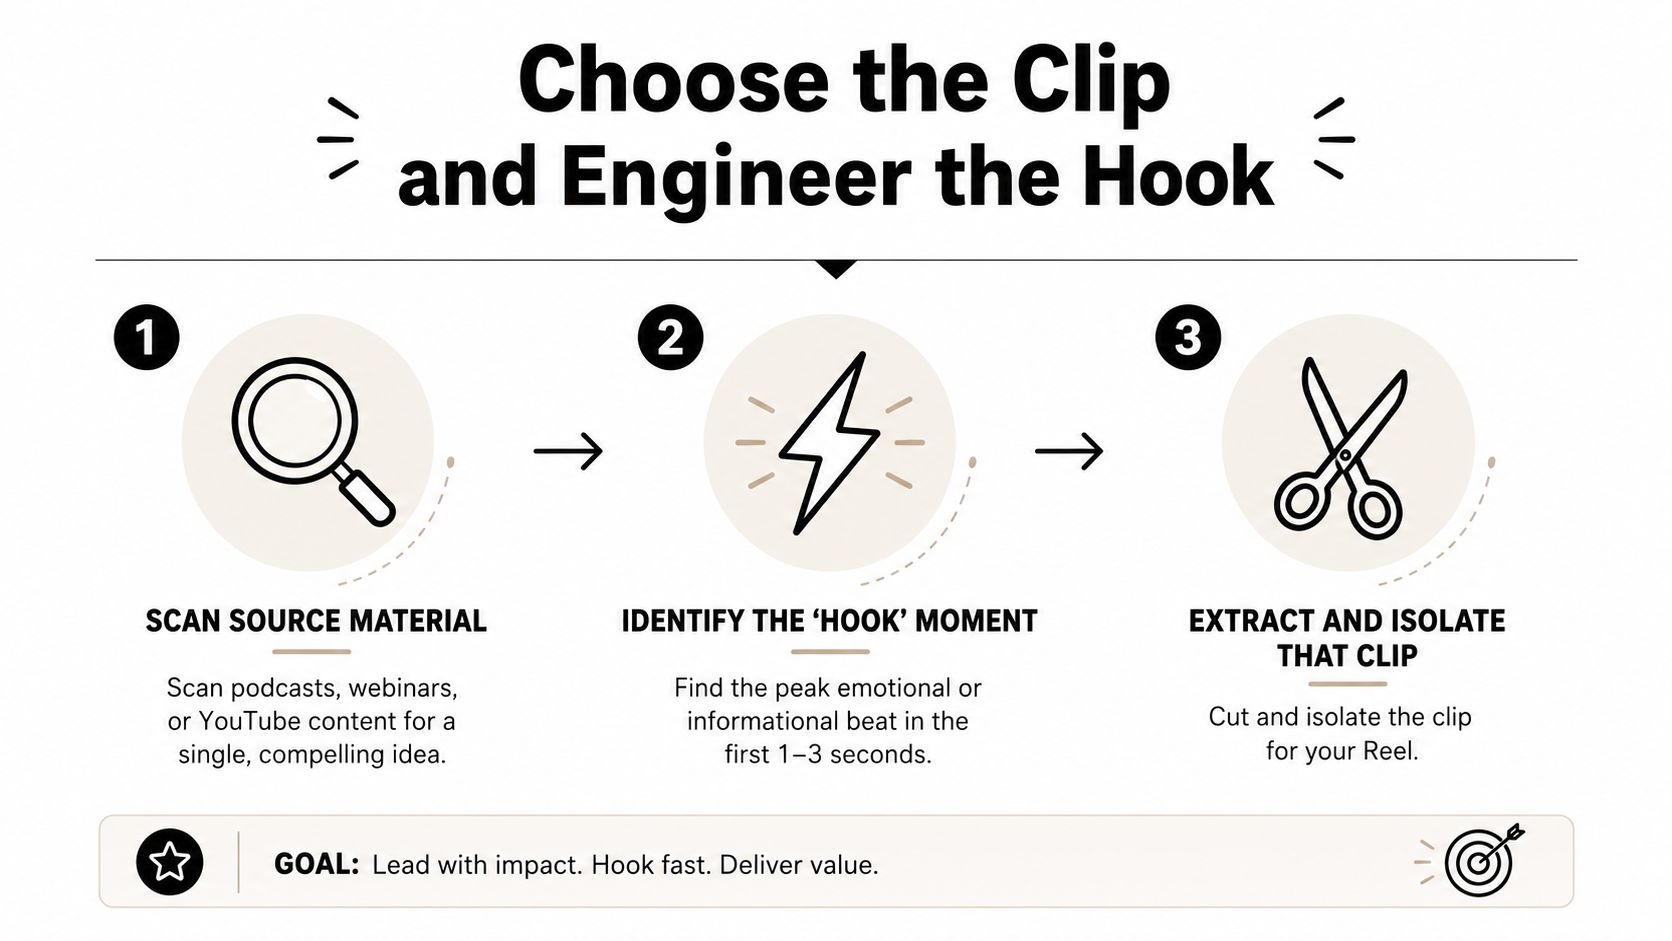
Open the source recording before opening your editor. Scan the transcript or rough timeline of a podcast, webinar, YouTube video, or customer conversation for a complete thought that can stand alone. The strongest candidates contain a clear answer, a firm point of view, a visible result, or a question that creates immediate tension.
Find the idea before you find the effect
A clip with weak structure will not become clear through transitions or effects. Select the idea first, then support it with a clean crop, accurate captions, and deliberate cuts. That approach also makes repurposing faster because alternate Reels can use the same body edit.
Look for:
- A payoff: “Here’s what changed after we removed this step.”
- A useful disagreement: A direct opinion that challenges a common assumption.
- A specific question: An answer that arrives quickly rather than after a long introduction.
- A visible result: A product action, before-and-after explanation, or demonstrated process.
Remove greetings, logos, repeated context, and phrases such as “I think what we need to talk about is.” Viewers need the reason to continue, not the speaker’s runway.
Build the first three seconds around the promise
The first 1–3 seconds decide whether a Reel earns continued viewing during its initial distribution test. Industry hook benchmarks describe a healthy 3-second hold around 70–80%. Retention below 70% usually signals a weak opening, while below 50% indicates a clear failure state, as reported by hook retention benchmarks.
Start with the result, question, or visual payoff. Put the promise on screen in the first frame, then delete any sentence that does not affect the viewer’s next action. A useful cut may begin halfway through the original answer.
Keep the first version within 15–30 seconds when the idea supports that length. Independent benchmark data reports average engagement of 5.8% for 15–30 second Reels, compared with 4.6% for 30–60 second Reels and 3.2% for Reels longer than 90 seconds, according to Reel engagement benchmarks. Longer clips can work, but they require enough value to justify the extra viewing time.
Trim dead air, compress setup, move the payoff earlier, and add a mid-video pattern interrupt. Then produce alternate openings from the same source. Change the first sentence, caption, or crop while keeping the body intact. For more opening prompts, review these video hook ideas.
Frame for Vertical and Design Inside Safe Zones
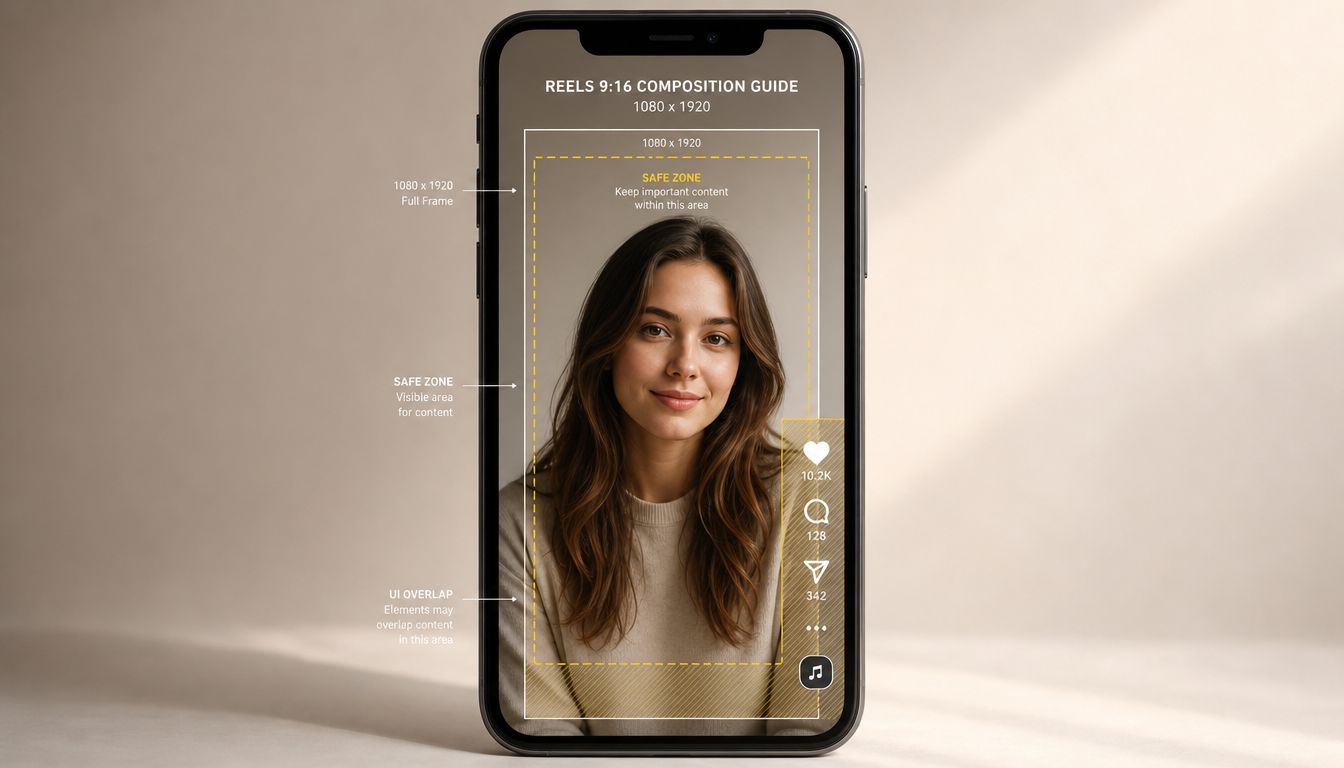
Vertical framing is a composition problem, not a final export checkbox. Instagram Reels use a 9:16 format at 1080×1920 pixels, which platform specification guidance identifies as the native full-screen canvas. A horizontal clip placed on that canvas without deliberate reframing will often leave letterboxing, crop the speaker, or push important text outside the visible area.
Reframe the subject, not just the file
For a single speaker, keep the face near the visual center and let the crop follow natural movement. For interviews or two-person conversations, use a speaker-focused crop and switch only when the dialogue or visual emphasis changes. Product demos need a different treatment, so keep the product action large enough to understand without forcing viewers to inspect a tiny horizontal frame.
Instagram’s interface occupies parts of the screen with handles, captions, engagement controls, and navigation. Keep faces, headline text, subtitles, and CTAs away from the extreme top, bottom, and side edges. The safe zone should be treated as a working area inside the canvas, not as the full canvas.
Check both feed and profile placement
A cover uses the same 1080×1920, 9:16 canvas, but its crop changes by placement. Instagram cover guidance notes that the feed uses a tighter crop while the profile grid uses a different crop, so center the subject and keep important wording away from the edges.
Before export, watch the clip on a phone. Check the first frame, the smallest caption, the speaker’s eyes, and the final CTA. If any of those compete with the interface, adjust the crop or move the text before publishing. The Instagram Reel dimensions guide is useful when standardizing this check across a team.
Add Captions and On-Screen Text That Works on Mute
Build captions into the edit from the first cut. A silent-first Reel should communicate its opening promise, supporting proof, and next action even when the viewer hears nothing.
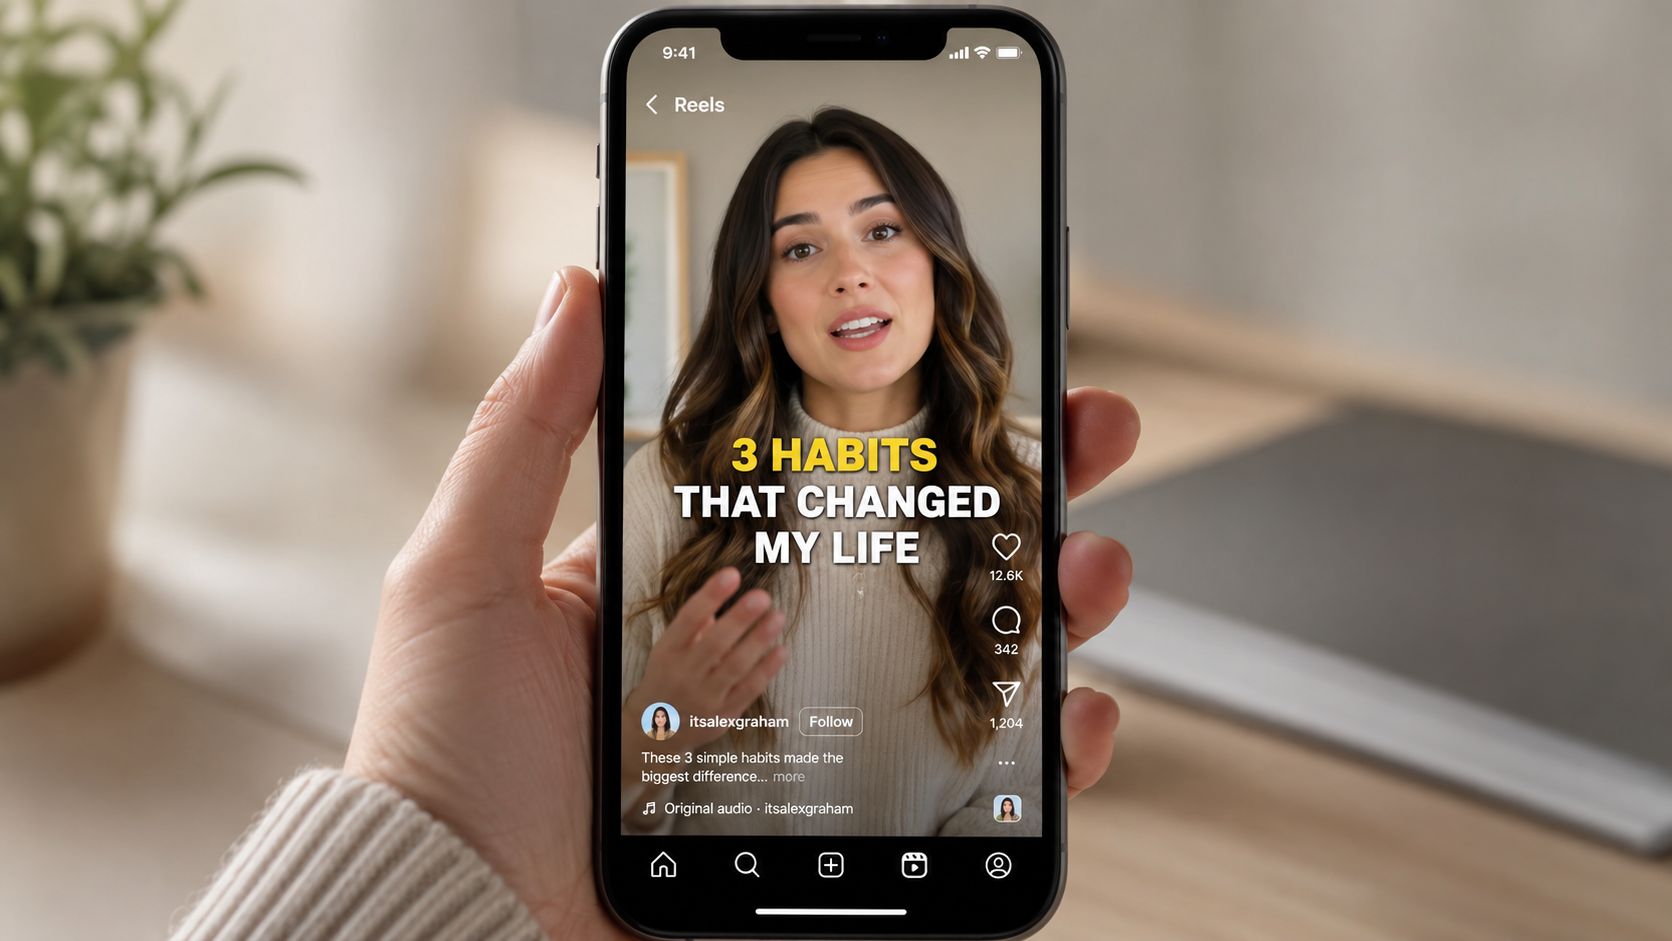
Generate auto-captions for a first pass, then correct names, product terms, numbers, and technical language by hand. Keep text chunks short, often around 3–5 words, so viewers can read them while following the speaker or product action. Use strong contrast and one stable caption position. Highlight only words that improve comprehension.
Practical rule: State the promise first, show proof next, and use the final text beat for the CTA.
Captions should carry dialogue. Selective on-screen text should carry the takeaway. Turning every spoken word into oversized kinetic type creates noise, especially when captions compete with a headline, interface element, or demonstration.
The opening caption needs a specific tension. “Today we’ll discuss customer onboarding” names the topic but gives little reason to stay. “Your onboarding flow loses users before activation” creates a stronger reason to continue, provided the footage supports the claim.
If early retention is low, tighten the opening caption and visual change before adding effects. Test a shorter first sentence, a sharper visual shift, or a clearer promise. This repurposing-first approach lets one long video produce several caption variations without rebuilding the entire edit.
For the mechanics, see how to subtitle with VideoLearningAI and this guide to adding captions to Instagram Reels. Check every version on mute before publishing, then confirm that captions do not cover the speaker, product, or CTA.
Export Publish and Schedule Without Losing Reach
Publishing quality depends on the handoff between edit and distribution. Export a clean vertical file at 1080×1920, check that captions remain readable, and watch the finished version on a phone before uploading. The export should preserve the intended crop, text timing, and audio balance rather than relying on Instagram to repair a weak master.
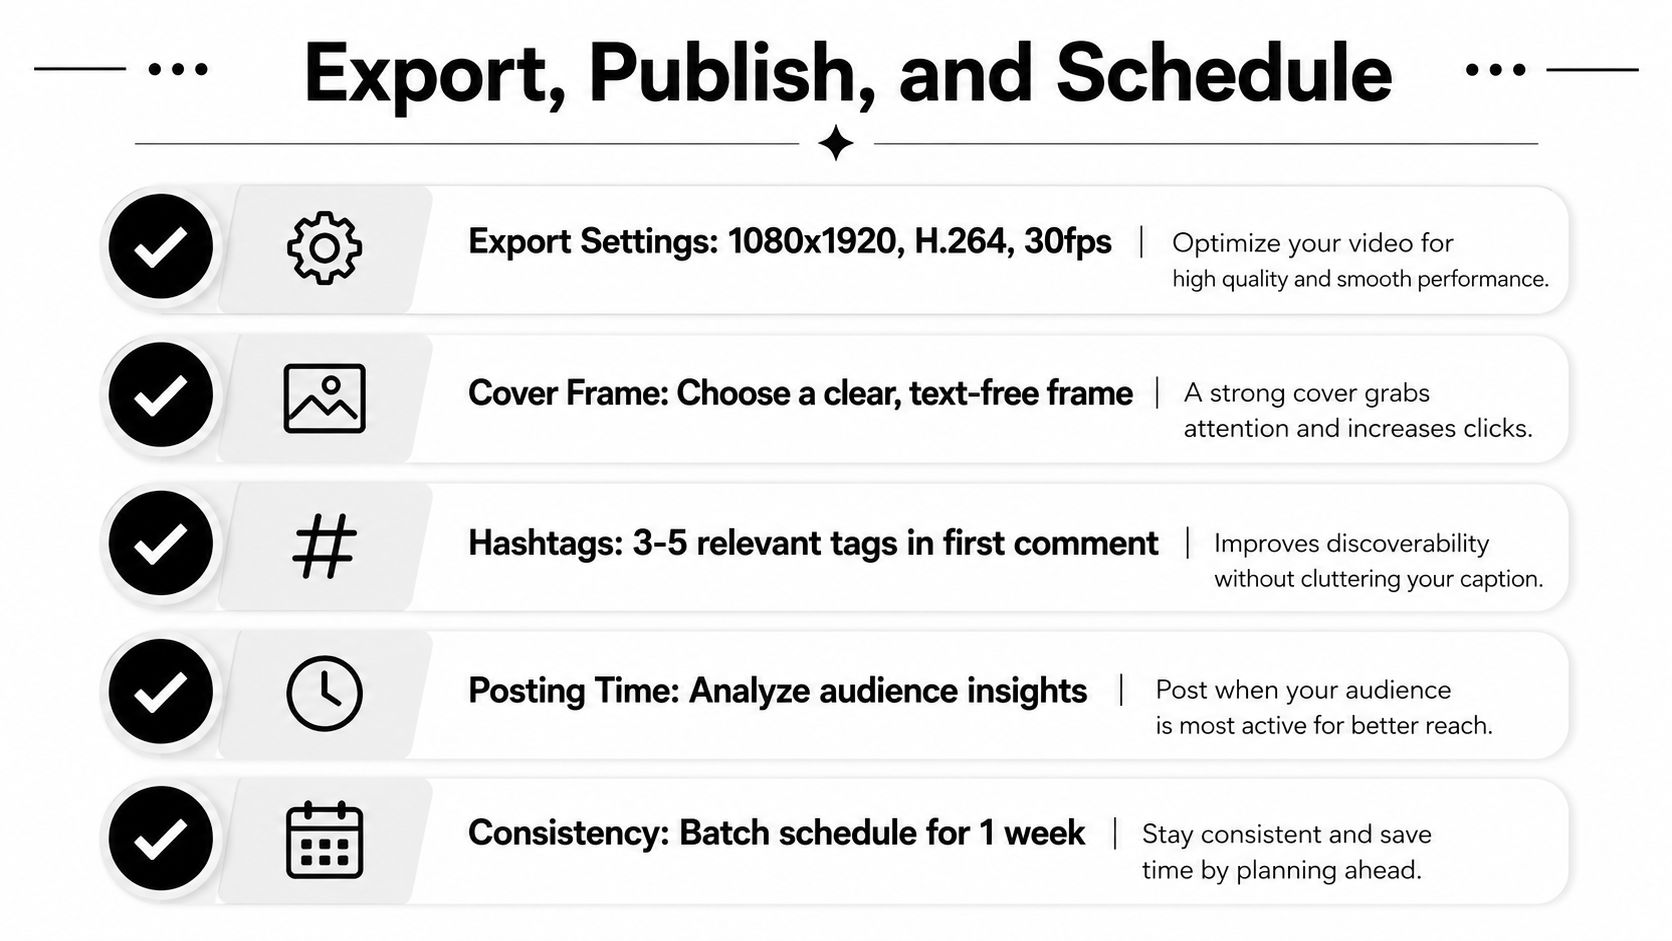
Instagram allows Reels to run for up to 20 minutes, but Reel length guidance notes that clips longer than 3 minutes aren’t recommended for new audiences and may receive less broad distribution. Treat 3 minutes as the practical reach ceiling, then shorten further when the idea can survive a tighter cut.
Prepare the post assets
Choose a cover that communicates the topic without depending on tiny text. Since feed and profile placements crop differently, keep the subject and any essential wording centered.
The caption can provide context that doesn’t belong in the video. Instagram allows up to 2,200 characters for Reel captions, according to Instagram Reel dimension and caption guidance. Use that space for a concise setup, a useful takeaway, a specific CTA, and relevant hashtags. Don’t use the caption to compensate for an unclear video.
Turn one recording into a queue
A long recording should produce a batch of distinct clips, not one overloaded highlight reel. Group the output by theme, then vary the opening hook, visual crop, and CTA while keeping each clip focused on one idea.
A practical review queue looks like this:
- Content check: Confirm the clip makes sense without the full recording.
- Visual check: Inspect the crop, safe zones, cover, and text at phone size.
- Caption check: Correct transcription errors and remove unnecessary words.
- Distribution check: Queue approved clips so publishing doesn’t depend on editing in real time.
For creators and B2B teams, quso.ai can repurpose long videos into short clips, generate auto-captions, and schedule posts across social platforms. The useful principle is consistency with review, not blind automation. Let the system handle repetitive production work, then keep a human check on the hook, message, and brand accuracy.
Key Takeaways to Make Reels Faster Every Week
The fastest Reel workflow starts before editing. Mark strong moments while recording, keep a running list of audience questions, and save clips that contain a complete idea.
Use this weekly checklist:
- Single idea: One clip, one promise, one payoff.
- Result-first hook: Start with the useful or surprising part.
- Vertical composition: Keep the subject and text inside safe zones.
- Silent-first captions: Make the message clear without audio.
- Batch distribution: Create several variations and schedule approved cuts.
That structure matters more than piling on effects or relying on trending audio. If revenue is part of the strategy, this guide to monetizing Instagram Reels can help connect publishing decisions to business goals.
Frequently Asked Questions About Making Reels
What length works best for a Reel?
Start with a tight, single-idea cut. Shorter clips often create a cleaner path from hook to payoff, while longer Reels need a strong reason to keep watching.
What dimensions should Reels use?
Use a 9:16 vertical canvas at 1080×1920 pixels. Keep faces, captions, and CTAs away from interface areas near the edges.
Can I make Reels from a podcast or webinar?
Yes. Search the transcript for complete answers, strong opinions, or clear demonstrations. Extract each moment, reframe it vertically, add captions, and create alternate hooks rather than manually rebuilding every clip.
Do trending sounds matter more than pacing?
No. Audio can support a Reel, but clear structure, fast delivery, and a useful payoff should come first. Silent-first design also protects comprehension when viewers watch without sound.
How long can a Reel caption be?
Instagram allows Reel captions up to 2,200 characters, giving you room for context, a CTA, and relevant hashtags without adding unnecessary spoken content to the video.
Use quso.ai to turn long recordings into short-form clips, add auto-captions, and schedule the approved Reels across your publishing workflow. Start with one podcast, webinar, or product video, extract several single-idea cuts, and build your next Reel queue from that source.