How to Add Captions to Instagram Reels: A 2026 Guide
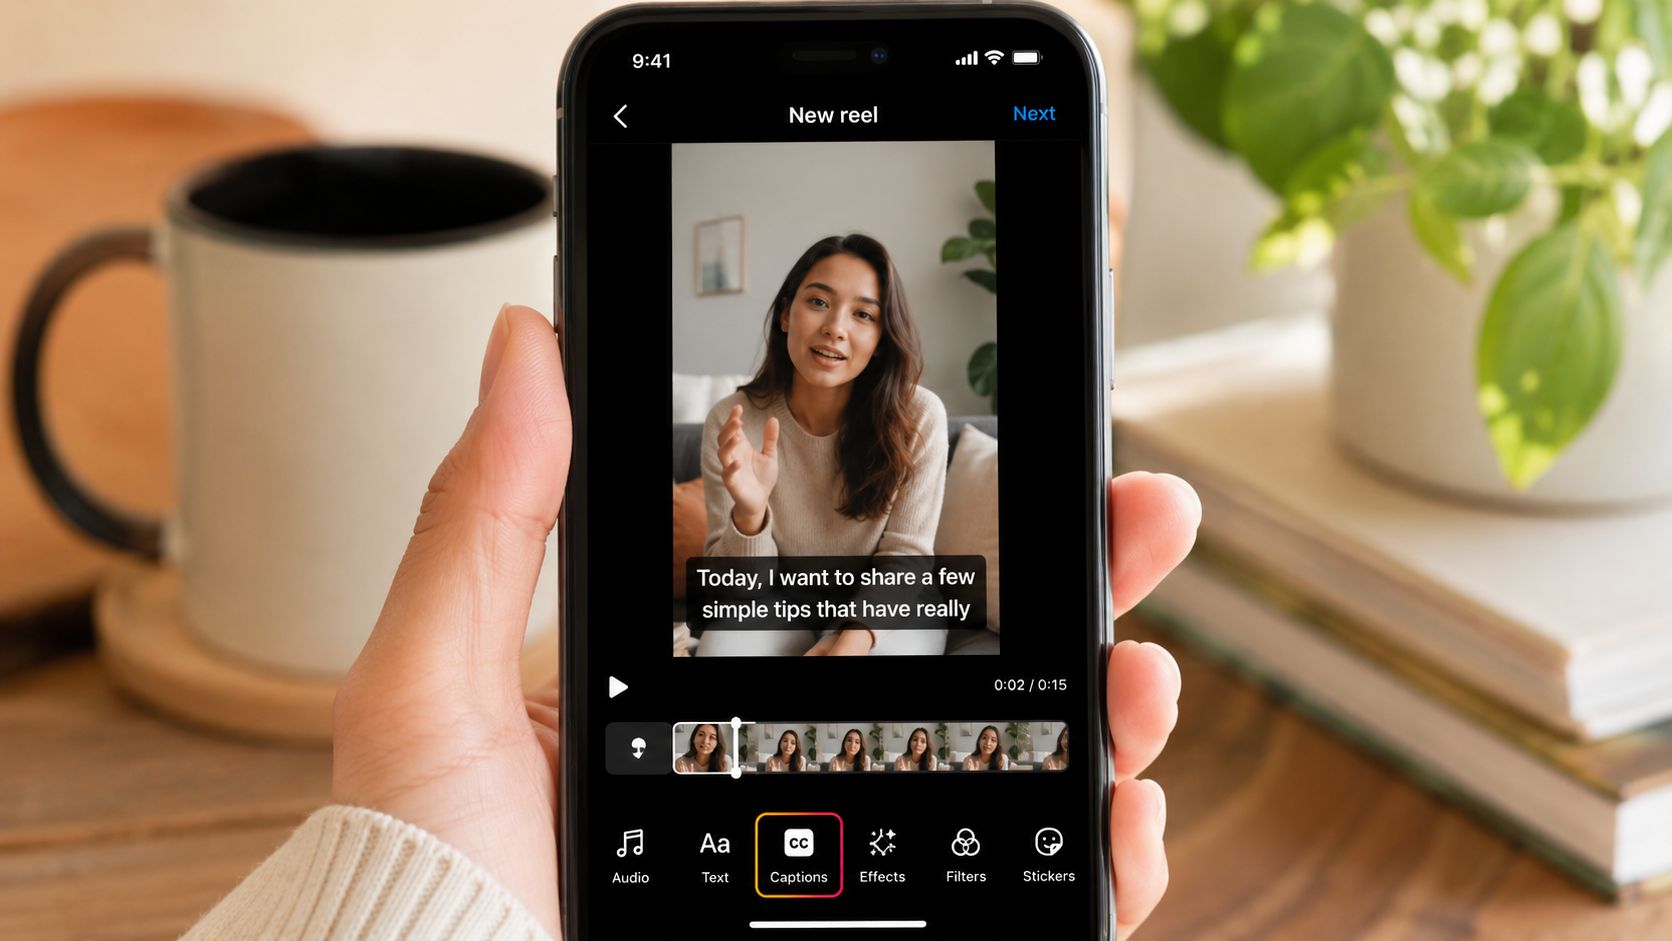
Open a Reel, tap the sticker tray, and choose Captions. Instagram will transcribe the audio for you, then you can edit the text, style, and placement before you post.
If you’re trying to figure out how to add captions to Instagram Reels, that’s the fastest path. The key question isn’t whether captions are available, it’s whether you should use Instagram’s built-in workflow, pre-caption before upload, or fix everything manually when the transcript misses the mark.
Table of Contents
- Getting Captions on Your Reels Fast
- The Native Instagram Method Using the Captions Sticker
- Using Pre-Upload Burned-In Captions for Control
- Captioning Best Practices for Readability and Impact
- Troubleshooting Common Caption Issues
- FAQ About Instagram Reels Captions
Getting Captions on Your Reels Fast
The fastest way to add captions is Instagram’s native Captions sticker, found in the sticker tray after you upload a Reel. That built-in path keeps captioning inside the posting flow, so you don’t have to export subtitle files or jump into another editor first. For a lot of creators, that’s enough for quick, clean posts, especially when speed matters more than styling control.
The three workflows that matter
- Native captions in Instagram for the quickest publish path.
- Burned-in captions before upload for more control over branding and accuracy.
- Manual fixes and troubleshooting when Instagram mishears names, jargon, or overlapping speech.
For repurposed video, this distinction matters. A long podcast clip, webinar segment, or founder takeaway usually needs tighter review than a casual selfie Reel, which is why many teams pair the native shortcut with a more controlled pre-upload workflow when the clip has to look polished across platforms. If you’re turning longer assets into short clips, this repurposing workflow guide is a useful companion.
Practical rule: use Instagram’s sticker when you need speed, and use pre-captioning when the Reel has to carry brand, product, or technical language cleanly.
The rest of this guide breaks the process down by method so you can match the workflow to the job, instead of forcing every Reel through the same path.
The Native Instagram Method Using the Captions Sticker
Uploading and finding the sticker
The standard flow is simple. Create or upload your video, tap Next, open the sticker menu, select the blue Captions sticker, and wait for Instagram’s speech-to-text system to transcribe the audio before you edit the font, style, and placement. That basic path is described in the walkthrough from this Instagram captions video.
Once the transcript appears, scan it like a human editor, not like a checkbox. Brand names, product terms, and names are the first things to inspect because auto-captioning often gets those wrong. That’s why a lot of guides recommend treating the auto-generated version as a draft, not a final asset.
Editing text and checking safe zones
After the transcript appears, adjust the caption text so it reads well on a phone. Keep the lines short, and test placement against the parts of the screen Instagram already uses for interface elements. The practical mistake users often make is putting captions too low, where buttons, usernames, and other UI can cover them.
If your Reel has key visual information near the bottom, move the captions higher. If the talking head fills the frame, keep the text centered enough to stay readable without blocking the face. In the edit screen, you can also change the style and alignment, and those settings apply across the Reel, as shown in the Reel editor workflow from this caption adjustment demo.
A separate route exists through accessibility settings, where users can toggle closed captions from their profile under Your app and media and Accessibility and translations. That path is helpful for broader app-level caption behavior, but for most creators posting a Reel right now, the sticker workflow is the one that matters most.
If a caption looks fine in the editor but clashes with the frame on mobile, it’s still not ready.
Using Pre-Upload Burned-In Captions for Control
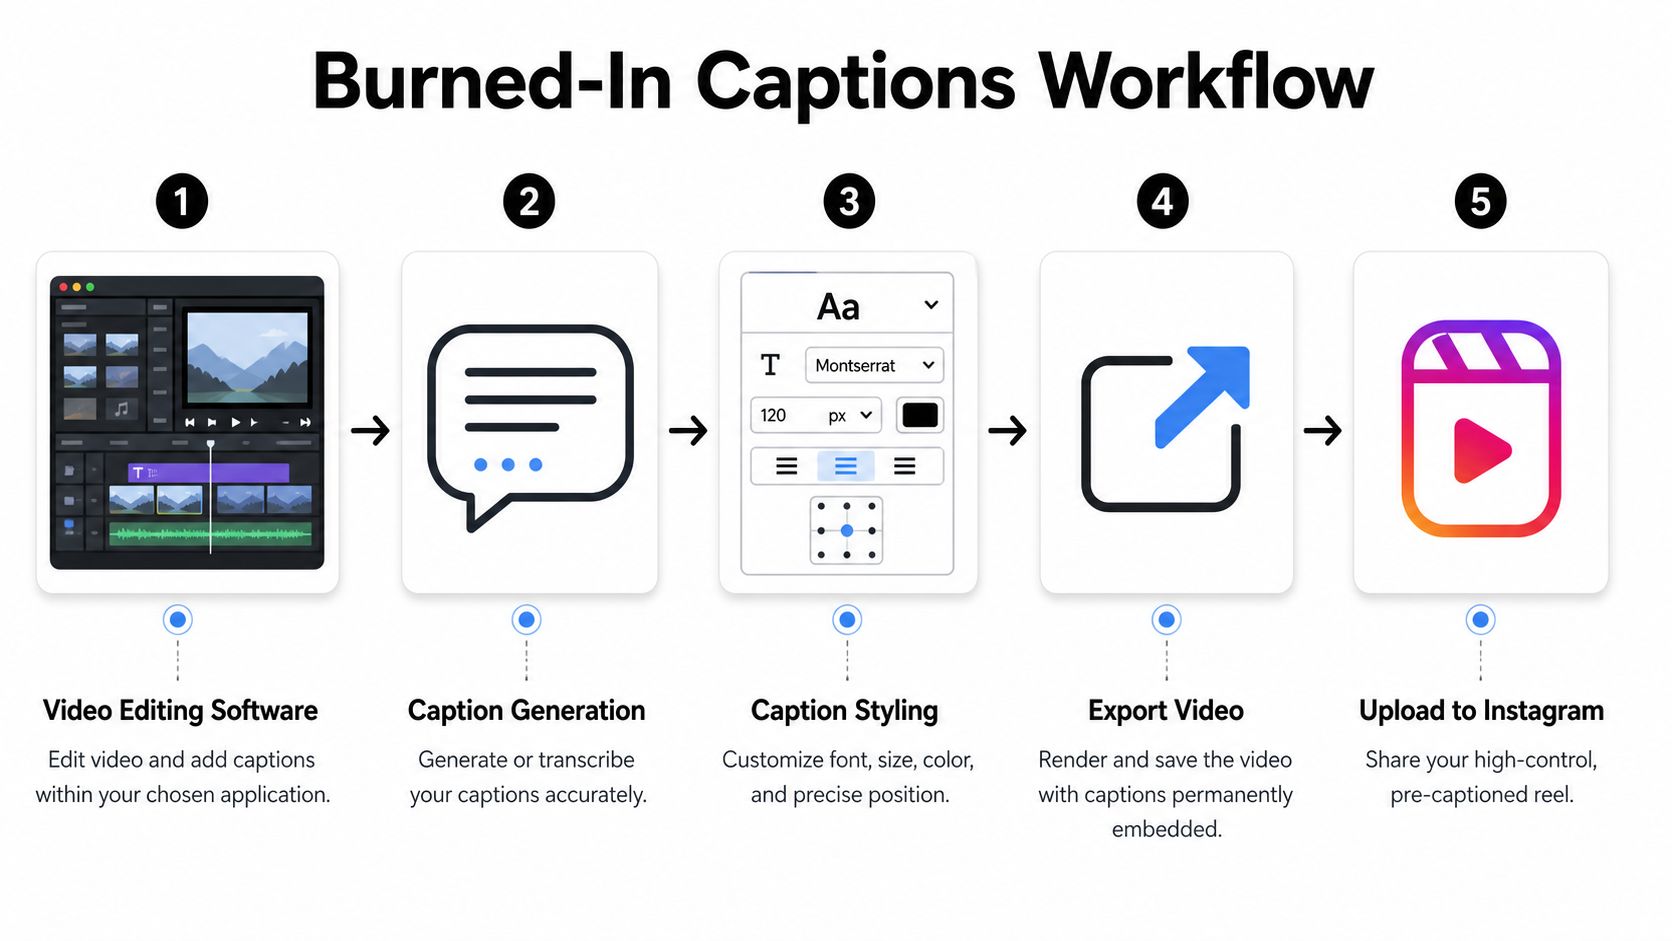
Burned-in captions are the better choice when you need the Reel to look the same everywhere, not just inside Instagram. The captions are rendered into the video file before upload, so you get more control over font, size, color, timing, and placement. That matters for B2B clips, course snippets, customer education, and any piece of repurposed video where wording has to be exact.
Instagram’s own in-app captions workflow removes a separate editing step for many creators, but it still leaves you inside Instagram’s styling limits. For teams that want to repurpose long-form video into captioned short clips and then schedule them in one workflow, tools built for that process are often a better fit. One option is quso.ai’s subtitle workflow for video editing teams, which is designed for clipping, captioning, and scheduling in a single flow.
When pre-captioning wins
Pre-captioning usually makes sense when the content is more valuable than the speed.
- Podcasts and webinars: tighter wording, cleaner pacing, less room for transcription mistakes.
- B2B demos and tutorials: technical terms, product names, and acronyms need review before publishing.
- Brand-led clips: consistent styling keeps the Reel from looking off-brand across posts.
The main trade-off is effort. You spend more time up front, but you avoid last-minute cleanup inside Instagram and reduce the chance of posting a clip with a broken name or awkward timing. For teams publishing at volume, that workflow also makes scheduling easier because the finished file is already ready to go.
If you’re building recurring Reel output from long videos, this is where automation earns its keep. A tool like quso.ai can generate captions while you repurpose the source video into short clips, then hand you a finished asset that’s ready to schedule.
Captioning Best Practices for Readability and Impact
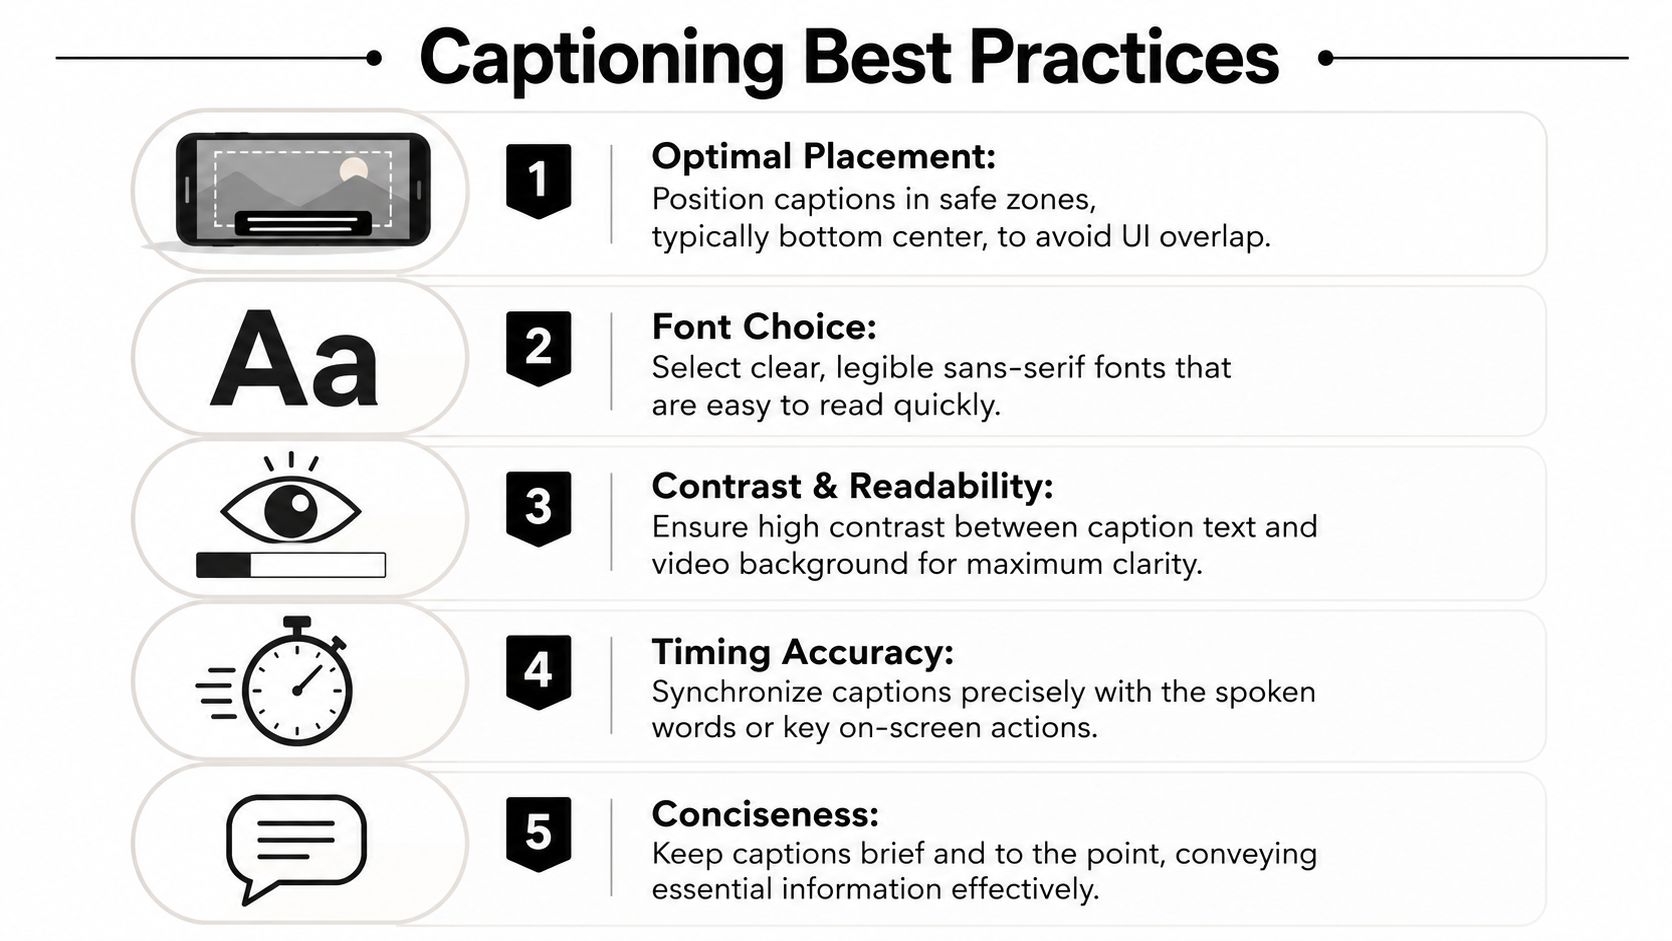
Good captions aren’t just present, they’re easy to read at a glance. That’s where most Reel captions fail, because people focus on transcription first and readability second. The more useful question is whether the text helps someone follow the clip without slowing them down.
What to optimize first
- Placement: keep captions inside the safe zone, usually centered low enough to feel natural, but not so low that Instagram UI covers them.
- Font choice: use clean sans-serif styles that stay legible on small screens.
- Contrast: make sure text stands out from the background, especially in busy clips.
- Timing: sync each caption block to the spoken line or visual beat.
- Conciseness: keep the text short enough to read quickly.
The readability trade-off
Most content treats captions as a universal best practice, but different creators need different outcomes. Podcasters often want clean spoken-word transcription. Educators need sequence and clarity. B2B marketers want repurposed clips that are readable, branded, and ready for distribution, which is why the workflow should match the goal, not just the platform.
Bottom line: captions should help someone understand the video without forcing them to pause or squint.
If you’re building captions for ads or promo clips, style choices matter even more because the text has to support the offer, not compete with it. This Instagram Reels advertising resource is useful if you want to think about captions as part of a broader performance creative system rather than a standalone overlay.
For teams refining their Reel format, these Instagram Reels best practices are worth pairing with your caption workflow, especially when you’re standardizing how clips look across a content pipeline.
Troubleshooting Common Caption Issues
The Captions sticker is missing
If the sticker doesn’t appear, first check whether you’re in the right editing flow and whether your app is current. Instagram sometimes surfaces features differently across accounts and app versions. If the issue persists, try the accessibility route from your profile settings, or switch to pre-captioning before upload so the Reel isn’t blocked by the app.
Instagram misheard a brand name or technical term
Fix the line directly in the editor if the error is small and obvious. If the Reel is full of jargon, names, or multilingual speech, pre-captioning is usually the cleaner fix because you can review the text before the video ever reaches Instagram. That’s the gap many basic guides miss, they explain how to add captions, but not how to rescue a transcript that gets the important parts wrong.
Captions are out of sync
When the text lags, the usual cause is a mismatch between the audio pacing and the auto-transcription timing. Shorten the caption blocks, remove filler words if needed, and recheck the flow on a phone before publishing. If the sync still feels off, caption the clip outside Instagram so you can control the timing more precisely.
The simple troubleshooting rule is this, identify the error, decide whether it’s a transcription problem or a styling problem, then fix it at the right layer. Not every issue belongs inside Instagram.
FAQ About Instagram Reels Captions
Can you add captions after posting a Reel?
Yes, but your editing options are limited after publishing. If you know the transcript needs careful review, it’s smarter to correct it before the Reel goes live.
Can Instagram automatically translate captions?
Instagram does support translation features in parts of the app, but translation quality depends on the source text. If the original captions are inaccurate, translation won’t fix the underlying problem.
Is there a character limit for Reel captions?
Instagram captions in the post description have their own limits, and the on-screen Reel captions need to stay short enough to read quickly. In practice, the visual limit is readability, not just character count.
Are burned-in captions better than Instagram auto-captions?
They’re better when you need control, consistency, or accuracy on branded content. Instagram’s native option is faster, but burned-in captions are easier to standardize across repurposed clips.
What should I choose for a podcast clip or webinar snippet?
Use pre-upload burned-in captions if the clip has technical language, multiple speakers, or a strong brand voice. Native Instagram captions are fine for fast publishing, but they’re less reliable when the transcript has to be exact.
If you’re repurposing longer videos into Reels, quso.ai can handle the captioning and scheduling in the same workflow, which keeps the process moving without forcing every clip back through manual cleanup. If you want a faster way to turn long-form footage into captioned short clips, it’s worth trying it on your next batch and comparing the result to your current process.