How to Add Subtitles to YouTube Shorts: A 2026 Guide
You can add subtitles to YouTube Shorts in three practical ways: use YouTube’s built-in auto-captions, upload an SRT file directly in YouTube Studio, or generate and burn in captions before upload. YouTube officially added SRT upload support for Shorts in 2023, and that matters because it gives you far more control than the older text-overlay workaround.
If you’re working on Shorts right now, you’re probably dealing with the same trade-off most social teams hit. The fastest method isn’t always the cleanest. The most accurate method takes more setup. And the method that looks best across YouTube, TikTok, and Reels usually isn’t YouTube-native at all.
That’s why the answer to How to Add Subtitles to YouTube Shorts isn’t just where to click. It’s choosing the right workflow for the kind of content you publish, how often you repurpose long videos into clips, and whether you need captions that viewers can toggle or captions that always stay on-screen.
Table of Contents
- The Core Methods for Adding Subtitles to Shorts
- Using YouTube’s Built-In Captioning Tools
- The Professional Method Uploading an SRT File
- How to Style and Time Subtitles for Retention
- The Fastest Workflow AI-Powered and Branded Captions
- Frequently Asked Questions about Shorts Subtitles
The Core Methods for Adding Subtitles to Shorts
There are three workable methods.
- Use YouTube auto-captions if you want the fastest native option and you’re willing to edit mistakes afterward.
- Upload an SRT file if you want cleaner timing, better accuracy, and a proper closed-caption track.
- Burn captions into the video if you need branded subtitles that stay visible everywhere, including cross-posted clips.
Each method solves a different problem. Native captions are convenient. SRT is more controlled. Burned-in captions are better for multi-platform distribution because they travel with the video file.
Shorts are often watched in sound-off situations, fast scroll environments, and by mixed-language audiences, making subtitles essential. YouTube’s Shorts caption support now aligns more closely with long-form workflows, including direct SRT handling and broad language coverage for captions, which makes subtitling less of a hack and more of a standard publishing step, as outlined in this guide to posting YouTube Shorts.
Practical rule: If you’re publishing one quick Short, native tools are fine. If you’re publishing a content system, use files or burn-ins.
Using YouTube’s Built-In Captioning Tools
A Short goes live, the hook works, and the comments start pointing out caption mistakes within minutes. That is usually the moment creators realize YouTube’s native tools are useful for speed, not for polish.
Auto-captions in YouTube Studio
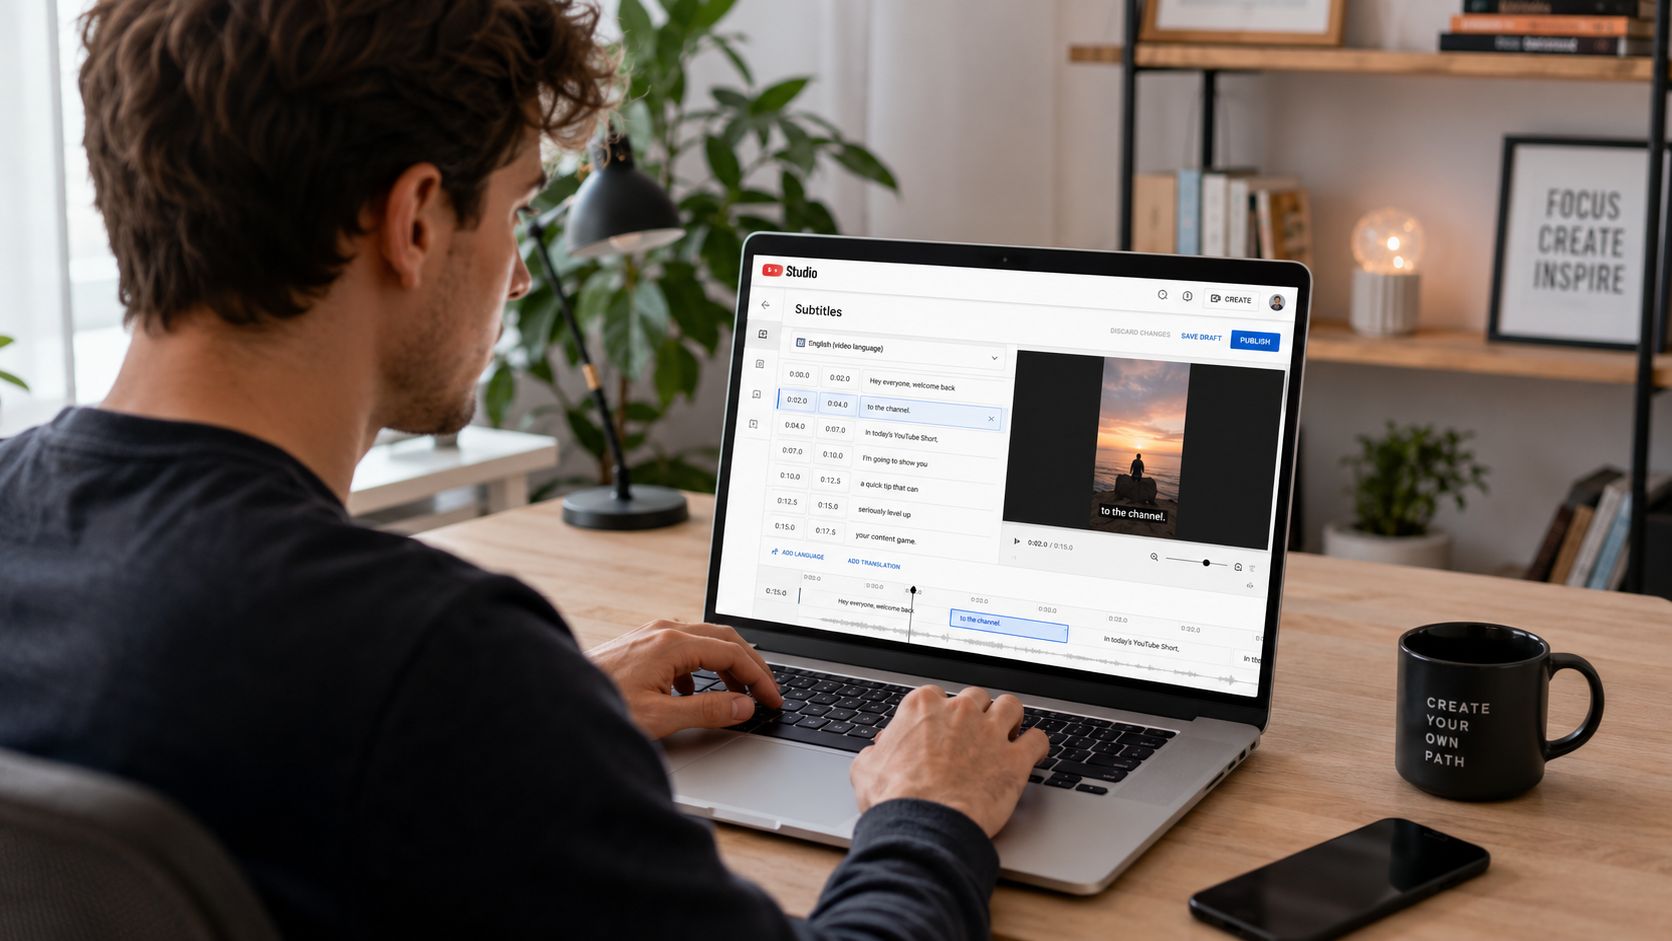
YouTube Studio is the fastest native workflow for a Short that needs captions today. Upload the video, open the subtitle panel, wait for the transcript to generate, then edit line by line before publishing.
That editing pass is the main job. Auto-captions are usually good enough to draft from, but they regularly miss product names, abbreviations, slang, and fast speech. They also tend to break sentences in awkward places, which hurts readability on a vertical screen.
Use native auto-captions when the priority is speed and the video is simple. A talking-head clip with clear audio is usually manageable. A busy clip with overlapping speech, music, or technical terms turns into manual cleanup fast.
A practical rule I use: if fixing the transcript will take longer than a few minutes, native captions stop being the efficient option.
The mobile Text tool
The Shorts camera text tool solves a different problem. It is good for a hook, one emphasized phrase, or a short callout timed to a beat. It is a poor choice for full subtitles because every text layer has to be placed and timed by hand.
That hand-built approach creates two problems. First, consistency slips. Font size, positioning, and timing often drift from scene to scene. Second, the text can sit too low on the frame and compete with the Shorts interface. If you edit captions visually in the app, keep them centered in the lower-middle portion of the screen instead of hugging the bottom edge.
If you already create subtitle files in an editor, this guide to subtitle workflows in Premiere Pro is useful for building cleaner timing before the video ever reaches YouTube.
Where native tools work, and where they waste time
| Tool | Best use | Main advantage | Main limitation |
|---|---|---|---|
| YouTube auto-captions | Fast uploads with clear speech | Quick draft inside Studio | Needs manual correction and limited styling control |
| Shorts mobile text tool | Hooks, punch words, short labels | Fast visual emphasis | Too slow and inconsistent for full subtitles |
Native tools are fine for one-off Shorts, quick tests, or creator accounts posting lightweight content.
They start to break down when you need repeatable quality across a batch of videos. You cannot rely on them for precise timing, consistent visual treatment, or a scalable caption workflow. For that, use a subtitle file or burn captions into the edit before upload.
The Professional Method Uploading an SRT File
A common Shorts workflow breaks at the last step. The edit is clean, the hook is strong, then captions get handled inside YouTube and the timing slips, line breaks look awkward, or a later wording fix turns into a full re-upload.
Why SRT is the clean option
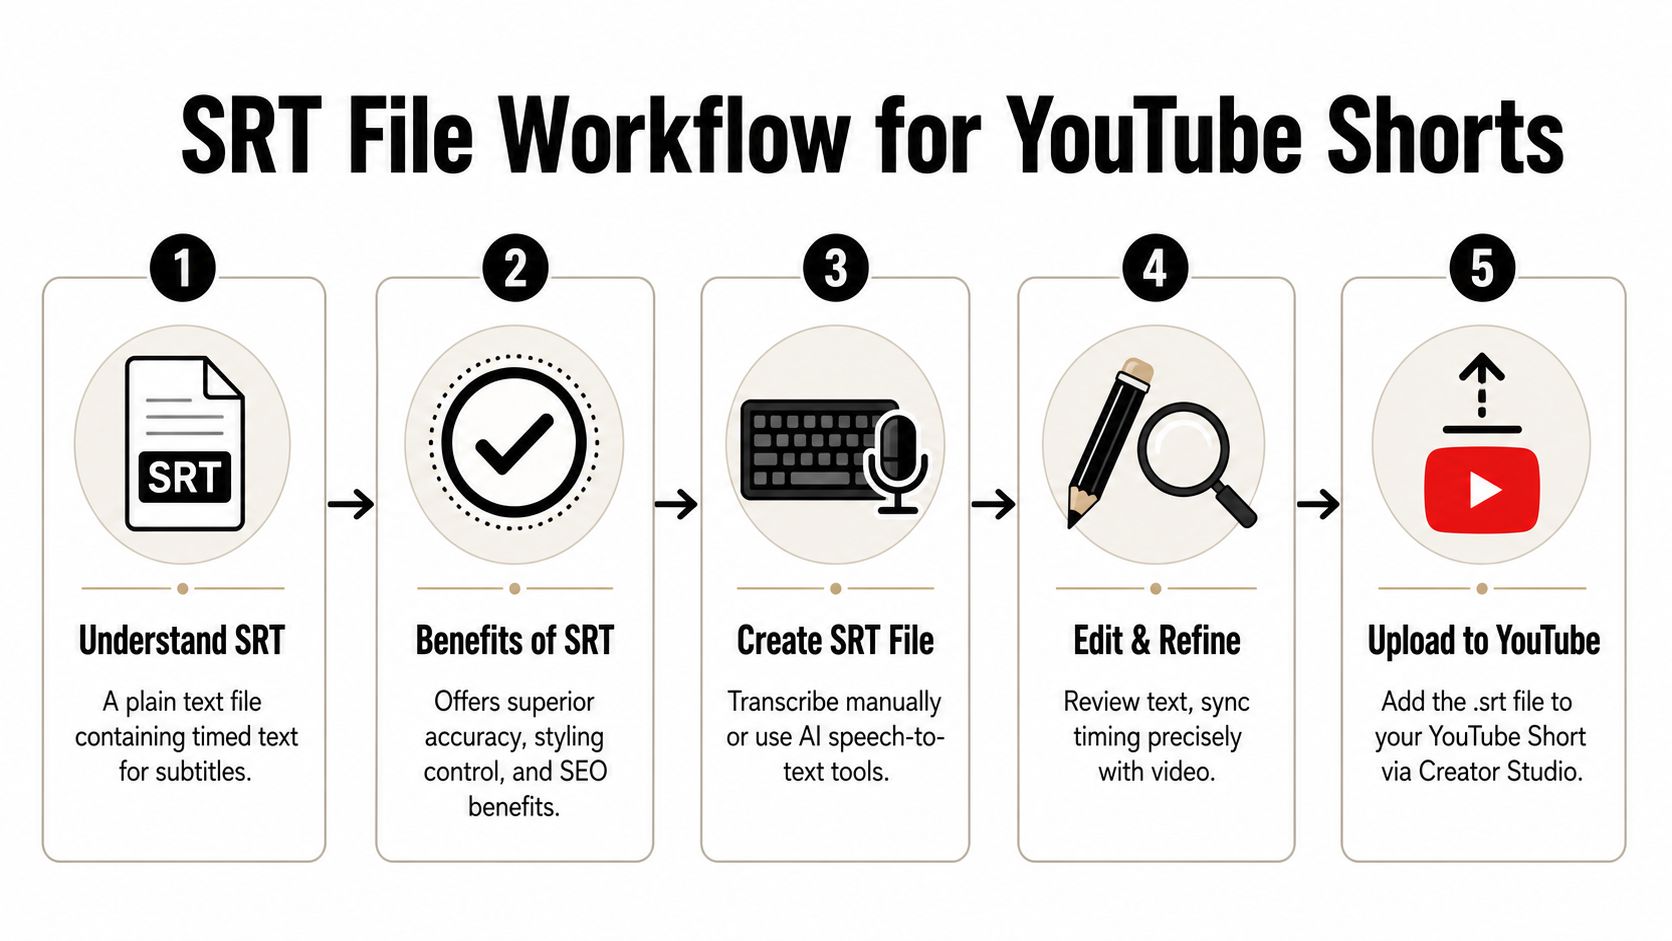
An SRT file is a subtitle file made of caption text plus timecodes. YouTube reads that file and displays each line at the assigned moment.
For Shorts, SRT is the best choice when you want control without burning text into the video itself. It keeps captions editable after upload, lets viewers toggle them on or off, and preserves a cleaner master file if you need to update the cut later.
This method is slower up front than auto-captions. It saves time once you are posting regularly.
That trade-off matters. If a Short is a one-off test, YouTube’s draft captions are usually enough. If you publish in batches, work with approvals, or need clean captions across multiple languages, file-based subtitles are easier to maintain.
If your captions are already being built in an editor, a practical Premiere Pro subtitle workflow helps keep timing and export settings consistent before the Short ever reaches YouTube.
How to upload an SRT to a Short
Use this method when the transcript is final or close to final.
- Create the subtitle file in standard SRT format.
- Save it with UTF-8 encoding so accented characters and non-English text display correctly.
- Open YouTube Studio and select the Short.
- Go to Subtitles and upload the SRT file for the video language.
- Play the Short through inside Studio and check timing, line breaks, and punctuation before publishing.
A few workflow habits prevent avoidable problems.
- Write in short caption units. One thought per subtitle is easier to read on a phone screen than long sentence blocks.
- Check timing around cuts. Captions that change on the same frame as a jump cut often feel late, even when the timecode is technically correct.
- Watch the opening and closing lines twice. Those are the spots where imported files most often feel clipped or rushed.
- Keep your naming tidy. If you publish multiple versions, label files clearly by language and edit date so the wrong subtitle file does not get attached.
SRT also gives you a cleaner revision path. If legal copy changes, a product name gets updated, or you catch a transcript mistake after publishing, you can replace the subtitle file without rebuilding the video. That is a significant professional advantage. Not flashy. Just faster to manage at scale.
How to Style and Time Subtitles for Retention
A viewer opens a Short on mute in a grocery line, gives you about a second, and decides whether to keep watching. Subtitle styling decides whether that second turns into watch time or a swipe.
Safe zones matter more than most creators think
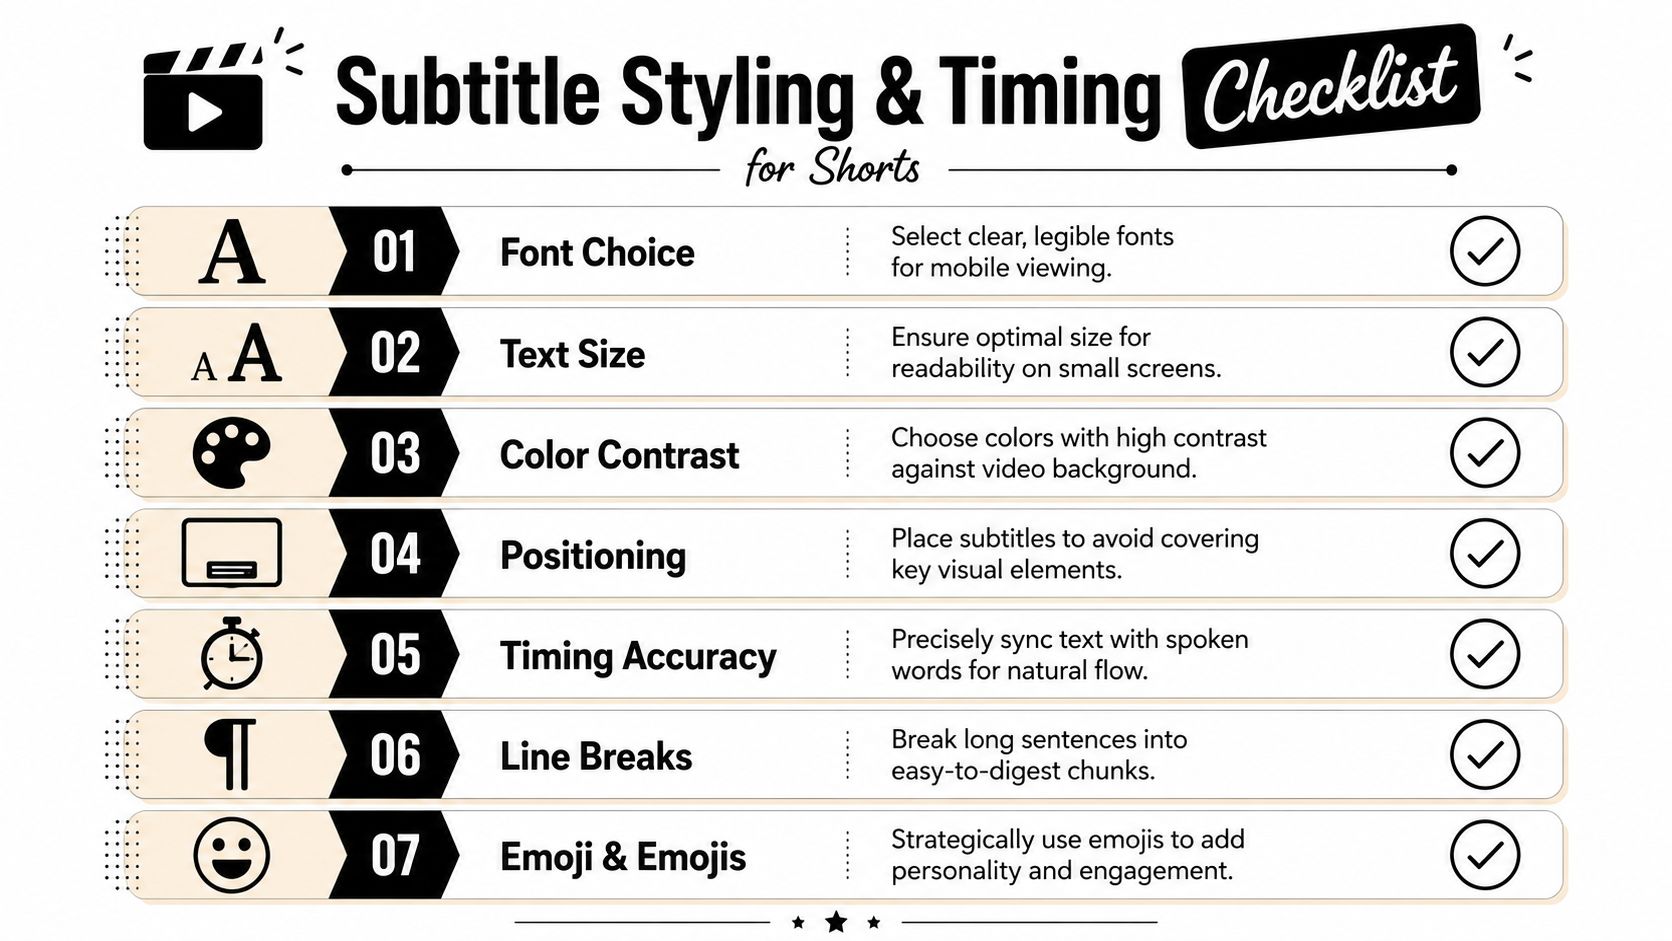
The fastest way to make captions harder to read is to park them at the very bottom of the frame. On Shorts, that area competes with interface overlays, progress indicators, and whatever text treatment is already in the edit.
The safer professional choice is to place captions a little higher than traditional lower thirds, usually around the middle-lower portion of the screen. That gives the text room to breathe and keeps it out of the UI stack. If you also publish to TikTok or Reels, this approach saves rework because the same safe-zone discipline carries across platforms. This guide to turning on captions on TikTok is useful if you want your caption placement workflow to stay consistent beyond YouTube.
Three layout habits help immediately:
- Keep captions inside a mobile-safe zone, not flush with the bottom edge
- Leave padding around the text box so letters do not feel cramped
- Check placement after export on an actual phone, not only in the editor preview
Legibility rules for mobile
Shorts are watched on small screens, often in bad lighting, and often while the viewer is half-distracted. Decorative caption styles usually lose that fight.
Use a bold, plain font. Keep line length tight. Add contrast behind the words, either with a solid or semi-transparent background, or with a clean stroke if the footage is simple enough to support it. Busy video backgrounds, quick cuts, and bright highlights all punish thin text.
I generally avoid over-styling unless the creator’s brand depends on it. Animated karaoke captions can work for entertainment clips, but they take longer to produce and can reduce readability if every word is bouncing, scaling, or changing color. For educational Shorts, commentary, demos, and repurposed interviews, simpler captions usually hold attention better.
Timing that feels natural
Good subtitle timing feels invisible. Bad timing creates friction right away.
Auto-generated captions are fast, but they often need cleanup around pauses, jump cuts, filler words, and proper nouns. The fix is not complicated. Start each subtitle when the phrase is spoken, not a beat early. End it as soon as the thought lands. If a line hangs on screen after the speaker has moved on, retention drops because the viewer is reading stale information instead of watching the next visual cue.
A few timing rules hold up well in practice:
- Break subtitles by phrase, not by a fixed word count
- Keep one idea per caption block
- Avoid flashing lines too quickly to read
- Do not let captions linger after the speaker changes topic
- Retime around cuts, because a technically correct subtitle can still feel late after a fast edit
Here, the trade-off becomes clear. YouTube auto-captions are fine for speed. An edited SRT gives tighter control. Burned-in captions give the strongest visual consistency. If retention matters, the winner is usually the method that lets you correct timing line by line instead of accepting the first transcript pass.
For teams producing Shorts at volume, it also helps to standardize the caption workflow before the file reaches YouTube. An AI video generator can help upstream with asset creation and clipping, then captions can be timed and styled in a repeatable way during post.
A simple final test catches most problems. Watch the Short once with sound off, once with sound on, and once on your phone at normal scrolling speed. If the captions still read cleanly in all three passes, they are doing their job.
The Fastest Workflow AI-Powered and Branded Captions
If you publish a few Shorts per month, manual cleanup is manageable. If you repurpose webinars, podcasts, demos, or interviews into a steady clip pipeline, manual subtitle work becomes bottleneck work.
When burn-in captions are the better choice
Closed captions are useful when you want a viewer-controlled track. Burned-in captions are better when you care about visual consistency across platforms.
That’s especially true for repurposed content. A file-based or AI-assisted workflow can generate an SRT first, then burn styled captions into the MP4 before upload so the text behaves the same way on Shorts, TikTok, and Reels. The same workflow is useful when you want branded captions that don’t depend on a platform setting.
If you’re also experimenting with creative production workflows, an AI video generator can help upstream with asset creation before captions are added downstream.
A scalable workflow for repurposing clips
The fastest repeatable process looks like this:
- Pull a clip from long-form content
- Generate captions automatically
- Correct names, jargon, and timing
- Apply a branded subtitle style
- Export once for every vertical platform
- Schedule distribution
Some tools combine those steps into one workspace. For example, quso.ai is built around repurposing long videos into short clips, adding captions, and preparing them for cross-platform publishing, which is useful when you don’t want subtitle work spread across separate apps. If you’re comparing caption behavior across platforms, this post on how to turn on captions on TikTok is a helpful reference point.
Later in the workflow, it helps to see how the full clip-to-caption process fits together:
The main trade-off is straightforward. Burn-ins give you consistency and styling control. Closed captions give the viewer more flexibility. Teams that publish across multiple short-form platforms usually choose consistency.
Frequently Asked Questions about Shorts Subtitles
Can I upload subtitles to YouTube Shorts directly?
Yes. YouTube supports direct SRT uploads for Shorts, and the file should be saved as UTF-8 so characters display correctly.
Why aren’t my subtitles showing on my Short?
Start with the basics. Check that the uploaded file is SRT, confirm the encoding, and replay the published Short to make sure the timing lines up with the audio. If the issue is baked-in text you want removed from a generated clip, this guide to a Veo3 AI removal solution is relevant.
Should I use closed captions or open captions for Shorts?
Use closed captions when you want a platform-native subtitle track viewers can toggle. Use open captions when you want fixed styling and the same look across YouTube, TikTok, and Reels.
Can I change the default look of YouTube’s native captions?
Not much. You get more control by uploading a prepared file or burning styled captions into the video before publishing.
What’s the safest place to put subtitles on a Short?
Avoid the bottom area where the Shorts UI appears. Keep subtitles around the vertical center-third so the interface doesn’t cover them.
If you’re clipping long videos into Shorts regularly, it’s worth testing a workflow that handles transcript generation, subtitle cleanup, styling, and publishing in one place. quso.ai is built for that use case, so you can move from long-form content to captioned short clips without stitching the process together manually.