How to Burn Captions Into Video the Right Way

You’re staring at a long edit, a pile of captions, and a deadline that does not care whether you want to babysit every clip by hand. The practical answer is simple. Burn captions into video when you need the text to travel with the file, survive platform uploads, and stay visible even when a player won’t load subtitle tracks.
If you’re repurposing one long recording into a stack of Shorts, Reels, or TikToks, the main question isn’t whether to burn captions in. It’s which clips need permanent captions, where they should sit so the app UI doesn’t cover them, and how to automate the export so you’re not editing every version twice.
Table of Contents
- What Burning Captions Into Video Actually Means
- The Fastest Path With an AI Caption Generator
- Burning Captions in Premiere Pro, Final Cut, and DaVinci Resolve
- Hardcoding Subtitles With FFmpeg and HandBrake
- Placement Rules So Captions Survive the Platform UI
- Export Settings and Burn-In Mistakes to Avoid
- FAQ on Burning Captions Into Video
What Burning Captions Into Video Actually Means
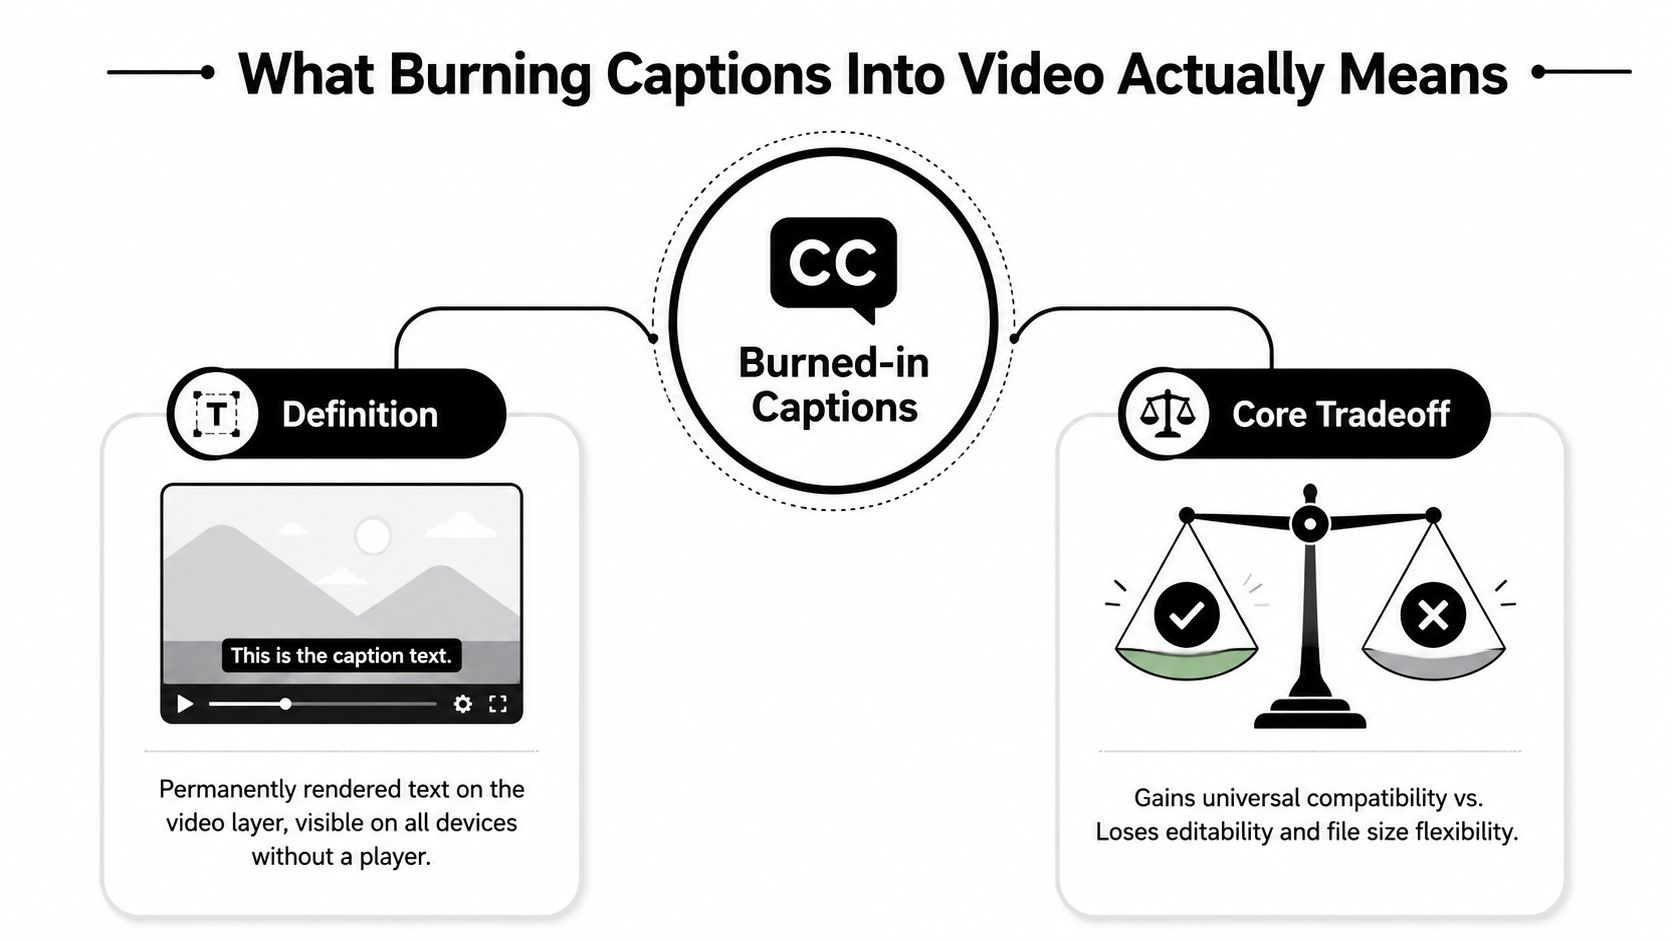
Burned-in captions are text rendered directly into the video frames. They’re different from sidecar captions or downloadable subtitle files because the viewer can’t switch them off later, and the text survives players and upload flows that strip subtitle tracks. AWS MediaConvert documents that you can burn in only one caption track per output, and that the captions must live in the same video output group as the video itself. AWS MediaConvert burn-in output captions
Why that matters for repurposing
That constraint changes the job from “add subtitles” to “lock the caption design before export.” If one source video gets turned into ten short clips, you don’t want ten different style decisions fighting the same brand look. You want one caption treatment that’s readable, consistent, and ready to ship across TikTok, Reels, and Shorts.
Practical rule: if the final file needs to survive upload, sharing, or platform processing without losing captions, burn them in before export.
The upside is durability. The downside is that burned-in text is permanent, so it can’t be toggled off or swapped for another language track later. That tradeoff is why burned captions work best when the file is already destined for a specific platform and aspect ratio. It’s also why short-form repurposing workflows often use burn-in at the very end, after the clip is trimmed, framed, and styled for mobile.
Here’s the map for the rest of the workflow, based on what you already use: an AI caption generator path, a desktop editor path, a command-line path, and a GUI fallback. If you want the fastest route, skip ahead to the AI section. If you already have subtitles, the FFmpeg route is lean. If you’re inside an editor, the export path is usually enough.
The Fastest Path With an AI Caption Generator
Many teams do not want to hand-edit ten clips just to get readable captions onto each one. They want to upload a long video, generate subtitles automatically, check the text once, and export the short-form version with captions already baked into the file. That’s where an AI repurposing workflow makes sense, especially if the same asset also needs to be scheduled for social after export.
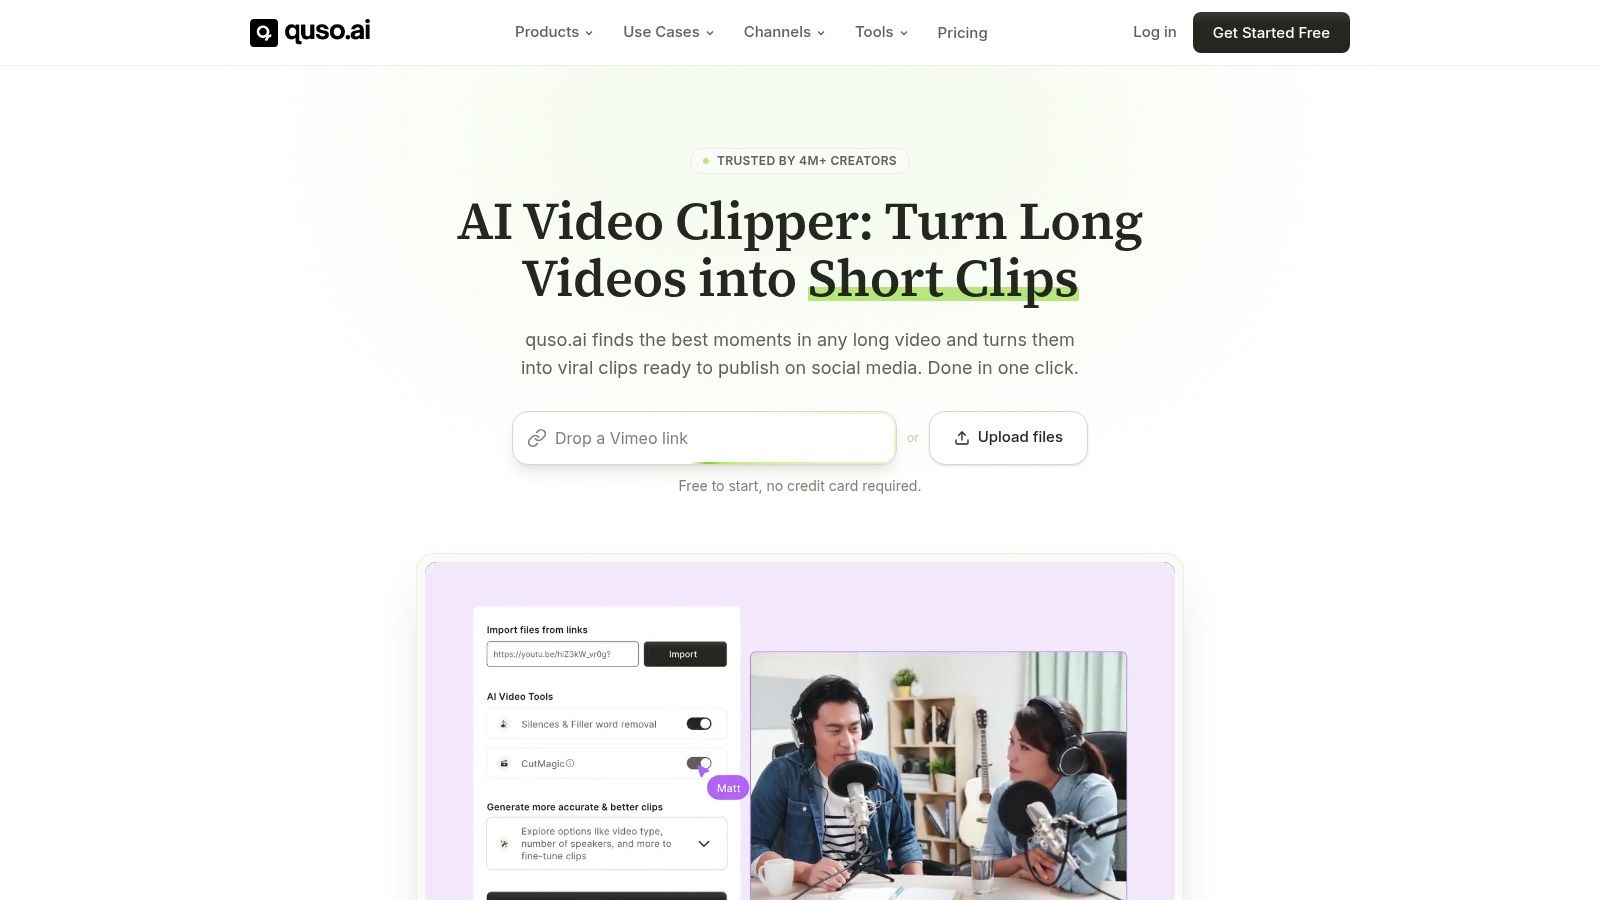
In quso.ai, the workflow is built around that repurposing loop. Upload the source video, generate the transcript or captions, review the text for names and jargon, then apply a caption style that’s meant for mobile viewing. From there, choose the burn-in export option so the subtitles become part of the MP4 instead of a separate track. The same flow can then move the finished clip into scheduling, which keeps captioning and distribution in one place.
The style choices matter more than people think. Use a sans-serif font, a readable weight, and a caption preset that supports word-by-word highlighting or short phrase chunks instead of dumping full sentences across the screen. That keeps the text usable on a phone and reduces the chance that a platform UI element hides the important part of the line. For many teams, this is the difference between a clip that feels native and one that looks pasted on.
A useful starting point is to keep the transcript review tight and make the styling decision once, not per export. If your captions are meant for TikTok, Reels, and Shorts, the goal is not literary polish. The goal is readable motion, clean spacing, and a file that’s ready to ship without reopening an editor.
For a platform-specific walkthrough, see how to add subtitles to YouTube Shorts.
Burning Captions in Premiere Pro, Final Cut, and DaVinci Resolve
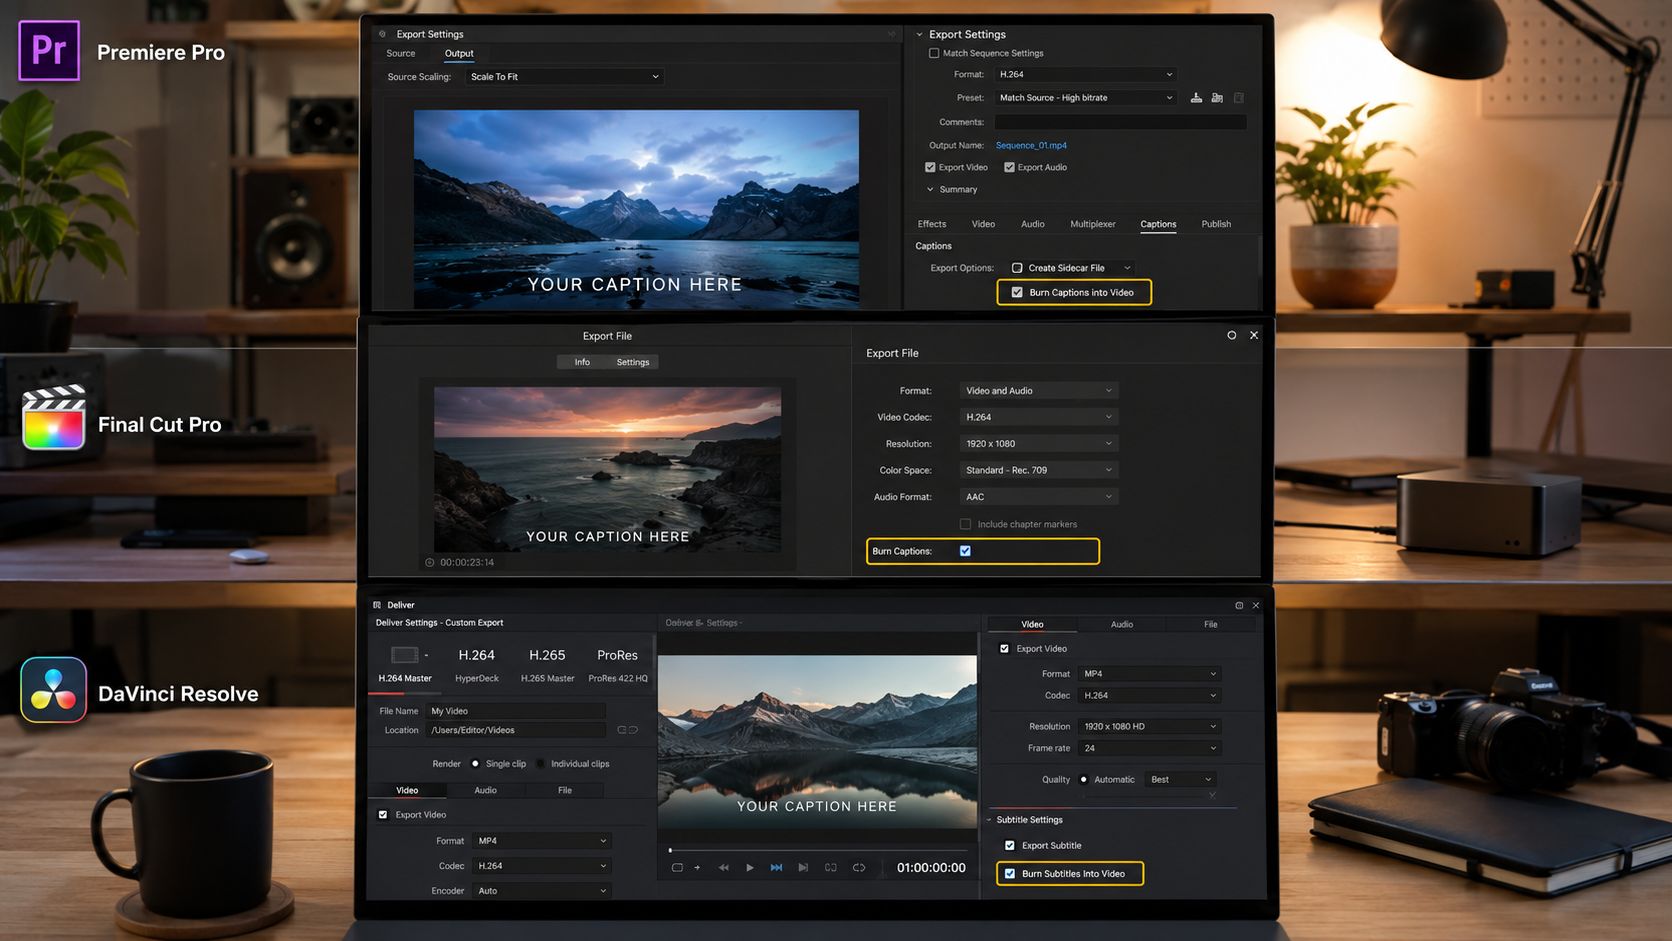
If the timeline is already open, the fastest move is usually to burn captions during export instead of rebuilding the whole clip in another tool. Premiere Pro is the most documented path here. Open Export Media, choose H.264, then pick the Captions setting that includes burned captions before exporting the final file. Premiere Pro burned captions export workflow
What usually trips people up
The export option is only part of the job. The caption track has to be labeled correctly, or the burn-in control stays unavailable. In practice, that means checking whether the track is the right closed-caption type for the project, because bad track labeling is one of the easiest ways to waste time in a finishing session.
Final Cut Pro follows the same logic even if the menu labels differ. You still need the caption track recognized properly, then you render with captions embedded into the delivered file rather than leaving them as a sidecar. DaVinci Resolve is similar on the Deliver page, where the burn-in option handles the final text rendering during export. The editor doesn’t matter as much as the outcome. The file either ships with permanent captions or it doesn’t.
Burn-in works fine for one-off deliverables, but it gets slow when you’re packaging a long source into a dozen social clips.
If you’re doing repeated repurposing, the AI route is usually faster because it cuts out the manual timeline churn. For a subtitle-oriented export workflow in Adobe, see subtitles for Premiere Pro.
Hardcoding Subtitles With FFmpeg and HandBrake
If you want a route that doesn’t depend on an editor license, FFmpeg is the cleanest command-line option. The documented command is:
ffmpeg -i input.mp4 -vf "subtitles=captions.srt" -c:a copy output.mp4
That line burns the SRT into the video stream while keeping the audio untouched, so you get a new file with captions baked in. The subtitles filter reads the subtitle file during transcode, which means the output is a fresh render, not a mutation of the source. FFmpeg burn captions recipe
What the command is doing
-vf "subtitles=captions.srt" tells FFmpeg to render the subtitle file onto the frames. -c:a copy passes the audio through as-is. The output name creates the new deliverable, which is the one you upload or archive.
There are a few practical gotchas. If the subtitle path has spaces, quote it. If your build doesn’t include subtitle support, the filter won’t work. And if you’re scaling the video, the caption rendering needs to happen against the final frame size, not an earlier one.
HandBrake is the GUI fallback for people who already have a subtitle track attached and just want the burn-in toggle. It’s especially useful when the subtitles were exported from YouTube as SRT and then loaded into the encode. That gives non-terminal users a simpler path without changing the underlying tradeoff.
| Criteria | FFmpeg command line | HandBrake GUI |
|---|---|---|
| Setup | Terminal and subtitle file | Visual encode interface |
| Speed | Faster for repeat jobs | Easier for one-off exports |
| Control | High, with filter syntax | Moderate, with preset controls |
| Best fit | Batch repurposing | Manual final export |
For a source-first workflow, Witness explains how to pull subtitles from YouTube and burn them with HandBrake using the Burned In option. Witness YouTube subtitles to burn-in workflow
Placement Rules So Captions Survive the Platform UI
Burned captions fail most often because they’re placed where the app interface already lives. TikTok, Reels, and Shorts all overlay controls and labels on top of the frame, so a caption that sits too low gets covered by UI, not viewed by the audience. The safest placement is the upper-middle third of the frame, with clear margins from the edges.
Readability beats decoration
The source guidance behind viral TikTok caption use points to two practical habits, captions above the lower action bar and text positioned so it doesn’t clash with native UI controls. It also recommends legible sans-serif fonts, bold weight, and large enough type for mobile viewing. Why viral TikToks use captions
The style choices that hold up best are boring in the right way. Use high contrast. Keep the line length short. Animate by word or phrase, not by giant sentence blocks. That keeps the viewer focused on the message instead of forcing them to read across a crowded frame.
For platform formatting rules and safe-zone thinking, see quso’s social media video specs guide.
Quick pre-export check: if the caption touches the bottom third, the right edge, or the lower action area on a phone preview, move it before you render.
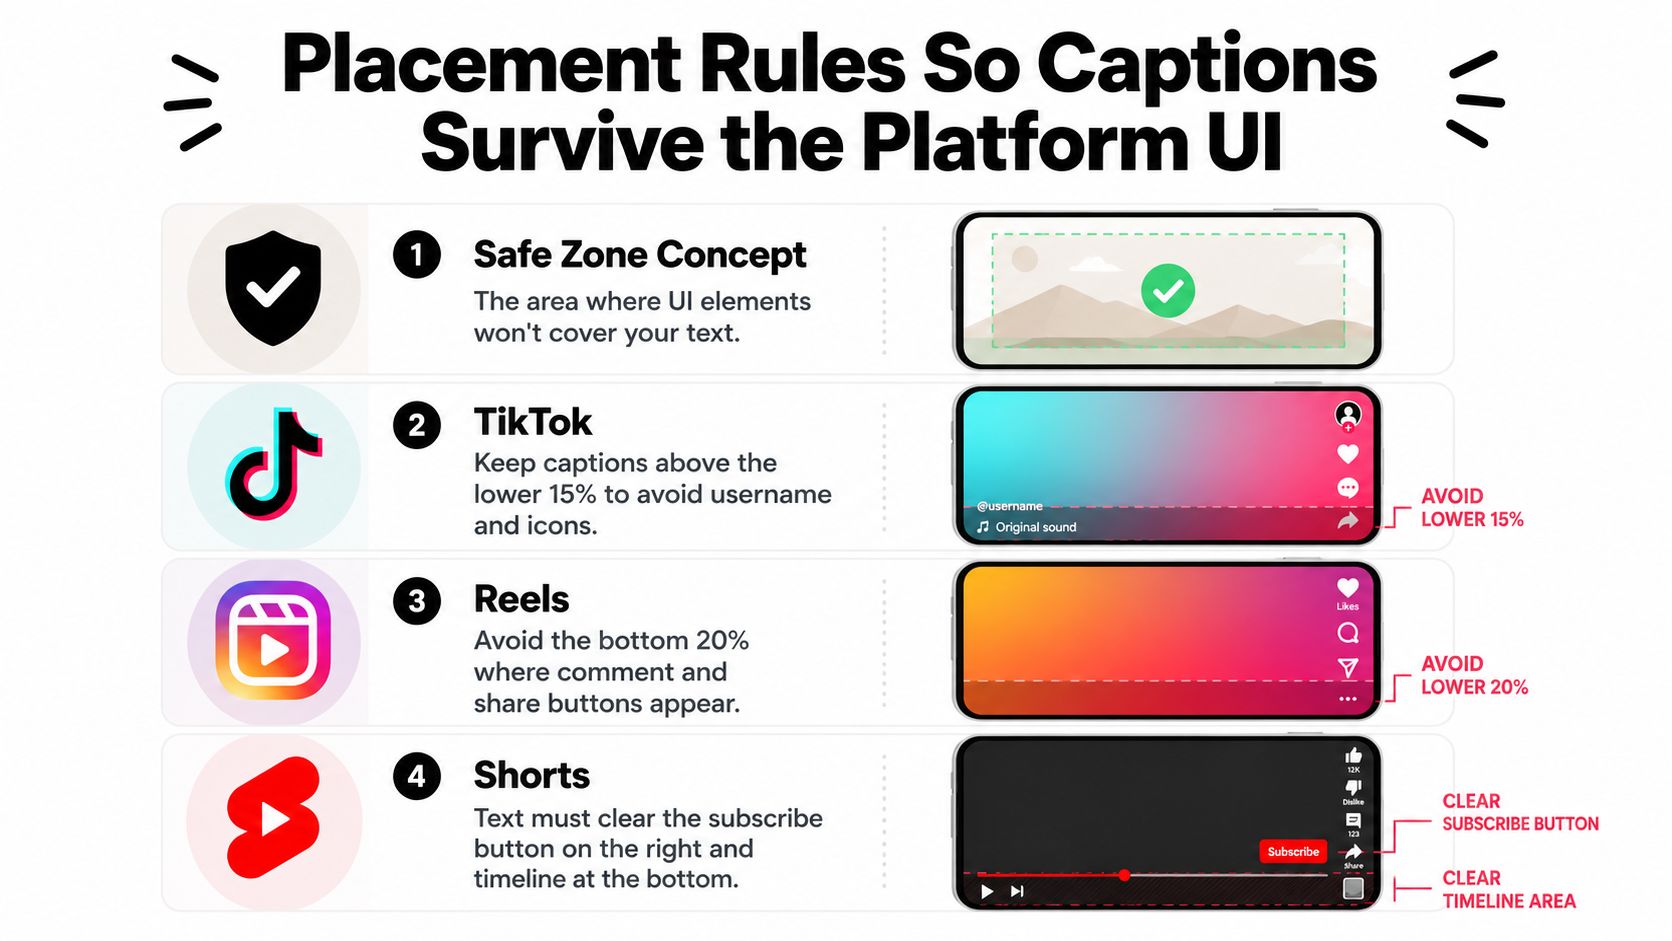
Before you export, check three things on a vertical phone preview. The captions should clear the bottom controls. They should sit far enough from the edge that nothing clips. And they should stay readable when the clip is viewed without sound, which is how a lot of short-form content gets consumed.
Export Settings and Burn-In Mistakes to Avoid
The export settings decide whether the captions look clean or mushy on a phone. H.264 is still the safe choice for cross-platform delivery, because it’s widely accepted and easy to share. Keep the resolution matched to the source so the text doesn’t get resampled into softness, and don’t let a horizontal source get lazily stretched into vertical without checking the caption position.
The errors that waste the most time
The most common mistake is a missing font. If the render pipeline can’t find the typeface, captions can show up as boxes or question marks. The fix is simple, use a font that exists on the system or embed a known-safe option before export.
Another failure is sync drift. If the subtitle file and video don’t share the same timing basis, the captions will arrive early or late. Match the frame rate, verify the timestamps, and preview the final render before you send it out. A third mistake is forgetting that a style chosen for a wide timeline may land in the wrong place once it’s exported as 9:16. Check the vertical composition before you call it done.
A reliable workflow starts with a finished video and matching subtitle file, then imports the subtitles, sets font, size, color, and position, and renders with burn-in enabled. Subtitle tools also recommend checking the final export, because once the captions are burned in, they can’t be turned off afterward. Burning captions workflow and verification
Keep the troubleshooting short and practical:
- Boxes or question marks: the font is missing, so swap to a supported font.
- Captions out of sync: the subtitle timing doesn’t match the video, so re-check frame rate and timestamps.
- Text outside the safe zone: the placement was set before the vertical export, so reframe and render again.
- FFmpeg path errors: the subtitle filename has spaces or special characters, so quote the path.
FAQ on Burning Captions Into Video
Can burned-in captions be turned off later? No. Once they’re baked into the pixels, they’re permanent unless you re-encode a new version.
Do burned captions hurt accessibility? They can, if you need users to toggle captions or switch languages. That permanence is a real localization tradeoff.
Do burned captions help on social platforms? Usually yes for mobile-first clips, because the text stays visible even when the player ignores subtitle files.
Can I swap languages after export? Not with burned-in text. You’d need a new export with a different caption track.
What’s the fastest workflow for repurposing long video? Auto-caption the source, style it for mobile, burn it into the export, then schedule the finished clip.
If you’re repurposing long videos into shorts, quso.ai can handle the captioning and export flow in one place, including burned-in subtitles for social-ready clips. It’s a practical fit when you want to move from transcript to publishable file without reopening the same edit three times. Visit quso.ai if you want to try that workflow on your next batch.