How to Edit a YouTube Short the Right Way
You’ve got a forty-minute podcast recording, two half-finished drafts, and enough time to publish one Short before bed. The usual mistake is opening the editor and jumping between trimming, captions, music, and export settings until the clip feels busy but still doesn’t have a clear point. Learning how to edit a YouTube Short means making the important decisions in order, then repeating the same trim, caption, framing, and publishing loop.
YouTube Shorts began as a mobile-first vertical format, with the beta launching in India on September 15, 2020, expanding to the United States in March 2021, and rolling out globally on July 13, 2021 (YouTube Shorts history). That origin still matters. The strongest workflows lead with the point, change the visual rhythm often, keep text readable on a phone, and turn long recordings into several usable clips instead of treating every Short as a fresh production.
Table of Contents
- Five Decisions Every YouTube Short Has to Make
- Trim and Pacing the First Three Seconds
- Editing Captions for Mute Watchers and Mobile Screens
- Vertical Framing and YouTube Safe Zones
- Repurposing a Long Recording Into a Short Clip
- Publishing Faster With a Shorts Checklist
Five Decisions Every YouTube Short Has to Make
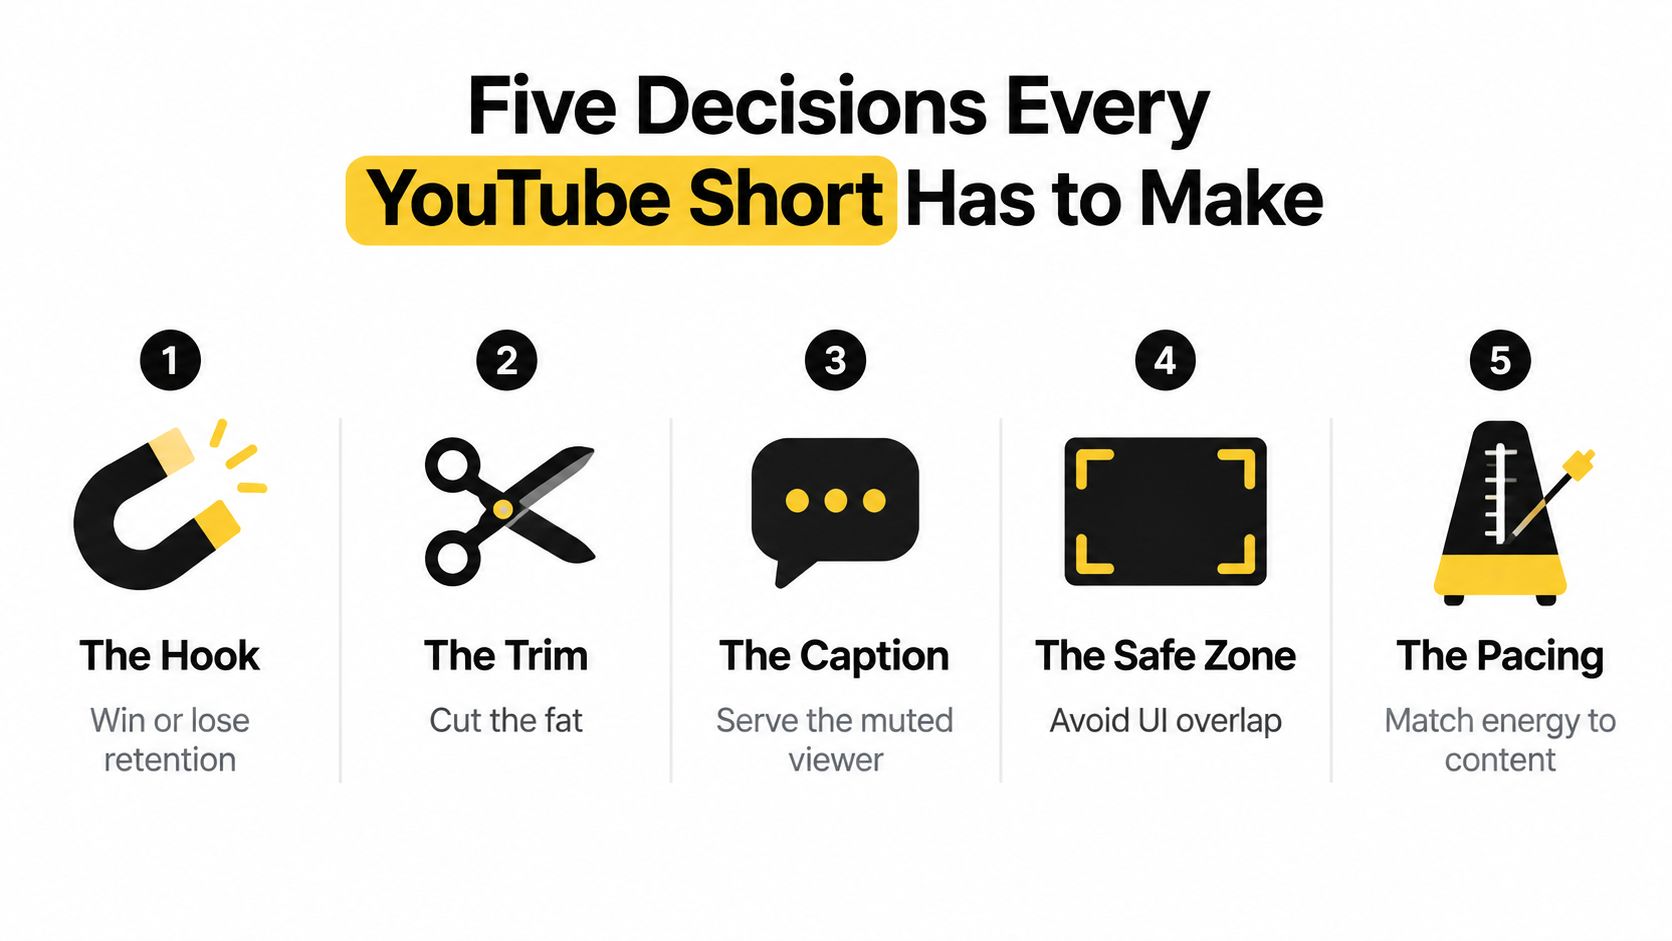
Before touching the timeline, lock five decisions. This prevents the common failure where you trim first, discover the ending no longer works, then rebuild the entire clip after adding captions.
Decide in this order
-
The hook line. Find the sentence that gives the viewer a reason to stay. It might be a sharp opinion, a surprising result, a useful instruction, or the answer to the question implied by the title. Start as close to that line as possible.
-
The trim. Choose the smallest section that delivers a complete idea. A Short can be brief or relatively extended, but it shouldn’t carry throat-clearing, repeated context, or a conclusion that merely restates the opening.
-
The caption. Decide whether captions will be plain, highlighted word by word, or styled around speaker changes. Choose this before export because changing the design afterward can force a complete re-render.
-
The safe zone. Keep the subject and essential text away from areas where YouTube’s buttons, title, handle, and progress elements may cover them. A clean edit can still fail if the viewer can’t read the final line.
-
The pacing. Match the cut rhythm to the idea. A fast visual pattern suits a tutorial with several steps, while a personal story may need a longer uninterrupted reaction to land properly.
Practical rule: Treat each decision as a checkpoint. Don’t polish captions on a clip whose hook hasn’t earned its place.
The order matters because each choice constrains the next one. Runtime affects which context stays, the hook determines where the cut begins, and the framing determines whether captions need to move. Make those calls first and the daily workflow becomes repeatable instead of improvisational.
Trim and Pacing the First Three Seconds
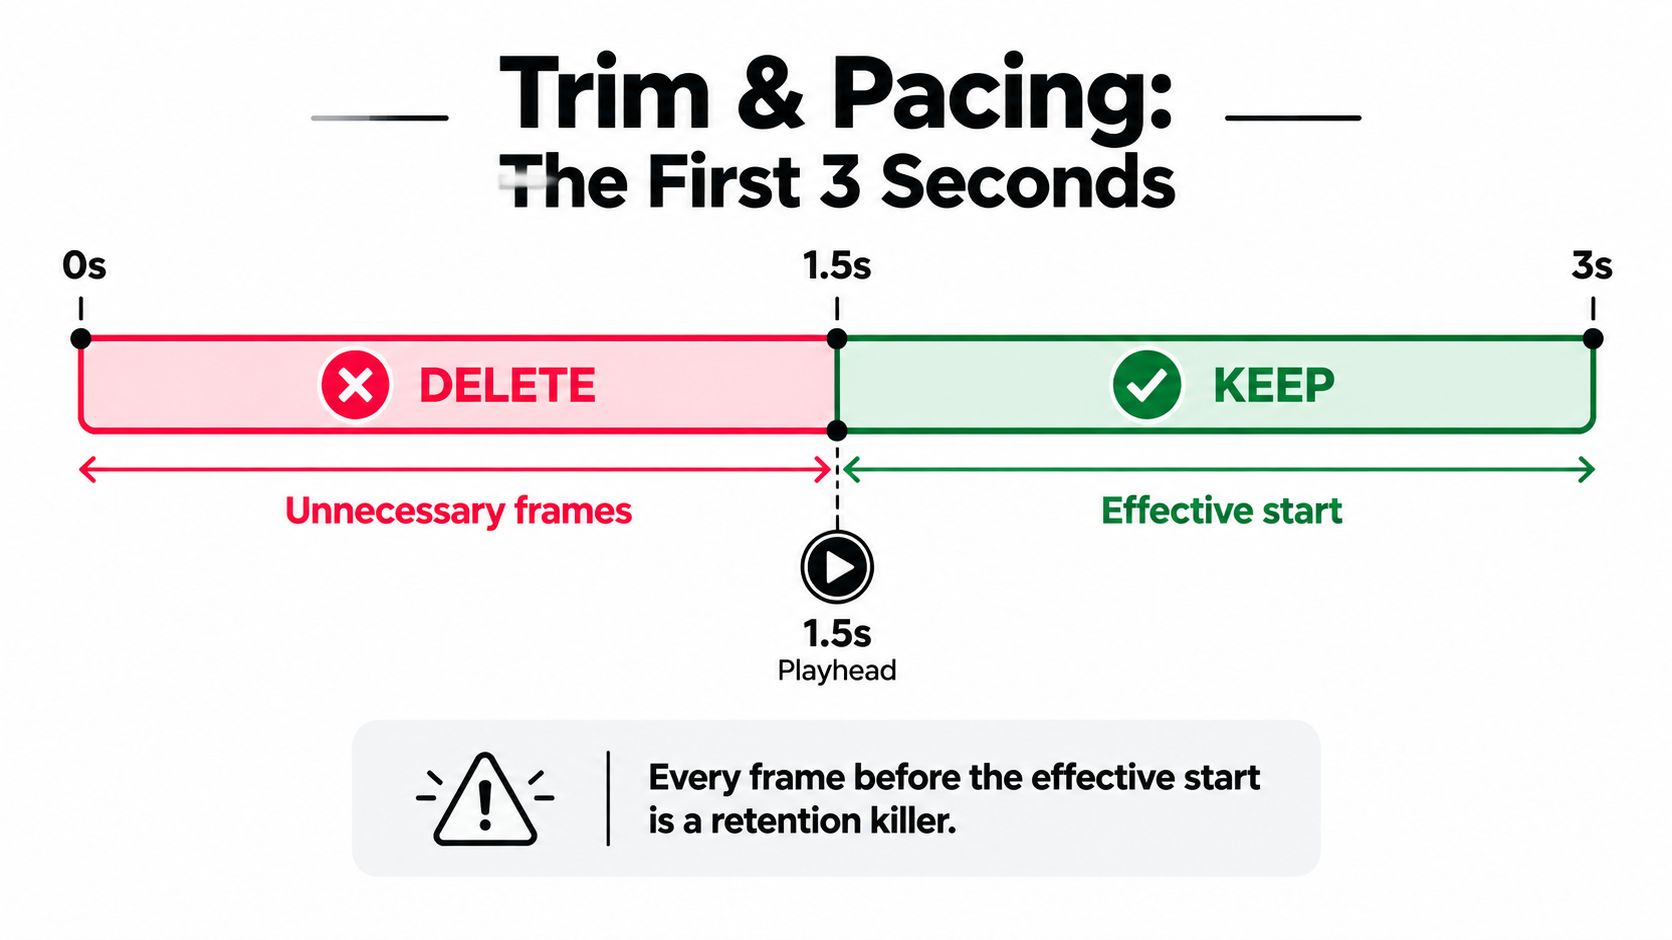
The first one to three seconds carry the opening burden. Start with the most useful spoken phrase or the strongest visual frame, then remove everything that delays it. Editing guidance for Shorts commonly recommends frequent visual changes, often within one to five seconds, alongside cuts, zooms, captions, and motion overlays (Shorts editing best practices).
For a talking-head clip, place the playhead before the first meaningful word and work backward. Remove the greeting, the inhale before the sentence, the camera adjustment, and the phrase that explains what you’re about to explain. As a practical editing rule, aim for the first spoken value proposition to arrive by the 1.5-second mark. That specific target is an editing standard, not a guarantee of retention, so review the result with the sound on and off.
What to remove
Cut these without hesitation:
- Dead air over 0.4 seconds, unless the silence is the joke or creates tension.
- Mid-word pauses that make the speaker sound hesitant.
- Repeated filler, including stacked uses of “so,” “like,” “basically,” or “you know.”
- The second take of a sentence when the first take is already clear.
- Action beats that don’t advance the idea, such as reaching for a product that isn’t central to the point.
- Setup language that gives the viewer information they could infer from the next frame.
Build the rhythm around two-to-four-second cuts, then allow a five-to-seven-second payoff beat when the speaker delivers the key explanation, reaction, or punchline. A single shot can run longer when it carries the payoff, but extended stillness without new information makes the clip feel unfinished.
Watch the cut at full speed. If a jump cut sounds harsh, cover it with a punch-in, a change of angle, a relevant screen recording, or a cutaway that adds meaning. Don’t add motion just to hide poor trimming. Every edit should answer one question: does the next frame earn the swipe? If it doesn’t, cut it.
Editing Captions for Mute Watchers and Mobile Screens
Caption editing is production work, not decoration. Play the draft at full speed with the audio muted. If the viewer can’t understand the central point from the visuals and captions, the clip isn’t ready, even if the spoken delivery sounds excellent.
Start with a simple layout. Use one line where possible and no more than two lines when the phrase needs to wrap. Break lines at natural language boundaries, not halfway through a name, verb phrase, or important claim. Heavy enough type, strong contrast, and a readable background treatment matter more than elaborate animation, especially when someone watches outdoors or on a small phone.
Keep text inside the viewing area
A useful working guide is to keep captions within the central 70 percent of the frame. Avoid the lower 20 percent, where titles, handles, and other Shorts controls can compete with the text, and keep key words away from the upper 10 percent, where progress and action elements may appear. These are editing guides for preview and testing, not a promise that every device displays the interface identically.
Auto-generated captions save time, but they still need a cleanup pass. Correct misheard names, product terms, acronyms, numbers, missing punctuation, and line breaks that overflow on smaller screens. Read the transcript without audio before exporting. If the sentence looks confusing in text, viewers won’t recover the meaning because the original recording was clear.
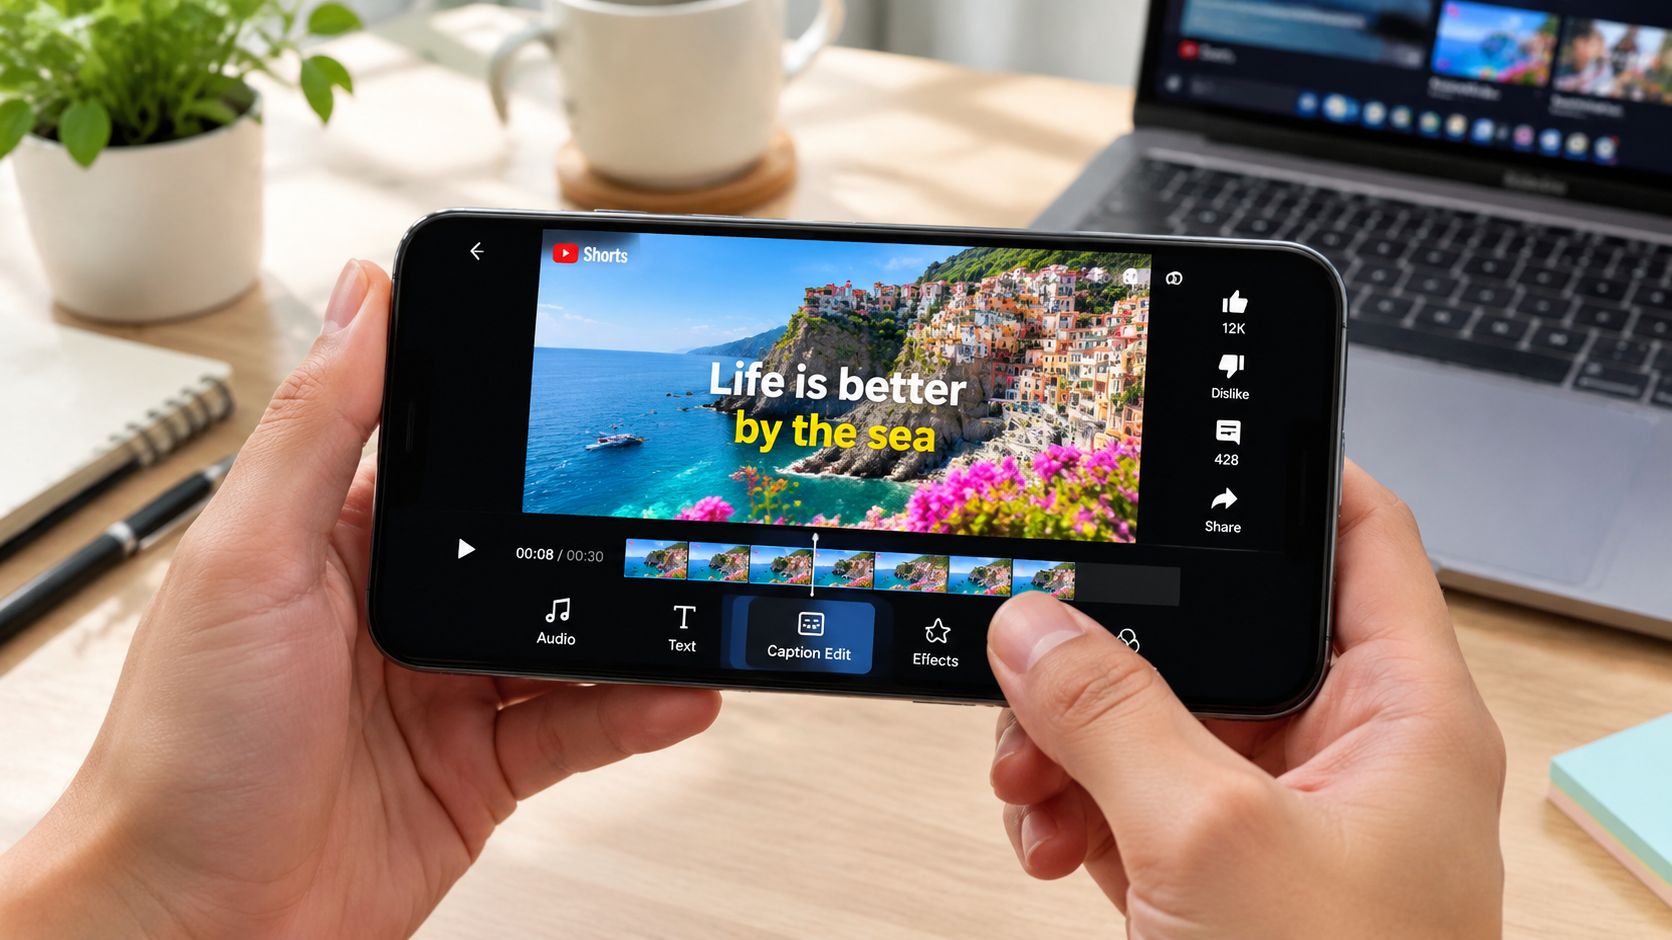
For a deeper workflow covering caption creation and cleanup, use this guide to add subtitles to YouTube Shorts. The final check should happen on the actual vertical preview, not only inside the editor. Captions that look balanced on a large monitor can become cramped once the player adds its interface.
Vertical Framing and YouTube Safe Zones
A horizontal recording becomes a weak Short when the crop cuts off the speaker, the product, or the visual detail that makes the selected 20 to 40 seconds understandable. Reframing should protect the point of the clip, not just fill a portrait canvas.
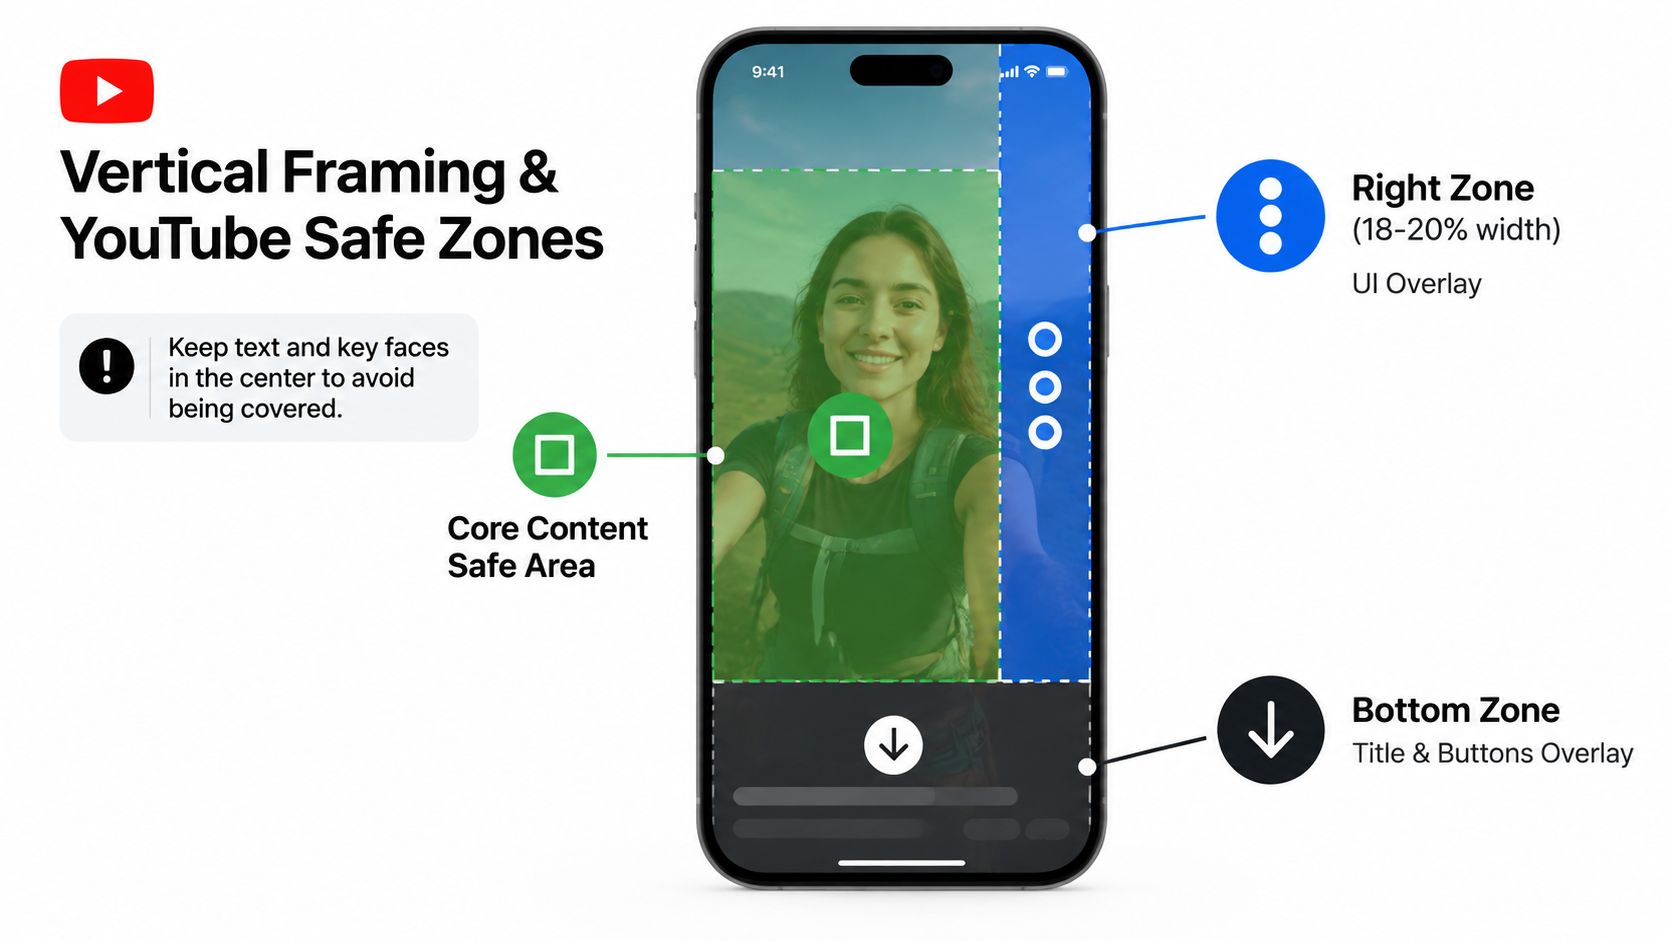
The Shorts player can cover several parts of the image:
- Right side: action buttons form a vertical stack. Keep key captions, faces, and product details away from the far right edge.
- Bottom area: titles, handles, and controls compete with the lower frame.
- Top area: progress and other interface elements reduce usable space above the subject.
Place the eyes near the upper third, with enough room above the head. On a 1080 by 1920 canvas, avoid putting a face, product label, or caption inside the bottom 220 pixels. Use that boundary as a starting point, then check the actual YouTube preview because interface placement can vary.
Reflowing horizontal footage
For one talking head, a steady center crop usually works better than constant artificial panning. Keep the face in the core viewing area and add punch-ins only when the spoken idea changes. Excessive movement makes a repurposed clip feel edited for motion instead of meaning.
Two speakers require a clearer choice. Keep both visible with a split or stacked vertical layout when each person contributes to the point. When one speaker carries the explanation, follow that person and support the other voice with relevant footage instead of cutting between faces every sentence.
YouTube’s categorization rules include square or vertical uploads up to three minutes for videos uploaded on or after October 15, 2024 (YouTube Shorts format guidance). Extra duration does not fix a poor crop. Check the export in the YouTube app, enable the interface preview when available, and confirm that buttons do not cover a face or the final caption. This YouTube Shorts dimensions and duration guide explains export choices that can cause avoidable framing problems.
Repurposing a Long Recording Into a Short Clip
The best repurposing workflow starts with selection, not effects. Open the transcript from a podcast, webinar, livestream, or talking-head recording and scan for lines that stand on their own. Look for concentrated explanations, emotional shifts, useful reveals, and moments where the speaker changes direction.
Use four filters:
- Density: Does the speaker deliver a complete thought without a long runway?
- Change: Is there a reaction, contrast, reveal, or clear before-and-after?
- Boundaries: Can the clip begin and end cleanly without requiring the previous conversation?
- Clarity: Would someone unfamiliar with the full recording understand the point?
Select several candidates between 20 and 55 seconds, then rank them by standalone clarity rather than by how impressive the full conversation felt. A technically brilliant exchange may depend on context that never makes it into the Short. A simpler answer may perform better because the viewer understands it immediately.
A tool such as quso.ai can help identify candidate moments from a long video, create vertical reframes, generate captions, and prepare clips for publishing. That changes the editor’s job from manually hunting through every minute to curating the strongest candidates, correcting the transcript, checking the crop, and choosing the clips worth scheduling.
For a broader content system, this content repurposing guide is useful because it treats one recording as a source asset rather than a single finished post. You can also review this workflow for turning YouTube videos into Shorts when the source is already published.
Pick a small batch of winners, run each through the same hook, pacing, caption, and safe-zone checks, then queue them. The advantage isn’t removing editorial judgment. It’s reserving that judgment for selection and refinement instead of spending it on repetitive cutting.
Publishing Faster With a Shorts Checklist
A polished clip can still fail before it reaches viewers. The crop may hide the speaker, the first frame may delay the point, or a caption animation may consume time without improving understanding. A pre-flight check catches those problems before export and keeps a repurposed clip from turning into another full editing project.
Run this checklist before each upload:
- Hook inside two seconds: Show or say the point immediately. Cut greetings, throat-clearing, and setup that does not help the viewer understand the clip.
- Single subject: Keep one question, claim, or idea in the edit. If the clip needs a second explanation, select a separate excerpt.
- Captions in safe zones: Keep important words away from buttons, titles, and progress elements. Check the actual phone preview, not only the desktop timeline.
- Vertical export: Use a 1080 by 1920 canvas for a standard vertical Short.
- Music check: Remove or replace music that could create a copyright problem.
- Readable thumbnail frame: Choose a frame with one clear subject and text that remains legible at mobile size.
- Title under 70 characters: Include the target keyword naturally. Do not turn the title into a string of tags.
- Description with one timestamp link: When useful, point viewers back to the relevant moment in the longer recording.
- Scheduled slot honored: Queue the finished clip for its planned publishing window instead of relying on memory.
- End-screen card removed: Standard end-screen elements can interfere with the Shorts viewing experience.
- Hashtags capped at three: Use only tags that clarify the topic.
- Analytics bookmarked: Save the review page so the next editing session begins with evidence instead of guesses.
The checklist should also cover the repurposing decision made before editing. Confirm that the selected 20-to-40-second excerpt stands on its own, starts cleanly, and does not depend on a sentence left behind in the longer recording. If the first line needs a long explanation, choose another moment or add only the context required to make the point understandable.
Shorts editing rewards a repeatable loop over a heroic single edit. YouTube’s format expanded from a prior 60-second cap to uploads up to three minutes for square or taller videos in October 2024, giving editors more room when context matters (YouTube’s three-minute Shorts announcement coverage). Extra runtime is useful for a complete explanation. It is not a reason to keep every sentence from the source recording.
A daily workflow makes patterns easier to spot. Compare which openings hold attention, which caption layouts remain readable, and which reframes keep the speaker visible. If you use tools to create videos with AI, treat the generated clip as a draft. Automation can find a candidate, build captions, or prepare a schedule, but it cannot reliably judge whether the first sentence has enough context or whether text covers the speaker’s face.
For batch production, finish selection before polishing. Choose several candidates from the longer recording, apply the same trim and caption checks, review each vertical crop, then schedule the clips together. This keeps editorial judgment focused on choosing and improving the strongest moments instead of rebuilding similar edits by hand.
FAQ
What is the best length for a YouTube Short?
The best length is the shortest runtime that delivers a complete idea without missing context. A concise 20-to-40-second clip often fits a single answer, while a longer explanation can use the expanded Shorts limit of up to three minutes when its structure requires it (YouTube Shorts format guidance).
How early should the hook appear?
Put the value proposition in the first one to three seconds. As a practical edit target, place the first meaningful spoken word by about 1.5 seconds, then remove greetings, pauses, repeated phrasing, and setup that delays the point.
Should captions cover the whole video?
Captions should support the full spoken idea when viewers may be watching without sound, but they do not need every hesitation or filler word. Correct the auto-generated transcript, use one line where possible, and keep the text clear of interface overlap.
How do you turn a horizontal video into a Short?
Reframe the footage on a vertical canvas and keep the main face or object near the center. For two important subjects, use a stacked layout or another composition that keeps both visible instead of switching between unstable crops.
Can one long video become several Shorts?
Yes. Search the transcript for self-contained insights, emotional changes, and clear reveals. Rank candidates by standalone clarity, edit each winner separately, check captions and framing, and schedule the batch rather than polishing only one excerpt.
quso.ai turns long recordings into short-form clips, helps generate and clean captions, and supports scheduling finished assets. Visit quso.ai to extract a batch of Shorts, run the trim and safe-zone checklist, and queue selected clips without rebuilding each one manually.