How to Improve Video Quality: Pro Tips for 2026
You've probably had this moment. You hit record, the message is solid, the edit is clean enough, and yet the final video still looks a little off. Maybe the skin tones feel strange, the shadows turn mushy on upload, or the whole thing somehow looks cheap even though you shot it on a decent camera.
That gap is what is often meant when asking how to improve video quality. They're not only asking for more pixels. They want footage that looks trustworthy, holds attention, and survives the trip from camera to editing timeline to social feed without falling apart.
The practical answer is to treat quality as perceived quality. Viewers notice exposure, color, motion, subtitles, framing, and compression faster than they notice your camera model. If those parts work together, a simple setup can look polished. If they don't, even expensive footage can look weak.
Table of Contents
Why Video Quality Is More Than Just Pixels
A lot of creators reduce quality to resolution. They assume 4K means professional and 1080p means basic. Viewers don't see it that way. They judge quality through signals like clean audio, stable motion, accurate color, readable text, and whether the image feels intentional.
That matters because trust is tied to presentation. In 2026, 89% of consumers said video quality affects how much they trust a brand, up from 87% in 2024, and 84% said they want to see more videos from brands according to Teleprompter's video marketing statistics roundup. If your videos look rough, the audience doesn't separate the production issue from the business. They often read both as the same thing.
Practical rule: People rarely say, “this bitrate is too low.” They say, “this brand feels less credible.”
Quality also shapes performance before anyone talks about conversions. A cleaner image gets people to stop scrolling. Better subtitles keep them watching in silence. A stable frame makes your message easier to absorb. If you're also trying to increase reach, strong packaging still matters. The tactics in this guide pair well with resources on how to make videos go viral, because distribution and quality work best together.
One more shift is worth noting. Video quality now sits inside a broader content system, not as a standalone production choice. If you publish frequently, repurpose clips, and rely on social platforms for discovery, then quality standards affect brand consistency across every touchpoint. That's one reason video plays such a central role in modern marketing, especially in AI-shaped workflows discussed in this look at why video content marketing matters in the age of AI.
Fundamentals for Flawless Video Capture
Good post-production starts with footage that gives you room to work. If the capture is noisy, out of focus, or auto-adjusting every few seconds, editing won't rescue it cleanly. Most quality problems start before the first cut.
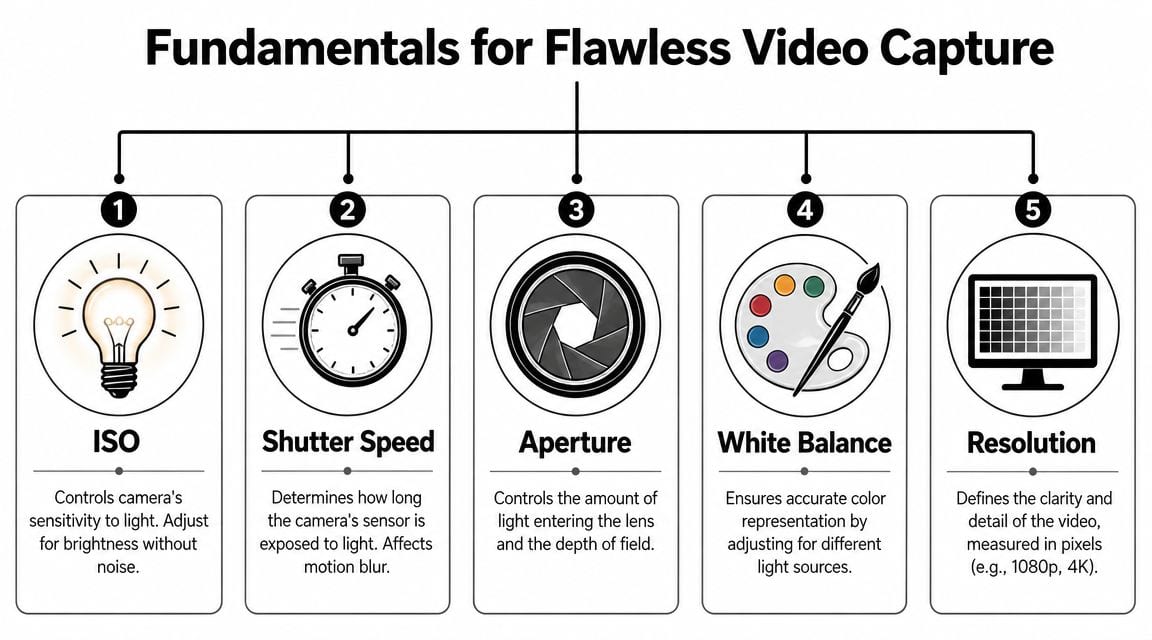
Set exposure before you chase sharpness
The fastest mental model is the exposure triangle. Aperture controls how much light enters the lens and how blurred the background becomes. Shutter speed controls how long the sensor sees light and how motion is rendered. ISO raises sensitivity, but when you push it too far, noise usually follows.
Here's the practical order:
Pick frame rate first. Use the frame rate that matches the job. If you want a natural, cinematic look, many creators choose 24fps. If you need smoother action or plan to slow footage down, 60fps is often the cleaner choice.
Set shutter speed to match motion. A common starting point is roughly double the frame rate. That keeps motion blur looking natural instead of twitchy or smeared.
Adjust aperture for depth and light. Wider apertures brighten the image and isolate the subject, but they also make focus harder to hold.
Raise ISO last. ISO is useful, but it's the setting most likely to make footage look brittle and muddy.
If you're learning vertical content capture, Viral.new's TikTok filming tips are a useful companion because they focus on practical framing and shooting habits for social-first delivery.
Lock the settings that drift
Auto mode is convenient, but it often creates visible changes inside a shot. Exposure pumps when someone leans toward a window. White balance shifts from warm to cool mid-sentence. Autofocus hunts right when the speaker makes the best point.
Those changes make footage feel amateur because the viewer notices the camera making decisions.
A better approach is to lock the variables that shouldn't move:
Manual focus: Use it for interviews, talking heads, product shots, and any setup where your subject stays in a predictable plane.
Manual white balance: Set it to the actual light source so skin tones don't drift.
Fixed exposure: Keep brightness stable unless the scene itself changes.
Consistent resolution: Match your intended output and crop needs before shooting.
When a shot looks “cheap,” the problem is often inconsistency, not lack of detail.
A few capture habits also save hours later:
Watch the background: A cluttered background lowers perceived quality faster than a modest camera does.
Clean the lens: Especially on phones. Fingerprint haze kills contrast and makes everything look soft.
Check audio while framing: People forgive an imperfect image sooner than they forgive harsh or hollow sound.
Record a short test clip: Review it full-screen before the actual take. Tiny issues are easier to fix on set than in edit.
If you want to improve video quality fast, this is the most effective place to start. A controlled image grades better, compresses better, and needs less repair later.
Mastering Light and Stability On Set
Most viewers can't name good lighting, but they spot bad lighting instantly. The same goes for shaky footage. These are the two production signals that separate “quick clip” from “professional video” faster than almost anything else.
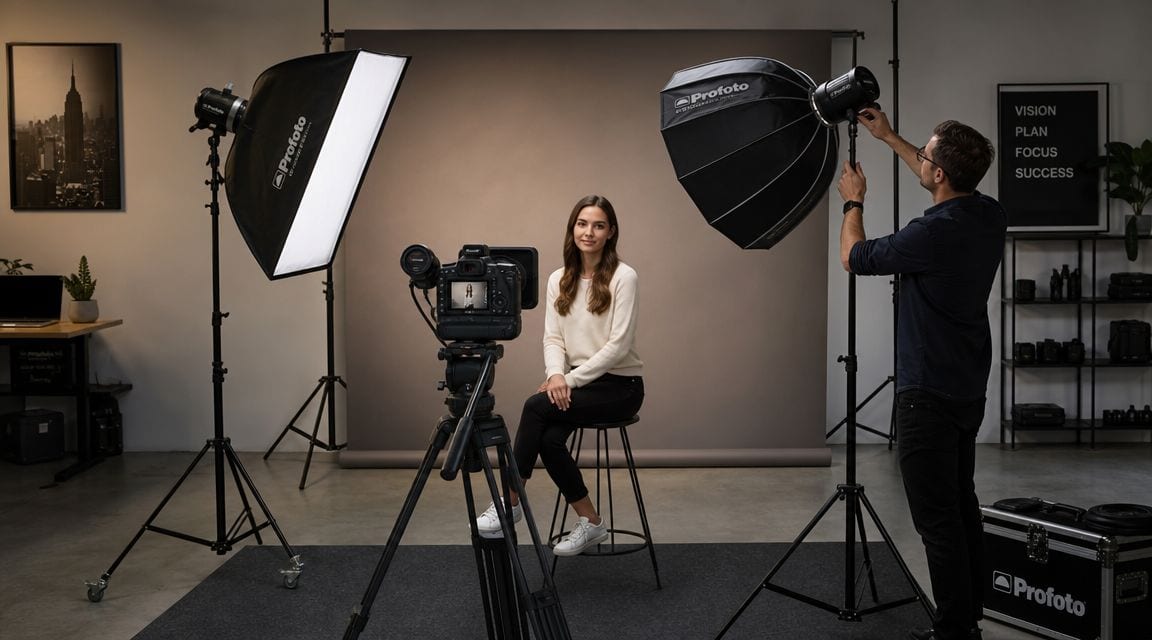
Build shape with simple lighting
You don't need a complicated studio. You need light that creates separation and keeps the subject readable. A basic three-point lighting setup still works because it solves the most common visual problems with a simple structure.
Key light: This is your main light source. Put it slightly off to one side of the subject to create shape on the face instead of flattening it.
Fill light: Use this to soften the shadows made by the key. It should support, not erase, contrast.
Back light: Place it behind the subject to create edge separation from the background.
If you only have one light, place it well and use the room. A window can work as the key. A white wall or reflector can act as fill. A practical lamp in the background can add depth without pretending to be a full back light.
Common mistakes show up the same way every time:
| Problem | What viewers notice | Better fix |
|---|---|---|
| Overhead room light only | Eye shadows and flat skin | Move the key light to face level |
| Harsh direct light | Shiny skin and hard shadows | Diffuse the light with a softbox or sheer material |
| Bright background, dim face | Subject looks underexposed | Expose for the face and reduce background brightness |
Choose the right kind of stability
Stability is about intention, not total stillness. A locked-off interview should feel steady. A handheld walk-and-talk can work if the movement feels controlled. Random micro-shake doesn't feel dynamic. It feels distracting.
Pick support based on the shot:
Tripod: Best for interviews, explainers, webinars, product demos, and anything that needs clean framing.
Gimbal: Useful when the camera must move through space smoothly.
Monopod: Good in tighter spaces where you want support without a full tripod footprint.
In-camera stabilization: Helpful, but it can crop the image and sometimes create strange edge warping.
Software stabilization: Good as a rescue tool, not a habit. Heavy stabilization can distort the frame or create floating motion.
A stable camera tells the viewer you meant to frame the shot that way.
If you want to see lighting and support choices in action, this walkthrough is a helpful visual reference:
One more on-set habit pays off quickly. Record a few seconds before and after the action. That extra handle makes stabilization, cutting, and reframing much easier in post. Clean starts and stops rarely happen when talent is waiting and the room is moving fast.
Polishing Your Footage in Post-Production
Editing is where footage stops being raw material and starts feeling finished. This is also where a lot of creators make things worse by overcorrecting. Good post-production improves clarity and consistency. Bad post-production adds harshness, fake texture, and colors that break trust.
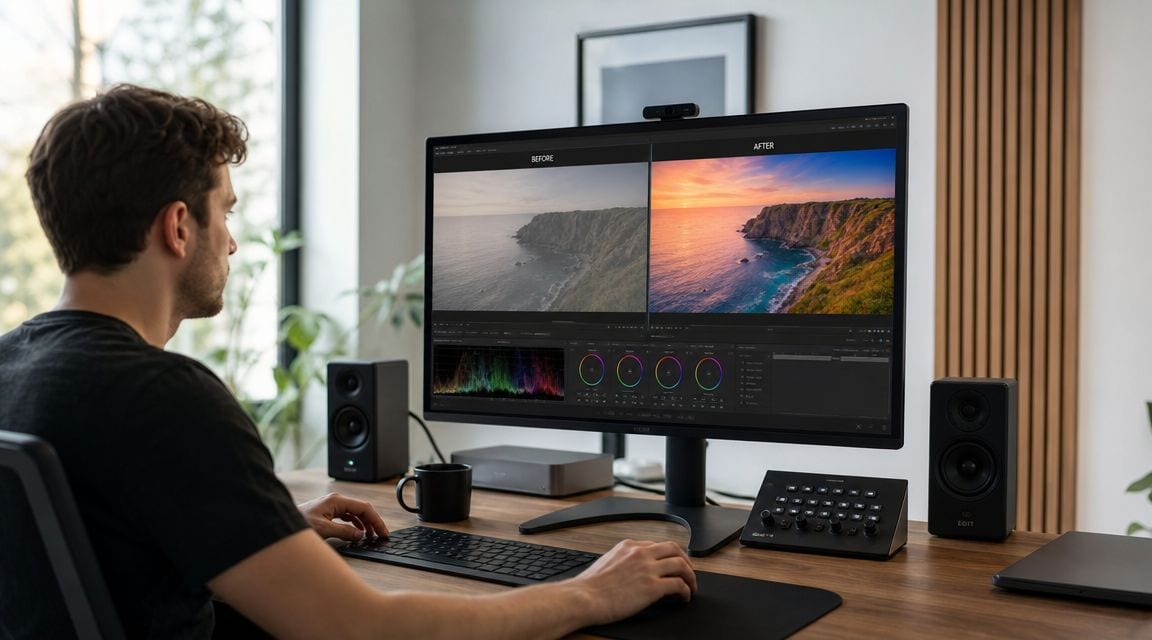
Correct first, grade second
Color correction and color grading aren't the same job. Correction fixes technical problems. Grading adds style and mood. If you grade before you correct, you usually end up amplifying mistakes.
Start with correction:
Balance exposure: Make sure faces aren't too dark or clipped.
Neutralize white balance: Get whites, skin, and neutrals into a believable range.
Control contrast: Enough separation to create depth, not so much that shadows collapse.
Check saturation carefully: Oversaturated skin looks fake faster than almost any other edit choice.
Then grade for taste. Maybe you want warmer interviews, cooler product shots, or softer contrast for an educational piece. That's fine, but the footage still needs to look credible.
A simple discipline helps. Use scopes if your editor provides them. Your eyes adapt too quickly, especially late in a session. Scopes don't.
Fix damaged footage without overprocessing it
People often search for how to improve video quality after the footage is already shot. Sometimes that's possible. Sometimes the right call is to preserve the original look rather than force a glossy result.
A real pain point is low-light material. As noted in this discussion of practical HD action video fixes, creators often want to repair noisy or dark footage without making it look AI-generated. The useful takeaway is the decision framework: preview short clips, compare conservative and aggressive settings, and decide whether denoising alone is enough or whether upscaling helps.
Use this framework:
If the footage is noisy but still detailed, denoise lightly first. Keep pores, fabric, and edges intact.
If the image is soft because of compression or crop, test selective sharpening second. Don't sharpen the whole frame aggressively.
If the source is low resolution, upscale only after testing motion. Hair, hands, and moving edges often reveal artifacts first.
If motion blur is baked in, accept it. Sharpening blurred footage usually creates crunchy halos, not real detail.
The best repair often looks modest. If the audience notices the fix, the fix is probably too strong.
For trimming and cleanup work before you get into serious correction, tools that speed up rough cuts help a lot. A workflow built around faster cuts, transcript-based edits, and clip cleanup can reduce the friction, and this guide to video trimmer tools for effortless editing is useful if you're comparing options.
Two post habits consistently improve results:
Work on short test sections first: Don't run a full denoise or upscale pass across the whole project before checking faces and motion.
Export a sample and watch it on the target device: A clip that looks great on a large monitor can fall apart on a phone after compression.
The AI-Assisted Workflow for Speed and Polish
AI is no longer a side experiment in video production. It's part of a practical workflow for teams that need more output without lowering standards. The important distinction is this: AI shouldn't replace judgment. It should remove repetitive work so you can spend more time on the decisions viewers notice.
Where AI actually improves quality
The strongest AI use cases are mechanical jobs that usually eat editing hours. Subtitling is the obvious one. Social clipping is another. Filler-word removal, silence trimming, transcript cleanup, and scene selection also fit well because they're repetitive and easy to review.
That matters at a business level too. According to SellersCommerce's 2026 video marketing statistics roundup, over 60% of marketers using AI say text-to-video platforms cut creation time by more than half, AI video tools can reduce production costs by up to 80%, and AI-generated subtitles can boost viewer retention by as much as 65%.
Those gains make sense in day-to-day production. Better subtitles improve comprehension in silent autoplay environments. Faster clipping means more platform-specific versions. Cleaner trims remove hesitation and dead air that make a video feel slower than it is.
What to automate and what to review manually
AI does its best work when you give it bounded tasks.
Good candidates for automation:
Caption generation: Fast, scalable, and easy to proof.
Clip extraction: Helpful for turning long interviews, podcasts, and webinars into shorter assets.
Silence and filler cleanup: Useful for tightening delivery without rebuilding the whole cut.
Template-based branding: Consistent fonts, colors, and layouts across social outputs.
Things you should still review by hand:
Story order and pacing
Brand-sensitive language
Color decisions
Aggressive enhancement passes
Platform-specific final framing
One practical option in this category is quso.ai, which combines clipping, subtitle generation, filler-word removal, repurposing, and social workflow tools in one system. If you're comparing software categories before choosing a stack, this guide to choosing the right AI video editor for your needs is a useful place to sort out what should be automated and what shouldn't.
The core point is simple. AI helps you improve video quality faster when it handles volume and consistency, while you keep control over taste, accuracy, and final polish.
Exporting and Delivering for Maximum Impact
A clean edit can still look bad after upload. Many creators often lose quality without realizing it at that stage. They export the “highest quality” file they can, send it to a platform, and assume bigger settings will survive better. That's not always how platform compression works.
Why platform delivery matters more than max settings
Social platforms don't display your master file. They ingest it, process it, compress it, and deliver a version built for their own playback system. That's why export decisions need to match the platform, not just the editing timeline.
As summarized in Topaz Labs' discussion of video enhancement and delivery settings, TikTok's newsroom guidance points creators toward platform-specific specs instead of assuming every enhancement helps distribution. The practical takeaway is more useful than the headline: a technically sharper export can still look worse after recompression, especially when aggressive sharpening and over-compression exaggerate halos and noise.
That changes how to improve video quality at the export stage. You're not trying to create the biggest file. You're trying to create a file that gives the platform enough clean information to compress well.
A few delivery rules hold up across most workflows:
Use a common codec first: H.264 is still widely compatible. HEVC can be efficient, but compatibility and workflow needs vary.
Choose MP4 when in doubt: It travels well across most platforms and tools.
Match frame rate to source: Don't create unnecessary interpolation on export.
Treat bitrate as a control, not a flex: Too low throws away detail. Too high can become wasteful, and platform recompression may cancel the benefit.
Go easy on sharpening: It often looks okay before upload and worse after.
Export for the feed where people will watch, not for the pride of having the largest file.
Recommended export settings for major platforms 2026
There isn't one universal preset that wins everywhere. A practical cheat sheet helps, but you should still check current platform specs before a major campaign.
| Platform | Resolution | Recommended Bitrate (Mbps) | Codec |
|---|---|---|---|
| YouTube | Match source and delivery format, commonly 1080p or 4K | Depends on frame rate, motion, and platform guidance | H.264 or HEVC |
| TikTok | Vertical delivery matched to platform specs | Moderate bitrate tuned for mobile compression | H.264 |
| Instagram Reels | Vertical delivery matched to app playback | Moderate bitrate with clean source compression | H.264 |
| Match source, often 1080p works well | Conservative to moderate bitrate for reliable playback | H.264 | |
| Match feed and placement format | Moderate bitrate, avoid oversharpening | H.264 |
The table is intentionally conditional because a precise one-size-fits-all bitrate chart would be misleading here. Motion level, frame rate, content type, and platform updates all matter. A static talking-head video and a fast-moving sports clip don't compress the same way, even at the same resolution.
If you want a simple decision model, use this one:
Start with the platform's preferred format
Export a short sample
Upload privately or test-post
Check skin, text, gradients, and motion on mobile
Adjust bitrate and sharpening based on what the platform did, not what your editor preview showed
The viewer only sees the delivered file. That's the version that counts.
Frequently Asked Questions About Video Quality
Should you shoot in 1080p or 4K?
Shoot in 4K when you need flexibility for cropping, reframing, or stabilizing in post. Shoot in 1080p when your workflow needs lighter files and your framing is already locked. If the final video is for web and social, both can look strong. Clean lighting, stable capture, and smart export matter more than resolution alone.
How do you improve smartphone video quality?
Start with the basics people skip. Clean the lens, lock exposure if your camera app allows it, avoid mixed lighting, and stabilize the phone with a tripod or grip. Use the rear camera when possible, record in a quiet room, and don't rely on digital zoom. Phones can look excellent when the scene is controlled.
How much bitrate is enough?
Enough bitrate is the amount that preserves detail without fighting the platform's compression pipeline. Fast motion, textures, and fine detail need more room than a static talking-head shot. The easiest way to judge it is with test exports. If hair, text, and gradients hold up after upload, you're close. If edges break apart or shadows smear, adjust and test again.
If you want to move faster without stitching together separate tools, quso.ai is built for the modern video workflow: clipping long videos into short-form assets, generating subtitles, cleaning up edits, repurposing content, and publishing across channels from one dashboard. It fits best when you need more polished output at a higher publishing pace, especially for social-first teams and creators.