How to Change Your Email on Instagram in 2025

When you first created your Instagram account for your business, you might have used any random email—or maybe even your personal one—just to get things rolling. But as your business grew, so did the DMs, collab requests, and customer inquiries. Now, it’s time to level up and switch to a professional email that keeps everything organized.
But wait—how do you actually change your email on Instagram? Is it buried somewhere in the settings? Will it mess up your account access? And what if you don’t have access to your old email? It’s confusing, and let’s be honest, a little frustrating.
Don’t worry, it’s easier than you think. In this blog, we’ll walk through the exact steps to update your email on Instagram. Whether you're rebranding, upgrading security, or just making life simpler, you’ll have it sorted in no time. Let’s get started.
How to Change Your Email on Instagram
Changing Instagram Email via Mobile App
Step 1: Open the Instagram app on your phone and log into your account.
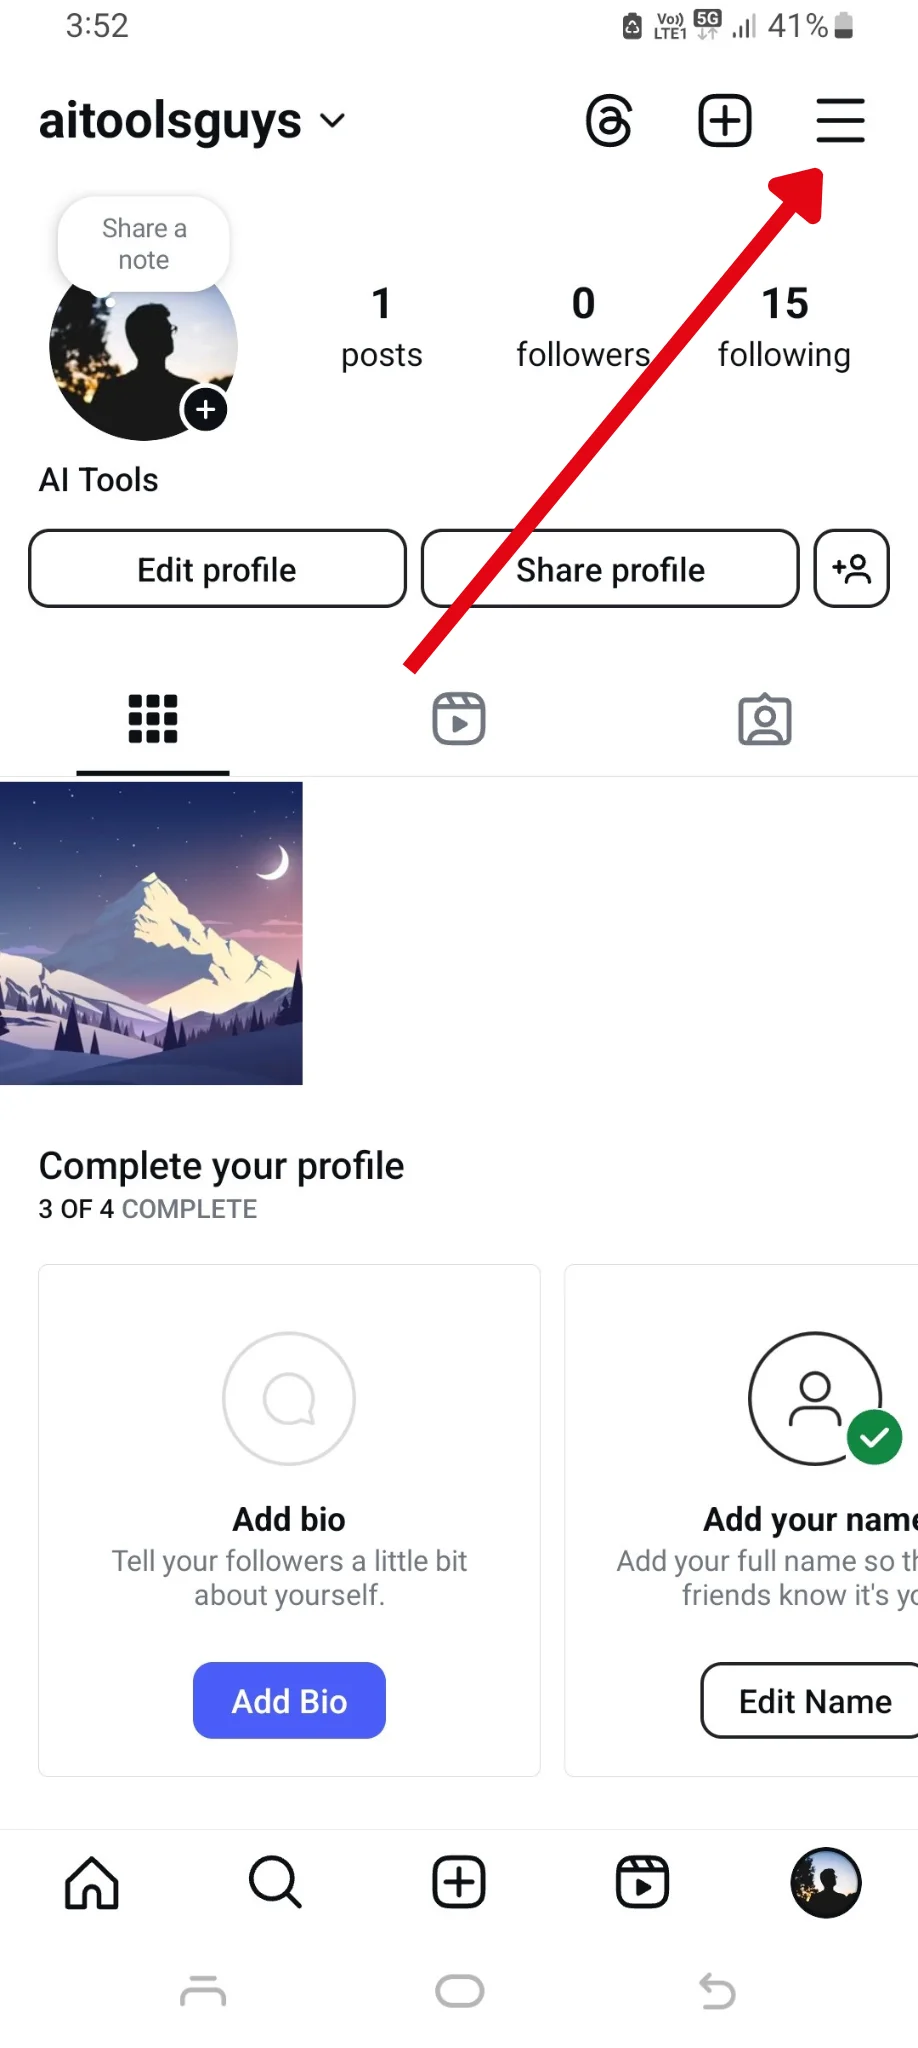
Step 2: Tap your profile picture in the bottom corner to go to your profile.
Step 3: Tap the three horizontal lines (☰) in the top right corner to open the menu.
Step 4: Go to Meta Accounts Center—this is where you manage core account settings.
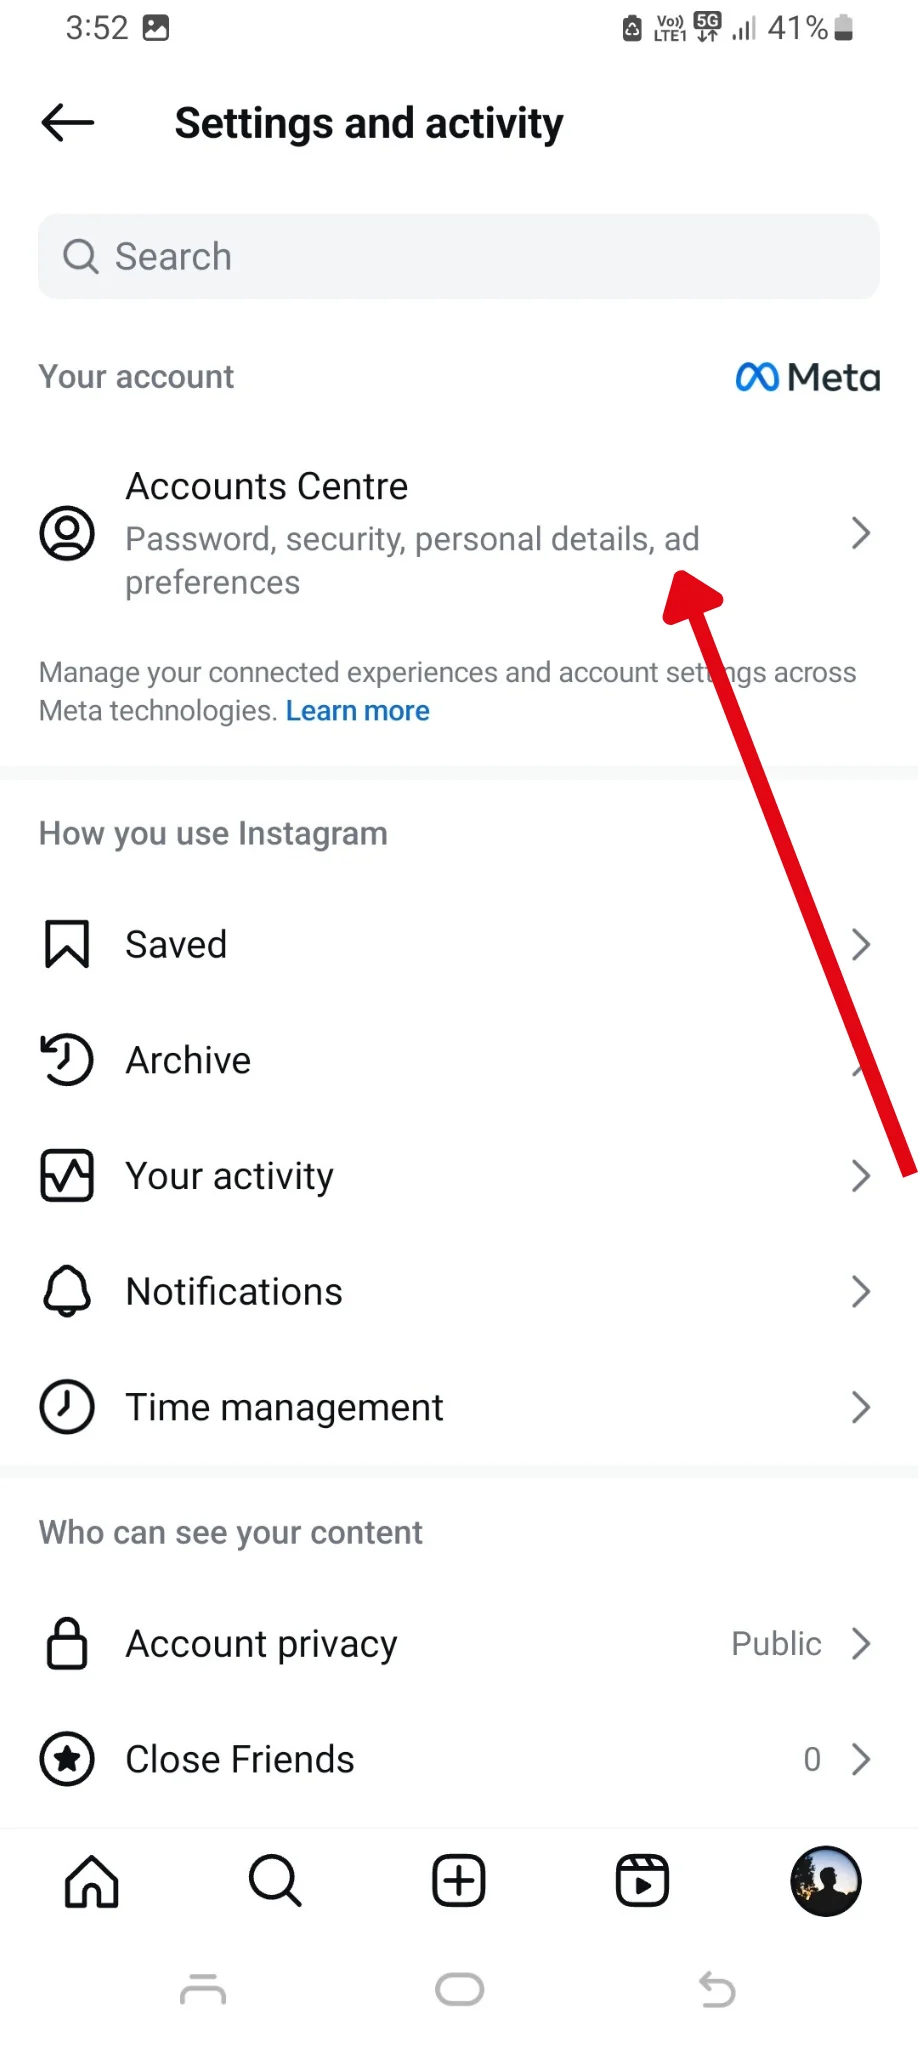
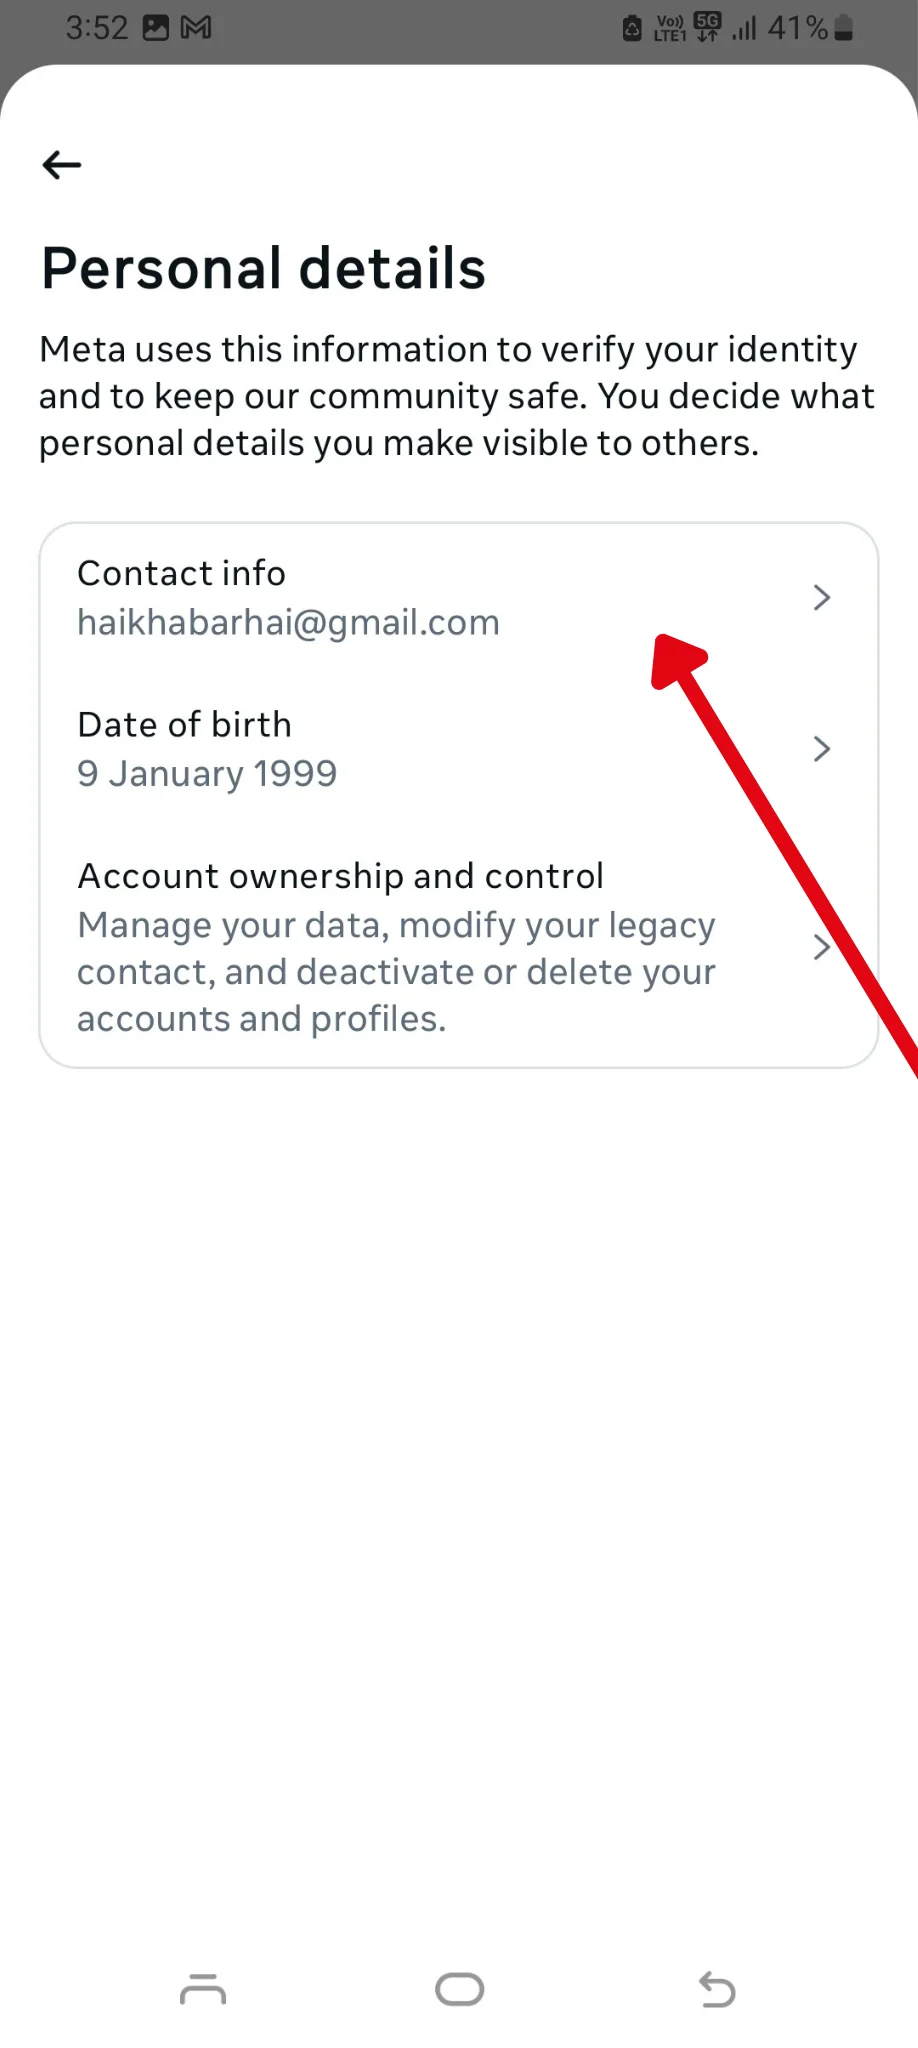
Step 5: Tap Personal details.

Step 6: Click on Contact info.
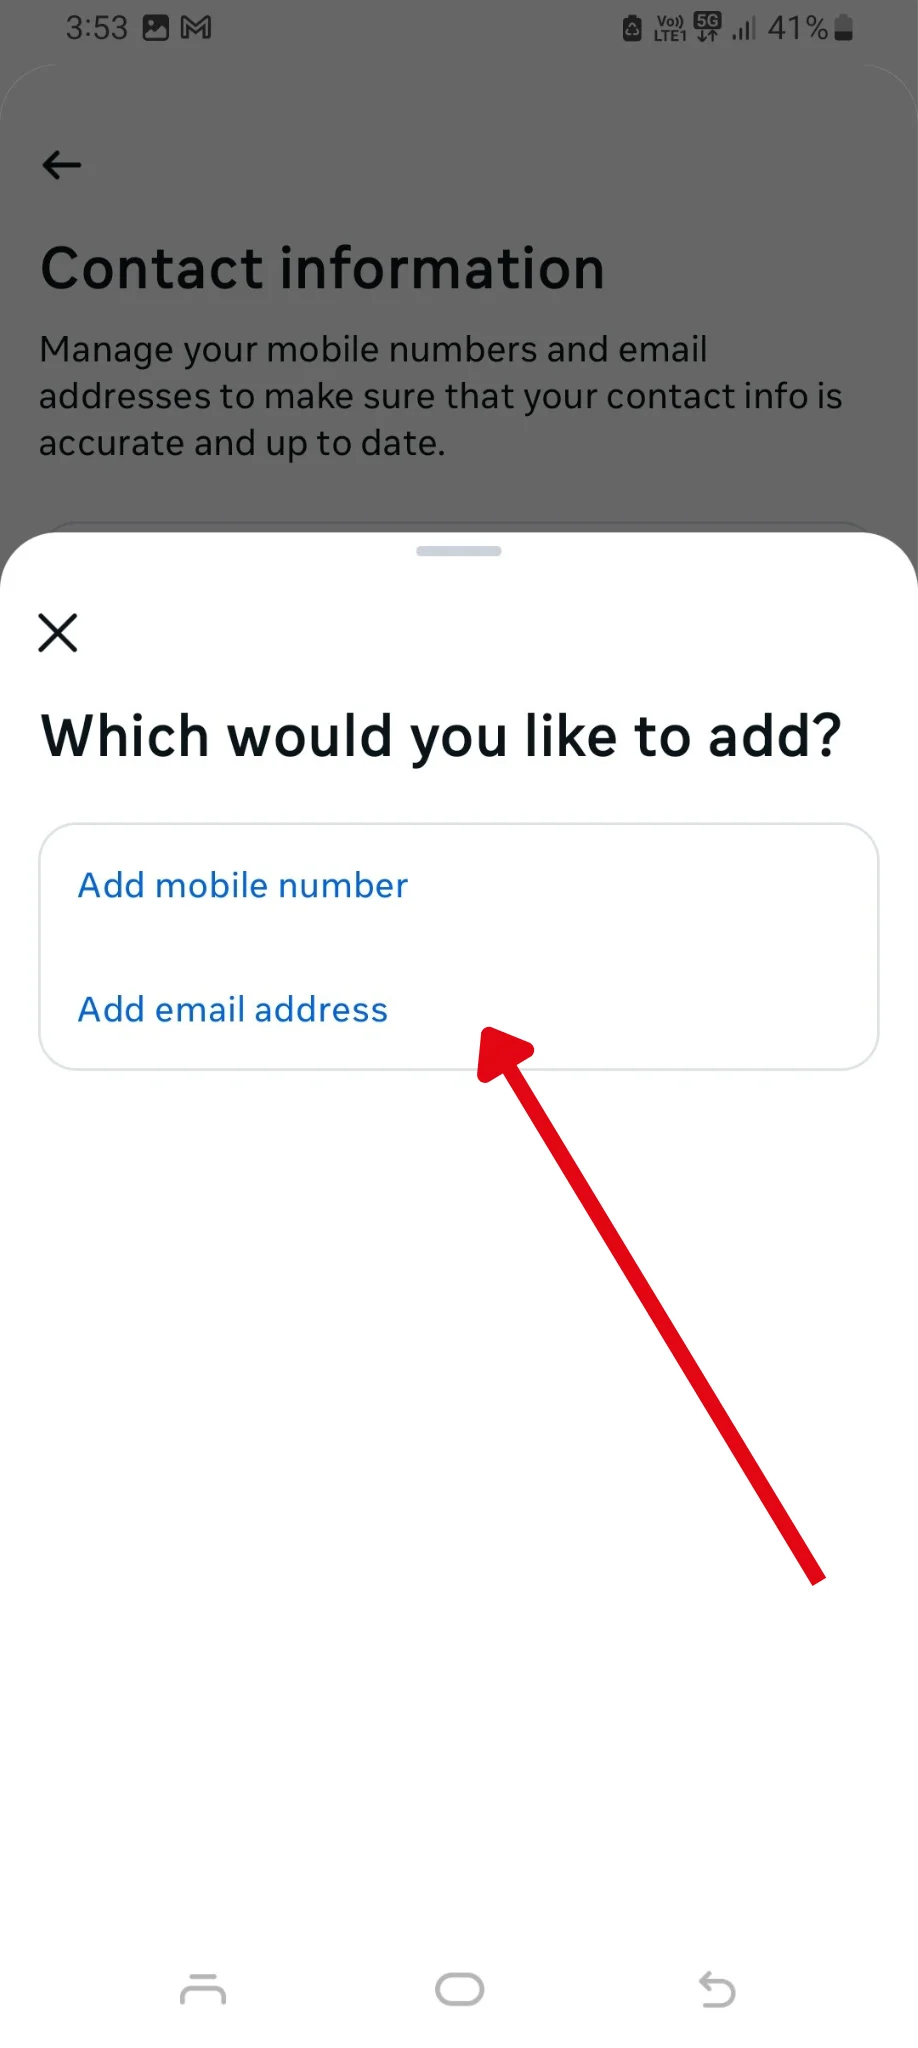
Step 7: Find the option to "Add new contact".
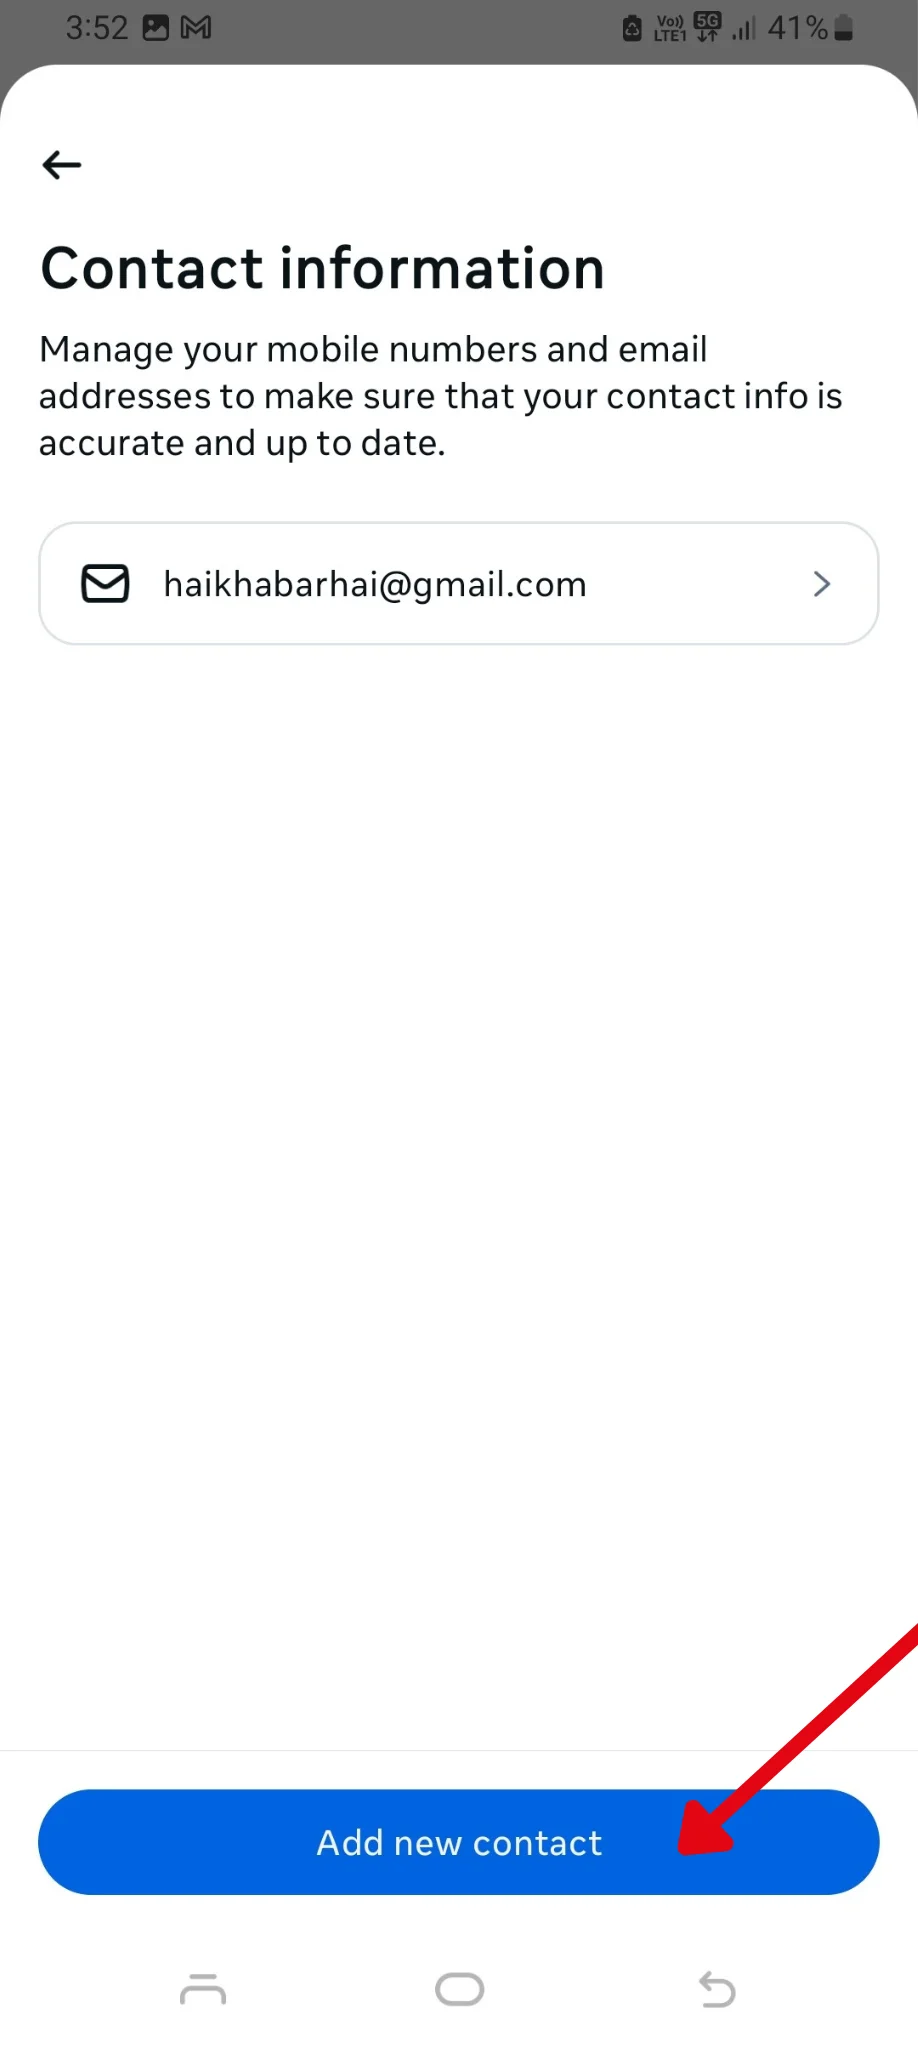
Step 8: Select Email address.
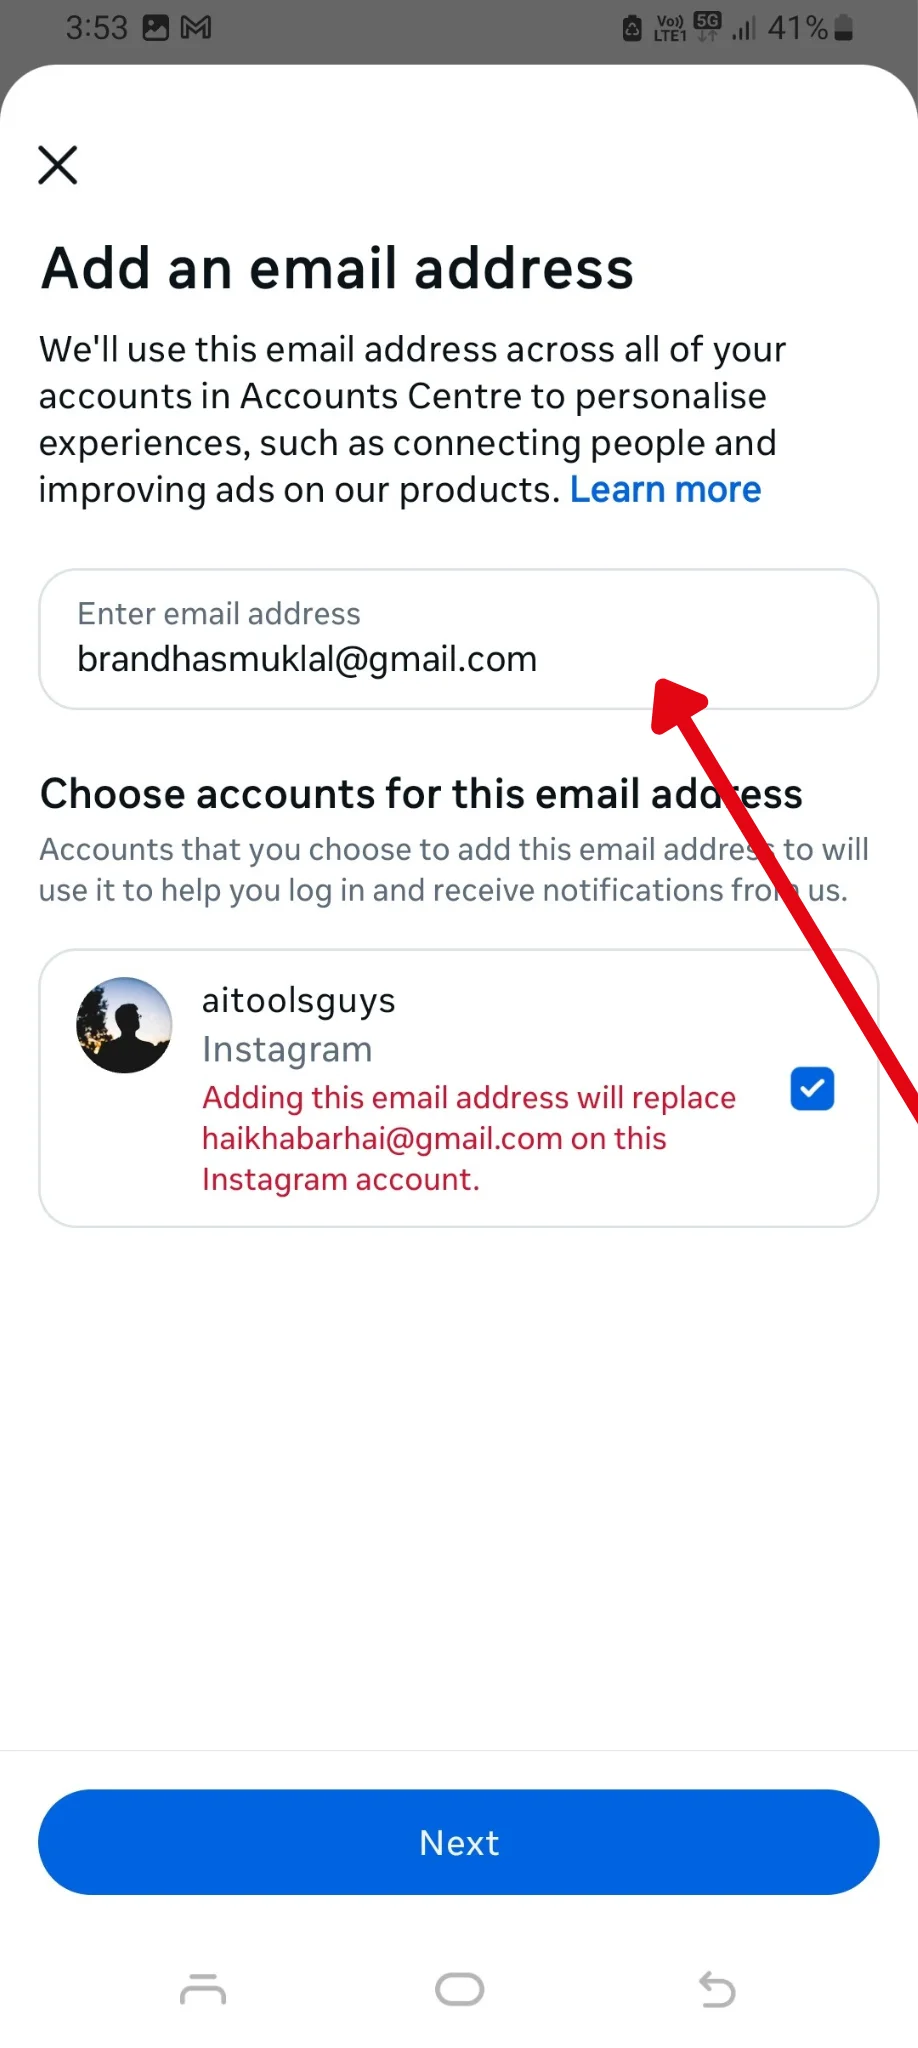
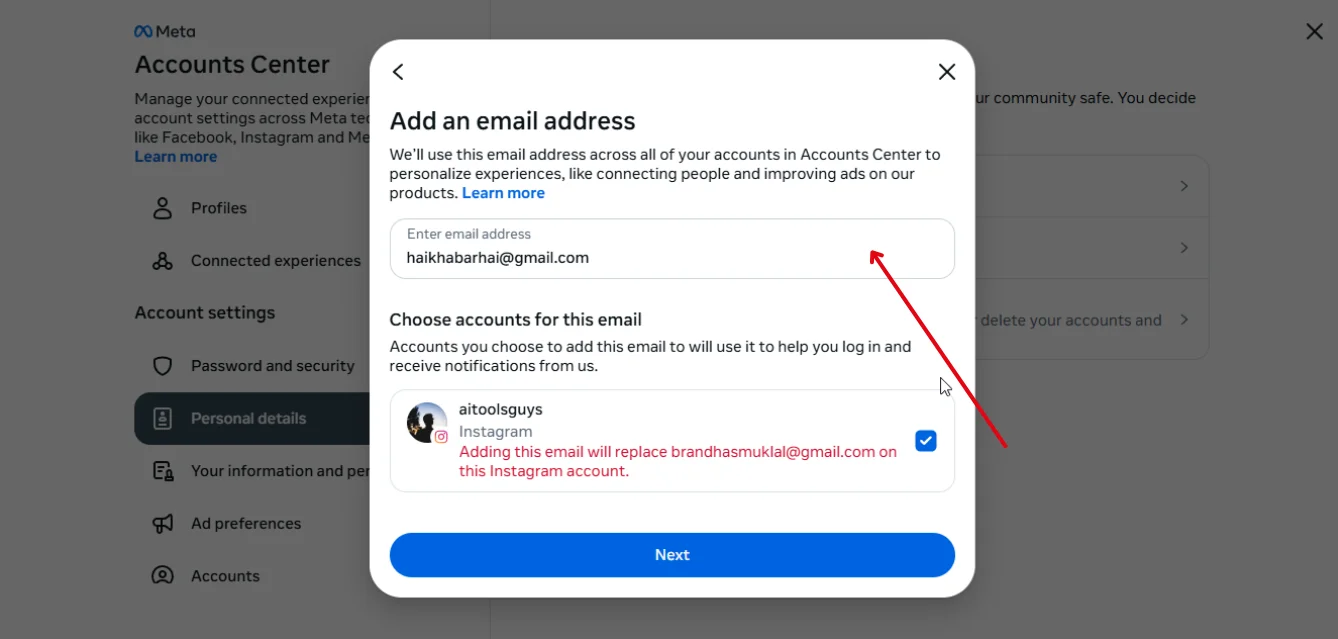
Step 9: Enter new email address and click "Next".
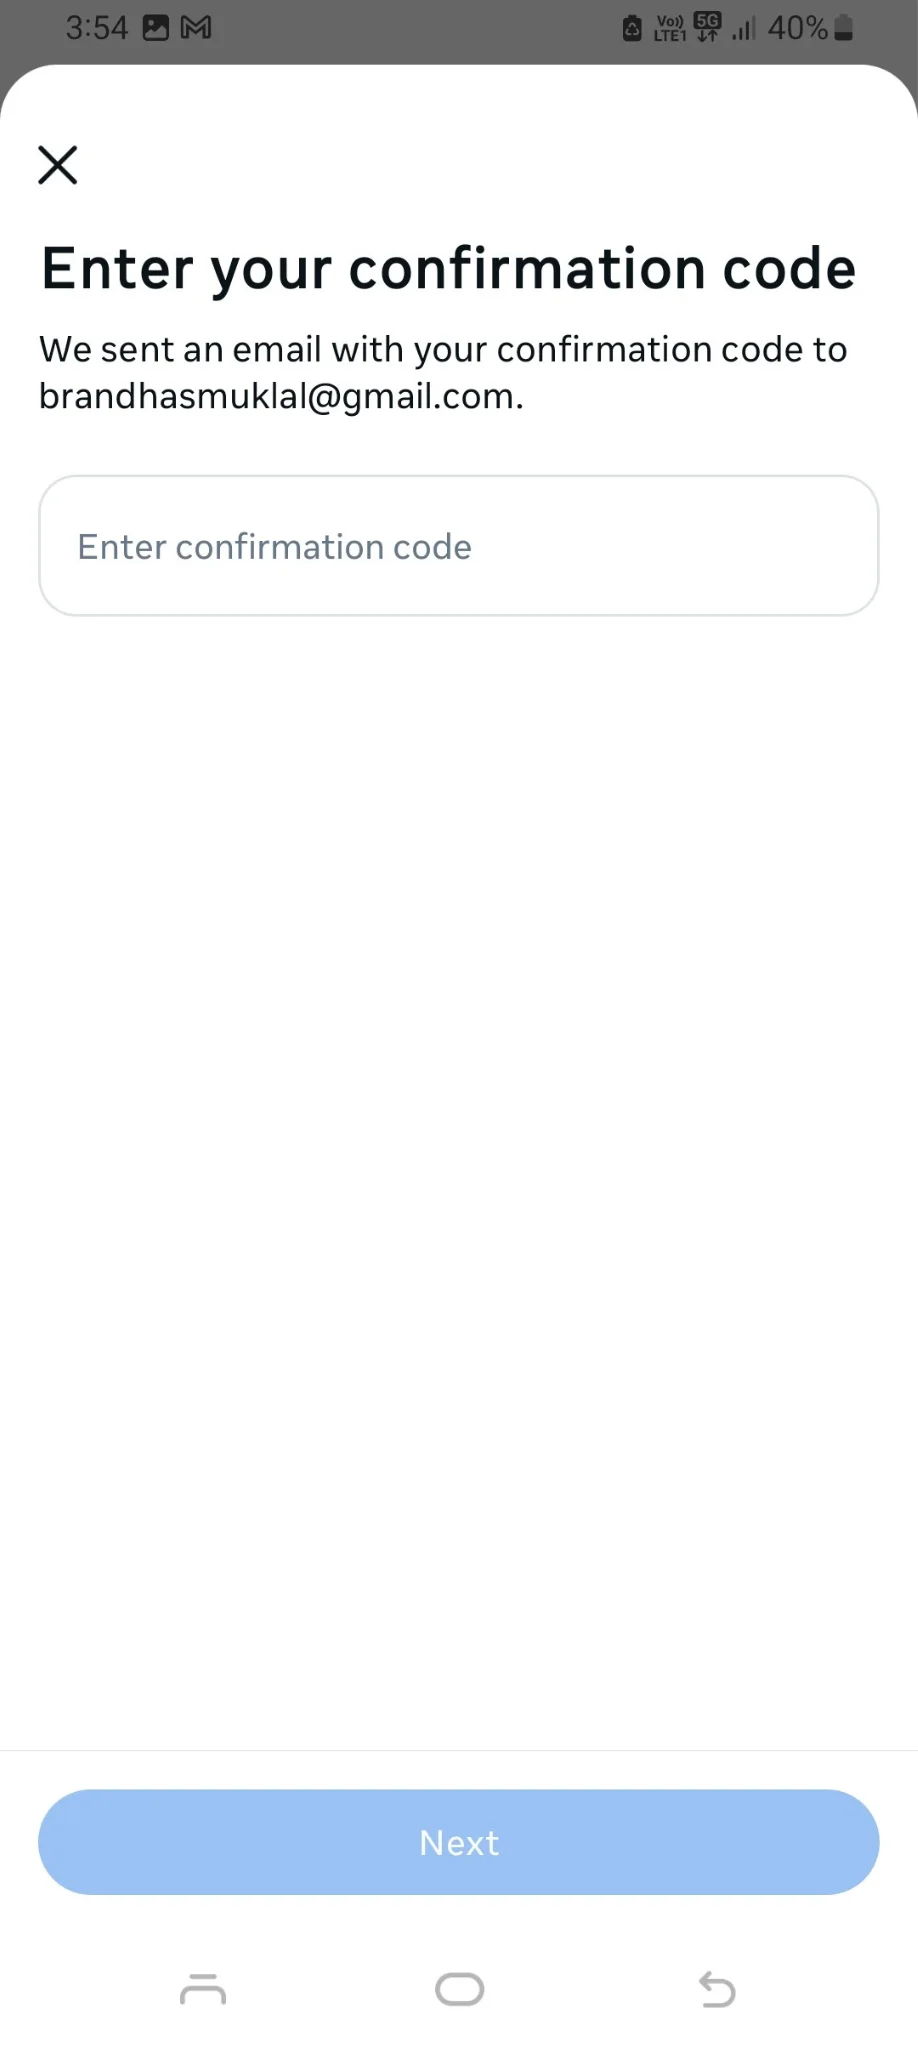
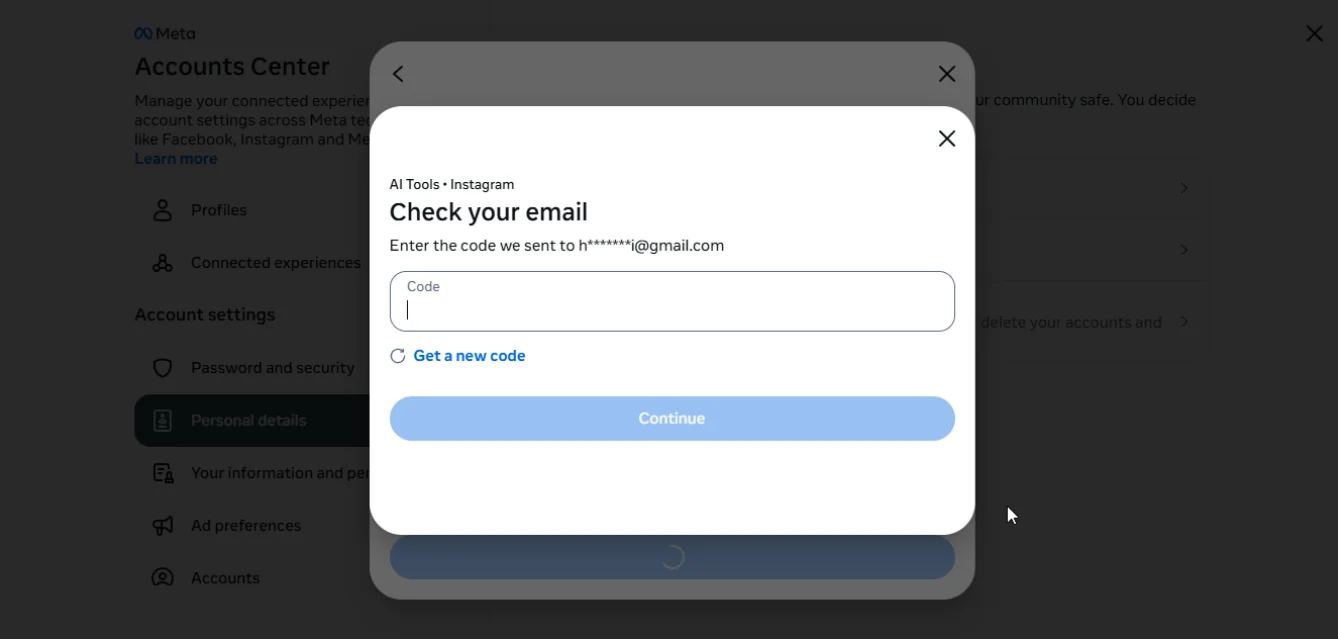
Step 10: Instagram will send a code to your new email address, insert the code in the field.
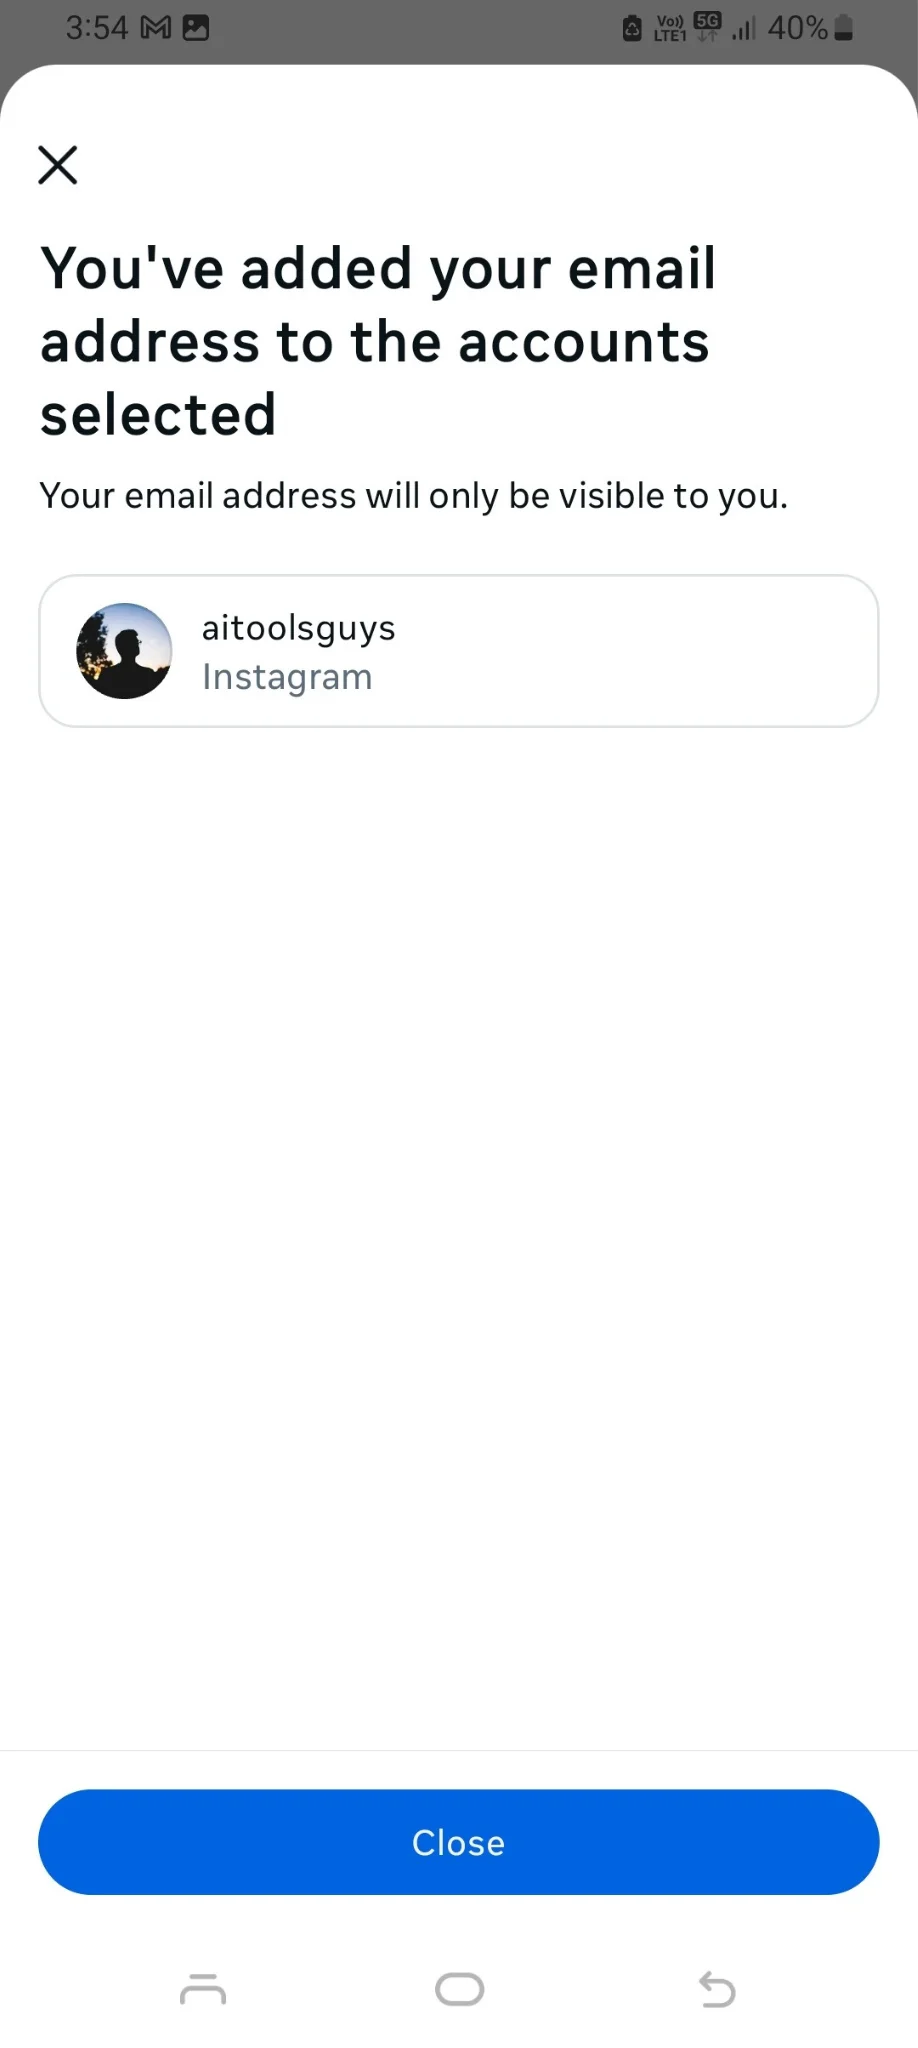
Step 11: Ta-da! Your email address is updated!
Changing Instagram Email via Desktop
Step 1: Open your web browser and go to Instagram.com. Log into your account.
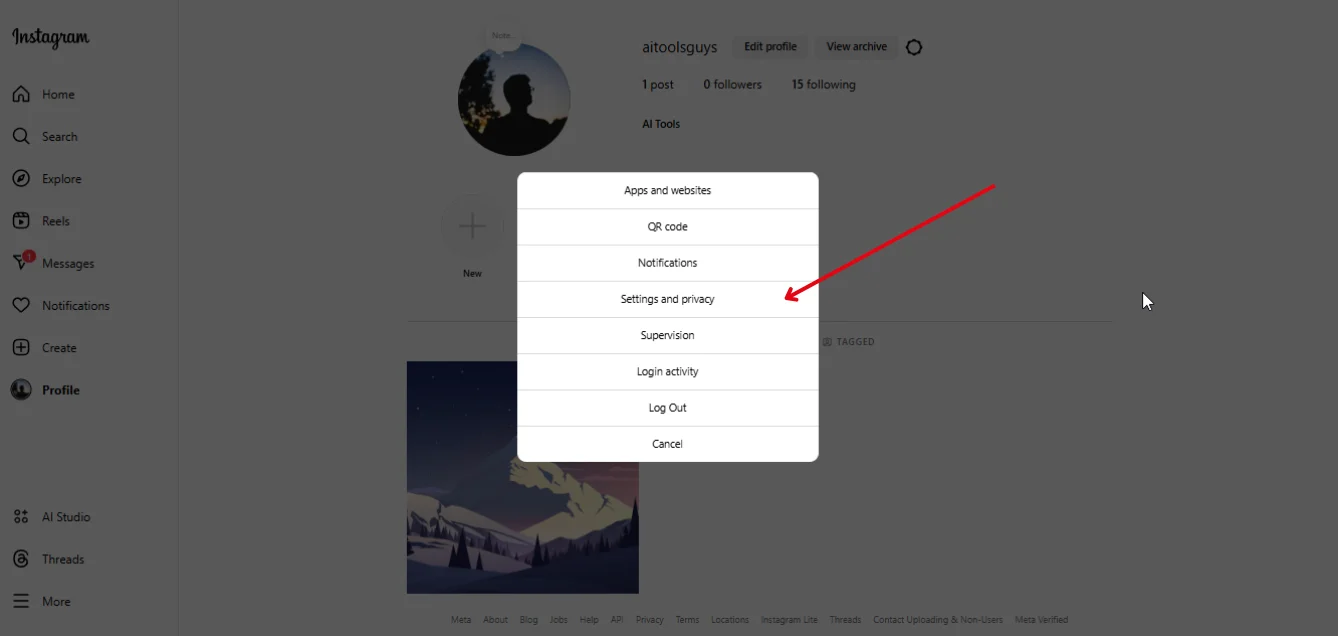
Step 2: Click on your profile picture in the top right corner and select Settings.

Step 3: Tap on Settings and Privacy.
Step 4: In the left-hand menu, go to Meta Accounts Center.
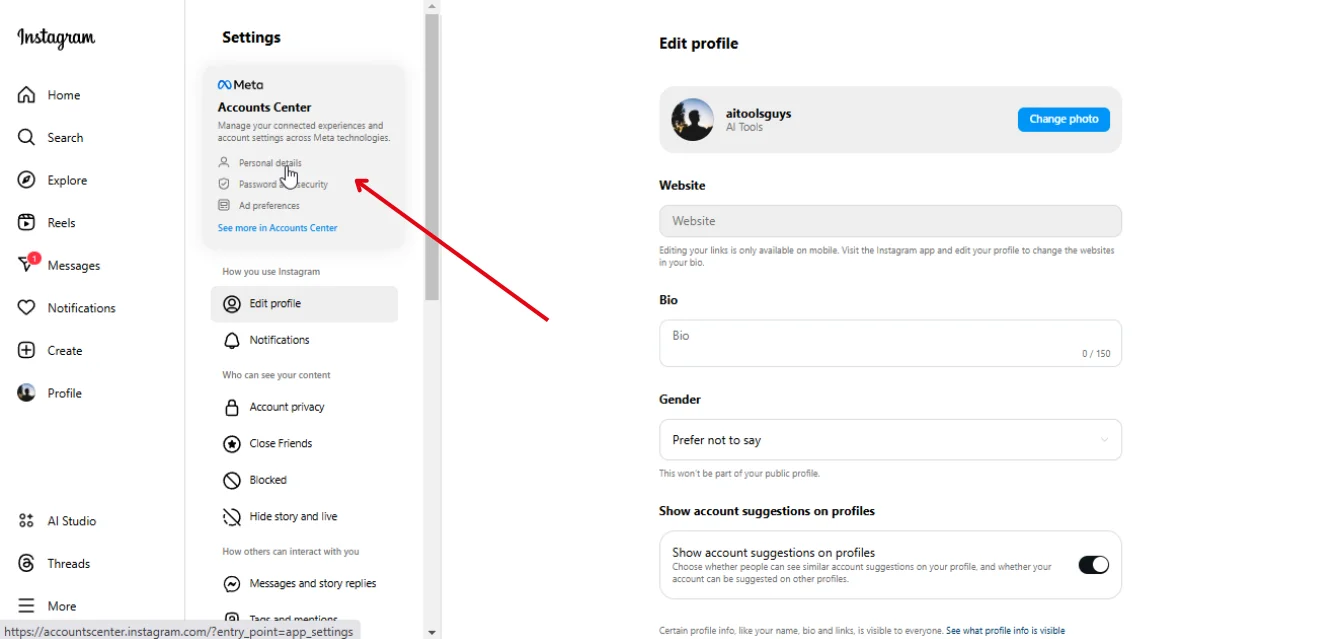
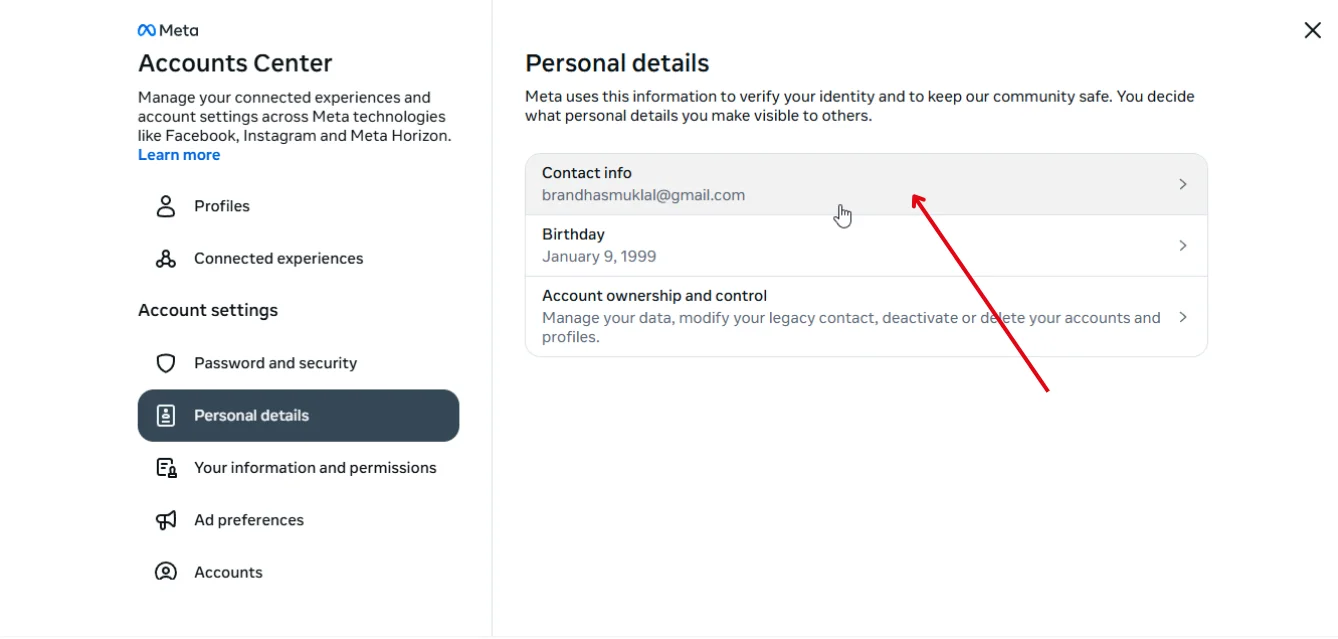
Step 5: Click on Personal details.

Step 6: Then select Contact info.
Step 7: Find the email section and select “Add new contact’
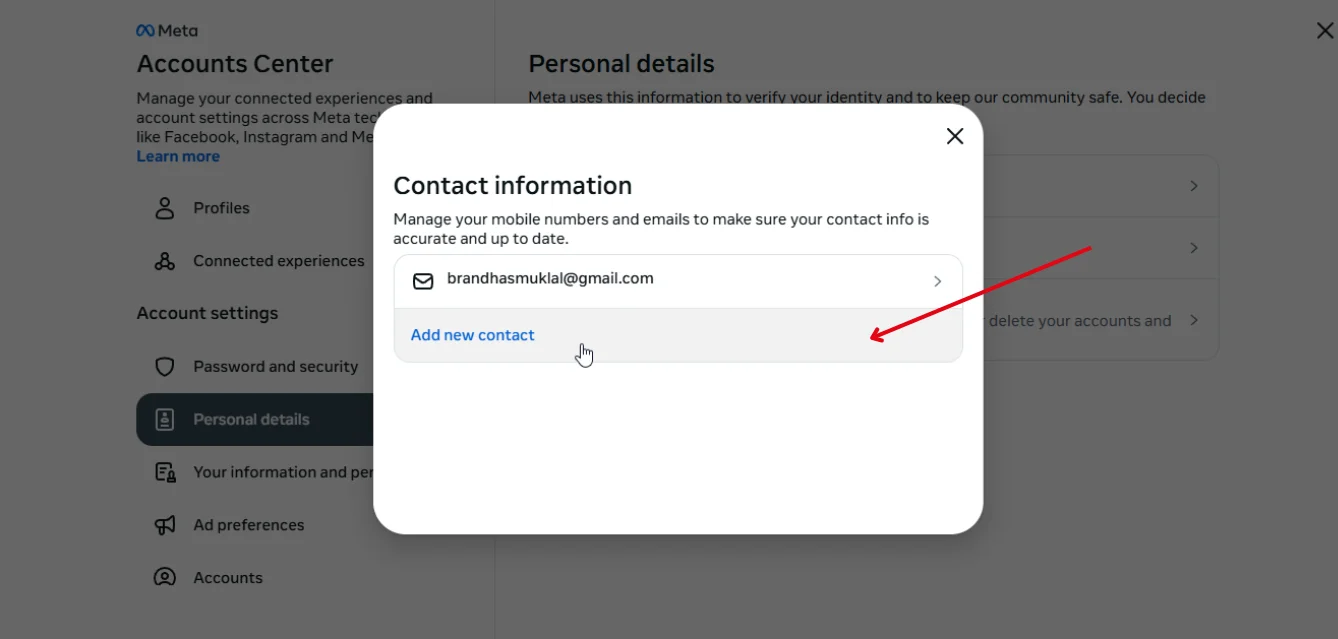
Step 8: Add your new email address and click “Next”.
Step 9: Instagram will send a code to your new email address, insert the code in the field.
Step 10: Ta-da! Your email address is updated!
Tips on Updating Your Email on Instagram
1. Prioritize Email Security
Your email is the gateway to your Instagram account, so keeping it secure is non-negotiable. Use a strong, unique password with a mix of letters, numbers, and symbols. A reputable password manager can help you store and retrieve credentials safely without the risk of forgetting them.
2. Stay Engaged with Your Inbox
Regularly check your email to stay updated on Instagram’s security alerts, login notifications, and potential threats. If your email account becomes inactive, you could miss critical updates—or worse, lose access to your Instagram.
3. Optimize Account Recovery Features
Familiarize yourself with Instagram’s recovery options so you’re prepared if access issues arise. Enable two-factor authentication (2FA) for an extra layer of protection, ensuring that even if someone tries to breach your account, they’ll need verification to proceed.
4. Synchronize Connected Services
If you update your email on Instagram, don’t forget to change it on all linked platforms. This keeps your social media tools, analytics services, and scheduling apps in sync, preventing disruptions in your business workflow.
By following these strategies, you ensure your Instagram account remains secure, functional, and always within your control.
Update Your Instagram Email for a Professional Edge
Updating your Instagram email address is a simple task, but a crucial one as well. Now that you know how to update it, you can ensure your account stays secure, organized, and professional. Taking a few minutes to make this change will help your business run smoothly and stay protected.
And if you need any help creating or managing content for your Instagram, log in or sign up for quso.ai and let us help you take your Instagram marketing to the next level.