With Facebook’s audience exceeding three billion monthly active users, it remains the largest social network worldwide. 98% of B2C companies and 89% of B2B companies have Facebook pages. Not having a presence there means missing out on connecting with a vast audience. Your Facebook Business Page not only helps grow your audience but also allows you to create Shops and run ads across Meta’s platforms. And the best part? It’s absolutely free.
Personal Profile vs. Facebook Business Page
Personal Profile
A personal profile is designed for individual users to represent themselves on Facebook. It includes:
- Personal details like name, profile picture, cover photo, and posts.
- A friends list to connect with other Facebook users.
- Privacy settings to control who sees your information and posts.
Business Page
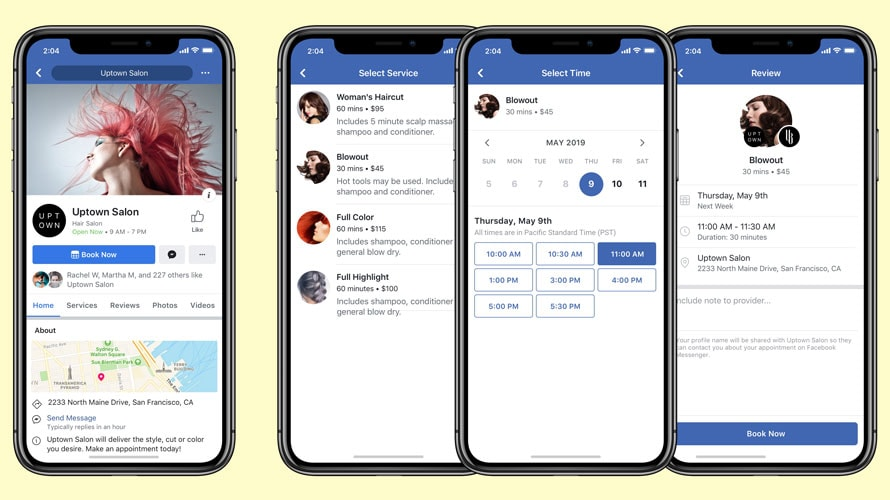
Source: Adweek
A business page, on the other hand, is intended for companies, organizations, and public figures to promote themselves. Key features include:
- Sharing business information, updates, and engaging with followers.
- Running ads to reach a broader audience.
- Management by a personal Facebook profile, known as the page administrator.
- The ability to add other admins to help manage the page.
It's crucial to keep your personal profile separate from your business page to comply with Facebook's terms of service and avoid confusing your followers.
Steps to Create a Facebook Business Page
Step 1: Choose or Create a Personal Facebook Account
To start, you need a personal Facebook account to create and manage a Facebook Business Page. This account is known as the Page administrator. A Page can have multiple administrators. You can use your existing personal account or create a new one with your work email for a clear separation between your personal and professional lives. Log into the chosen account and either click the "Create a Page" link or navigate to the Pages menu.
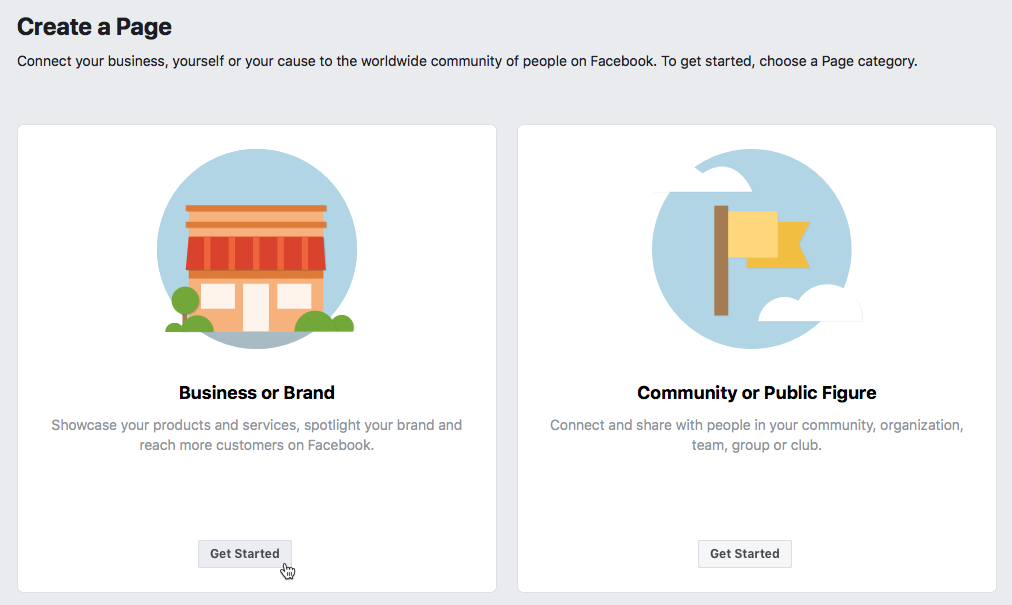
Step 2: Enter Your Business Information
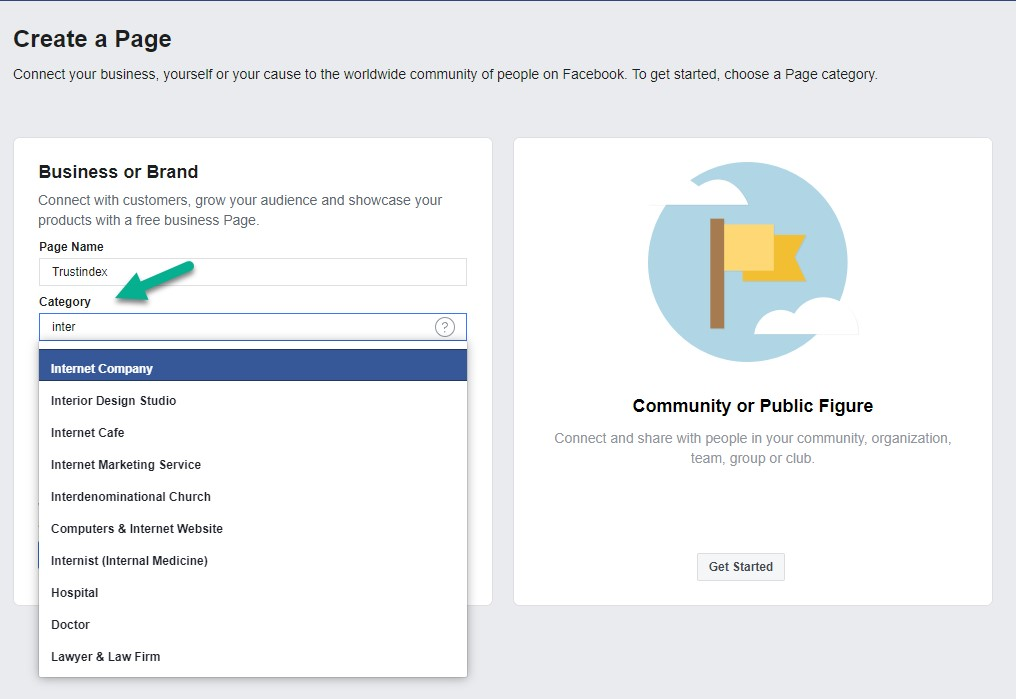
Next, populate your new Facebook business profile with essential details. Begin with a name for your Page, which is typically your business name. For specific branches or promotions, you might choose a more specific name. Select a category that best describes your business and optionally fill out the Bio section to help with social SEO.
Step 3: Add Contact Information
Enter your business's URL, phone number, and email. You can also add your physical location and operating hours if applicable. This information will be publicly available, so ensure you’re comfortable sharing it.
Step 4: Add Visuals and an Action Button
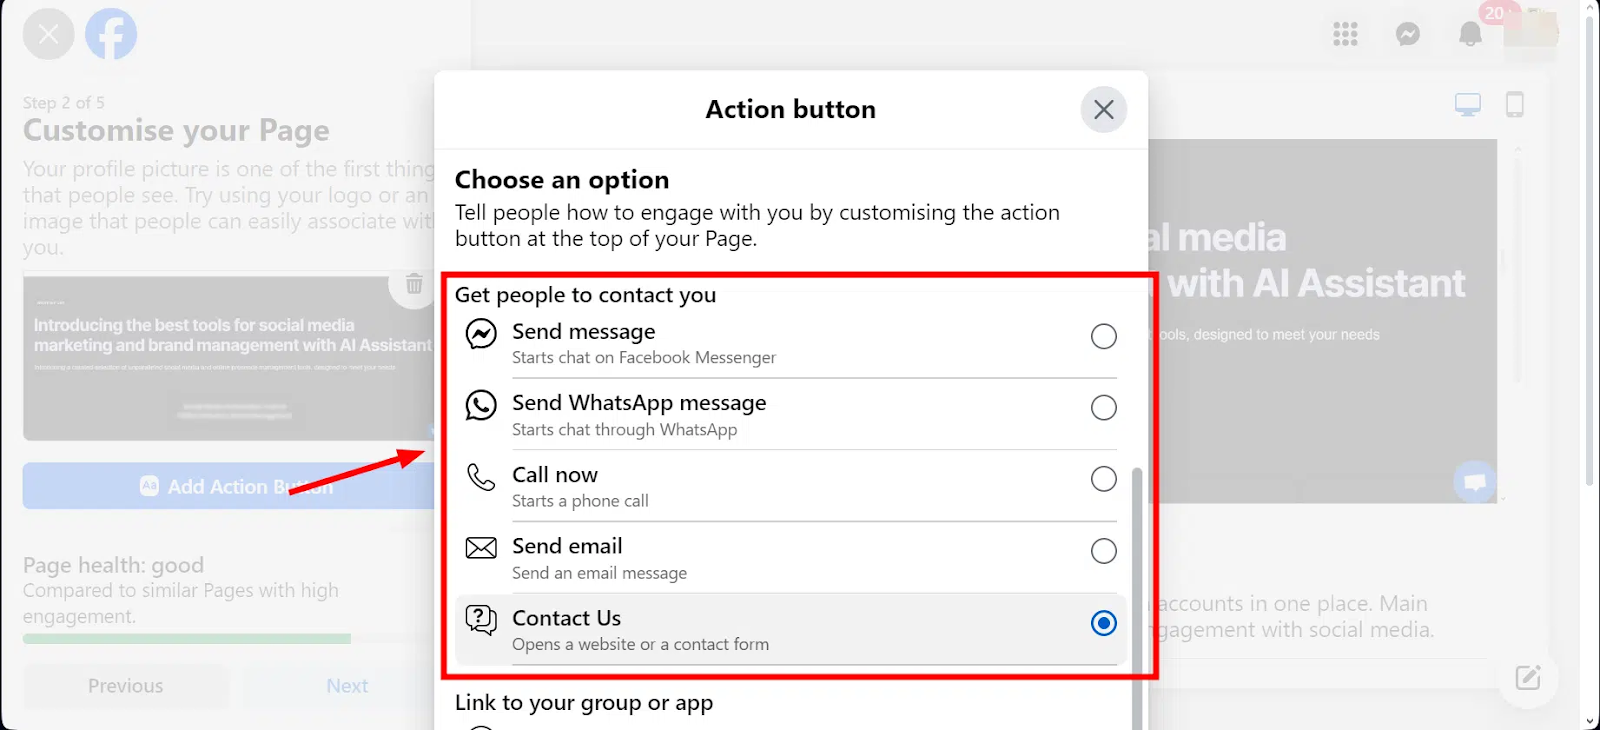
Enhance your Page with a profile photo (ideally your logo) and a cover image. These visuals represent your brand and appear alongside your posts and activities on Facebook. You can also add a call-to-action button like "Start Order," "Send Message," or "Get Tickets" to encourage customer interaction.
Step 5: Connect to WhatsApp
If you want to connect with customers via WhatsApp, you can add a WhatsApp button to your Page by entering your WhatsApp number and confirming with a code. If not, you can skip this step.
Step 6: Invite Friends to Like Your Page
Before officially launching your Page, invite your Facebook friends to like it to build an initial audience.
Step 7: Set Notification Preferences
Enable notifications for your Page so you stay informed about activities and interactions. You can also opt in or out of promotional materials from Meta.
Step 8: Customize Your Facebook Business Page
Click “Edit details” to add more information, adjust visibility settings for different sections, and provide a comprehensive view of your business.
Step 9: Adjust Privacy Settings
Go to Settings > Privacy to tweak your privacy settings. Decide if others can post on your page or leave reviews. These settings can be modified anytime.
Step 10: Link Your Instagram Page
If you have an Instagram Business Page, link it to your Facebook Business Page to manage both platforms efficiently. Go to Settings > Linked Accounts and follow the prompts.
Step 11: Start Posting!
Begin posting content on your Page. Use text, photos, Reels, polls, or go live to engage your audience. Focus on providing value, whether through entertainment, information, or inspiration. Consider boosting posts to extend their reach.
How to Add an Admin to Your Facebook Page
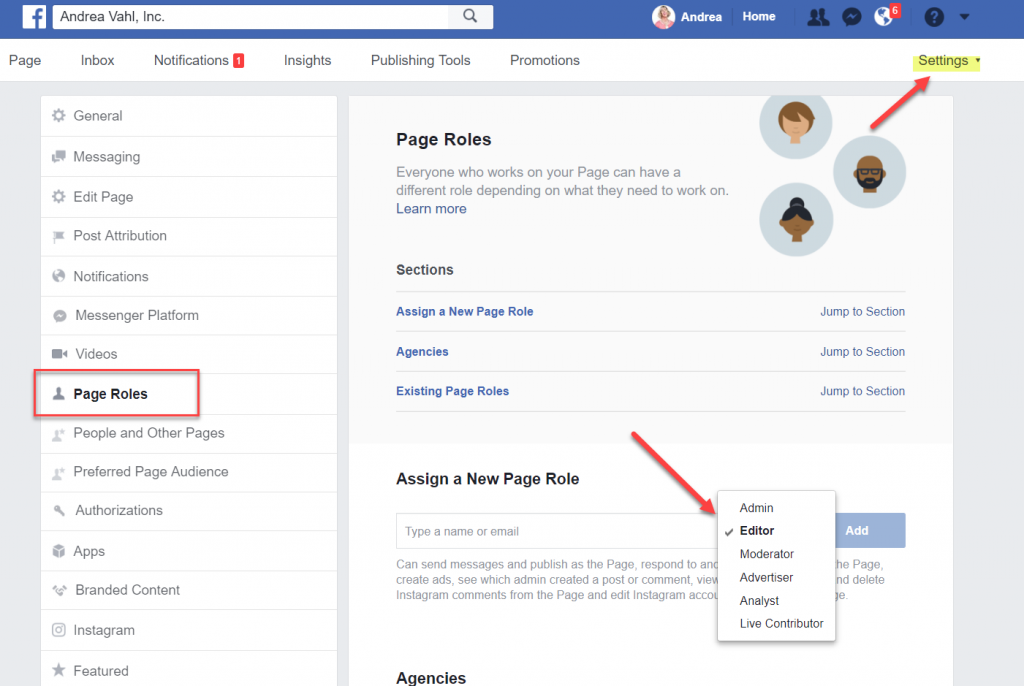
Step 1: Log in as Your Page
Navigate to Pages from the menu and select your Facebook Business Page.
Step 2: Open the Page Access Menu
Click on Page Access from the left-hand side to manage permissions. You can grant Facebook access (full control) or task access (limited tasks).
Step 3: Add New Admins
Click “Add new” under the relevant category, search for the person, and assign their permissions. For security, you may need to re-enter your Facebook password.
Step 4: Add Admins to Meta Business Suite
For financial tasks, add admins through Meta Business Suite by creating a business account and specifying their access levels.
Managing Your Facebook Business Page
How to Deactivate Your Facebook Page Temporarily
If you need a break, temporarily deactivate your page:
- Go to Settings, then General.
- Scroll down and click on Remove Page.
- Select Deactivate Page and follow the prompts.
How to Permanently Delete a Facebook Business Page
If you decide to close your page permanently:
- Go to Settings, then General.
- Scroll down and click on Remove Page.
- Select Permanently Delete Page and confirm your choice.
Optimizing Your Facebook Business Page
Explore Your Page Insights

Use Facebook Business Page Insights to make data-driven decisions:
- Click on Insights at the top of your page.
- Explore tabs like Overview, Likes, Reach, and Engagement for detailed metrics.
Pin a Post
Highlight important information by pinning a post:
- Click on the three dots on the top right of the post.
- Select Pin to Top of Page.
Get Facebook Reviews
Collect Facebook reviews to enhance your online reputation:
- Use tools like Podium to request reviews via text.
- Respond to reviews and remove any fake or spammy ones.
Protecting Personal Information While Growing Your Business
Creating a Business Facebook Page Without a Personal Account
To maintain privacy, create a Facebook account using your business email:
- Provide minimal personal information, such as your name and birthday.
- Skip adding a phone number if preferred.
Keeping Your Personal Information Private
Make your profile unsearchable and hide personal details:
- Adjust privacy settings to limit who can see your information.
- Change visibility settings for your email and birthday to Only Me.
How to Schedule Reels on Facebook Business Page
Maintaining a regular posting schedule is crucial, but we understand that it can be quite daunting. Fortunately, Facebook offers a feature that lets you schedule Reels in advance. This means you can prepare a batch of content once or twice a month without needing to post manually every day. Here’s the step-by-step process to schedule a Facebook Reel:
- Create your Reel as usual, adding any text or links you want to share.
- Once your Reel is complete, click on the “Schedule” option.
- Use the calendar and clock icons to select the desired date and time for your Reel to be published.
- Click “Schedule” to finalize the date and time settings for your Reel.
If you’re looking to manage short-form content across multiple platforms, consider using a scheduling tool like quso.ai (previously vidyo.ai). This can streamline the process and allow you to schedule and publish Reels not only for Facebook but for other social media platforms as well.
💡Related read: Podcaster Gains 75,000 Views on Facebook Reels With quso.ai
Easy Facebook Page Management by quso.ai (previously vidyo.ai)
Meta Business Suite and tools like quso.ai (previously vidyo.ai) can help manage your Facebook Pages. Meta Business Suite allows you to run ads, use Facebook Commerce, and connect Instagram and Facebook business accounts. quso.ai (previously vidyo.ai) offers advanced features like batching, scheduling and publishing Facebook Reels, making it a comprehensive tool for managing social media profiles across various platforms. Try quso.ai (previously vidyo.ai) today to run your Facebook business page on autopilot.


