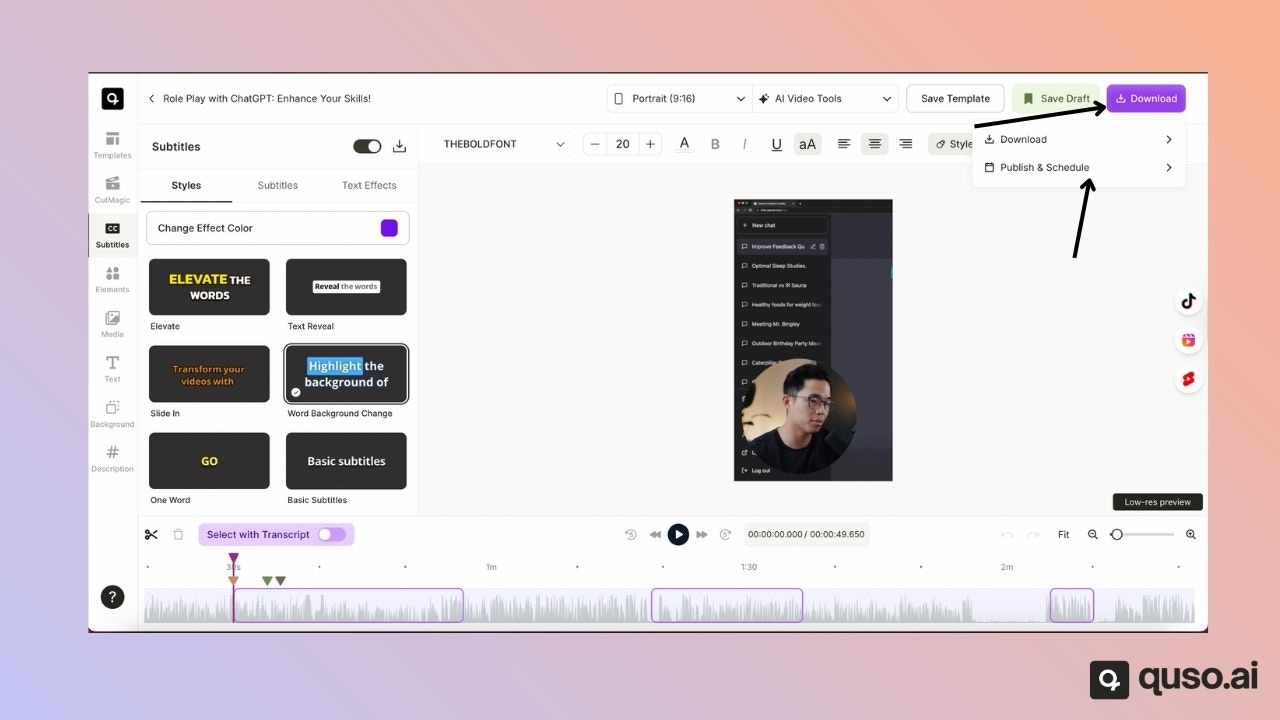
Step 1: Navigate to the Publish Section
After you finish editing your video:- Go to Downloads
- Select Publish
- Click Schedule
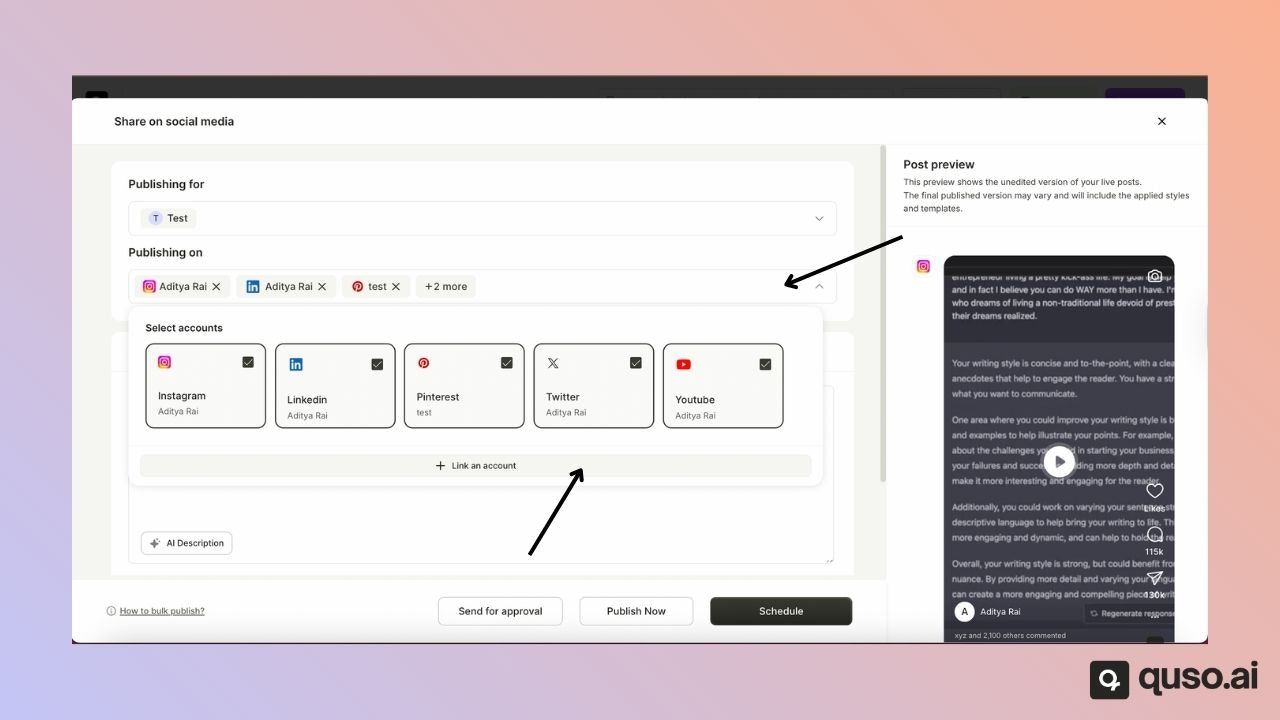
Step 2: Link Your Social Accounts
- If your accounts are already linked, you will see them listed.
- If not, click Link next to the platform you want to connect.
- Once linked, close the window, and the connected account will appear in your list.
Step 3: Generate a Description
Use the built-in tools to generate a caption or write your own.This description will be used when your post is published.
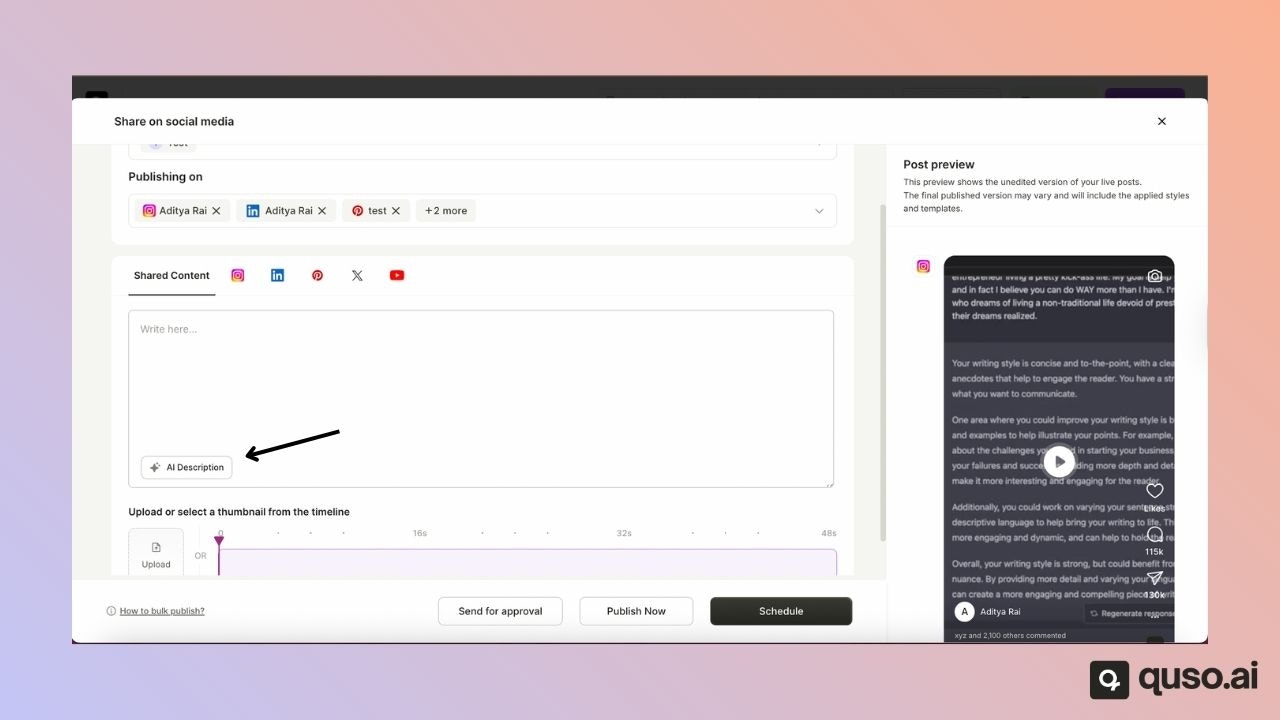
Step 4: Upload or Select a Thumbnail
You can:- Upload your own custom thumbnail, or
- Choose a frame from your video to use as the thumbnail.
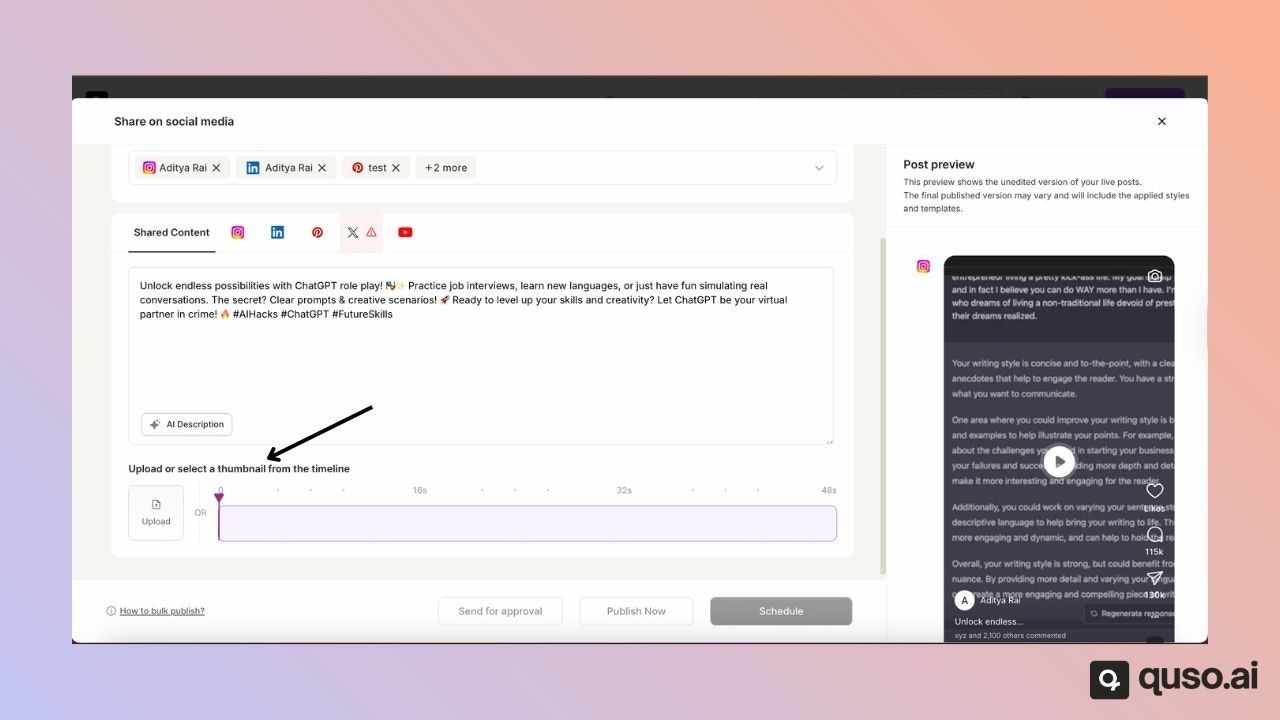
Step 5: View the Post Preview
You will see a mobile-style preview of your post. Note:This preview does not display your final edited template or subtitle style. It only shows how your post will appear on social platforms when viewed on a phone.
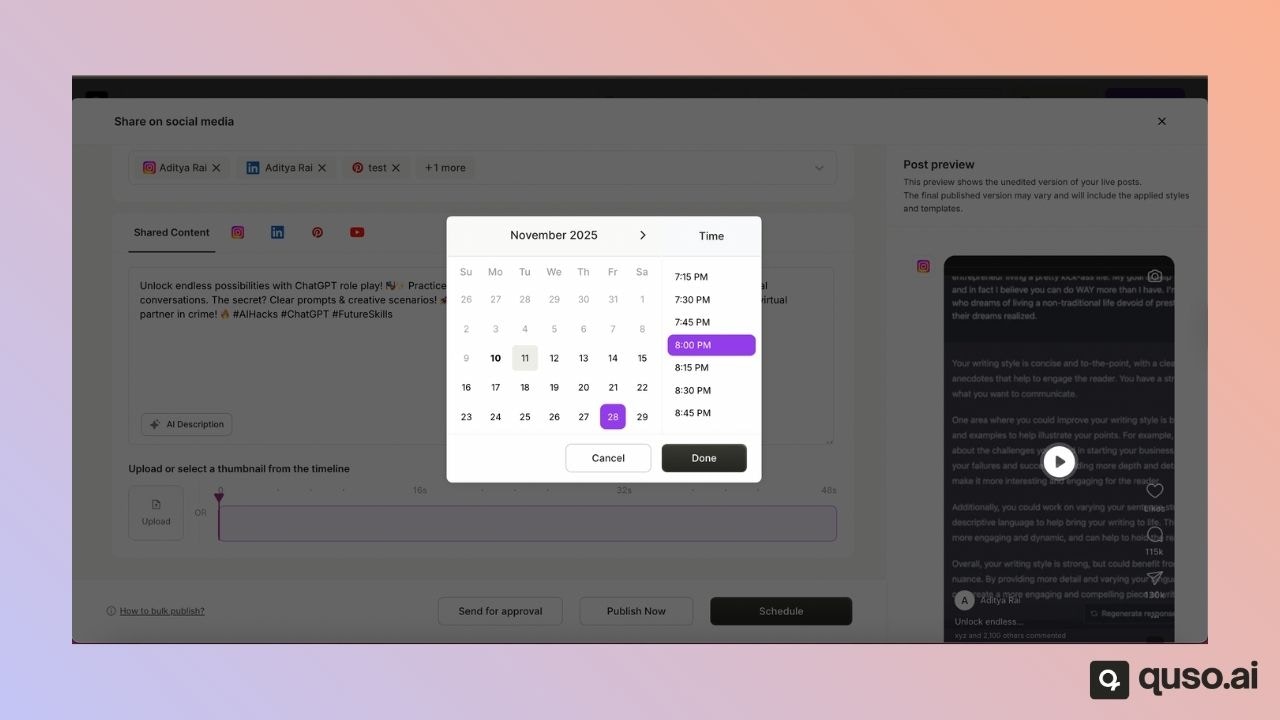
Step 6: Schedule Your Post
- Select the date and time you want your post to go live.
- For example, you can schedule it for the 28th at 8:00 PM.
- Once confirmed, the scheduling process will begin. This may take a few minutes.
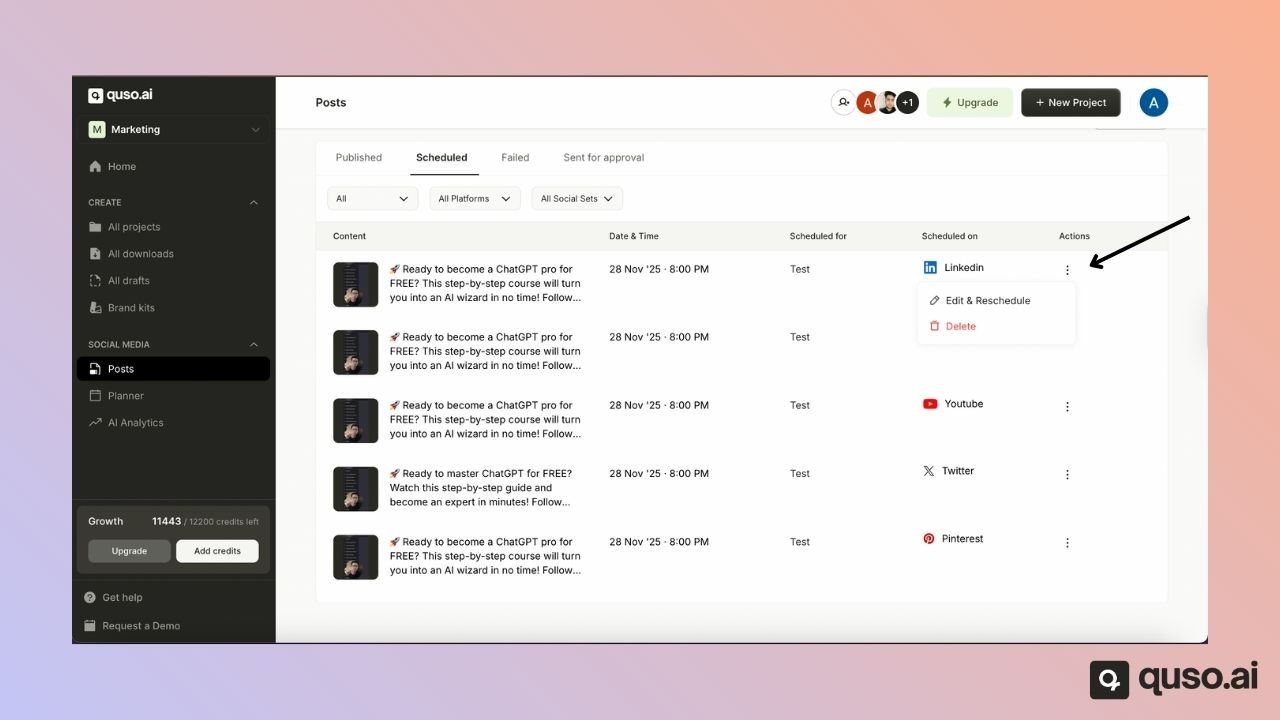
Step 7: Check Scheduled Posts
Once loaded, you will see which platforms the post has been scheduled for.Scheduled or published posts will appear here.
- Open Scheduled Posts
- You will see the post listed with its scheduled time
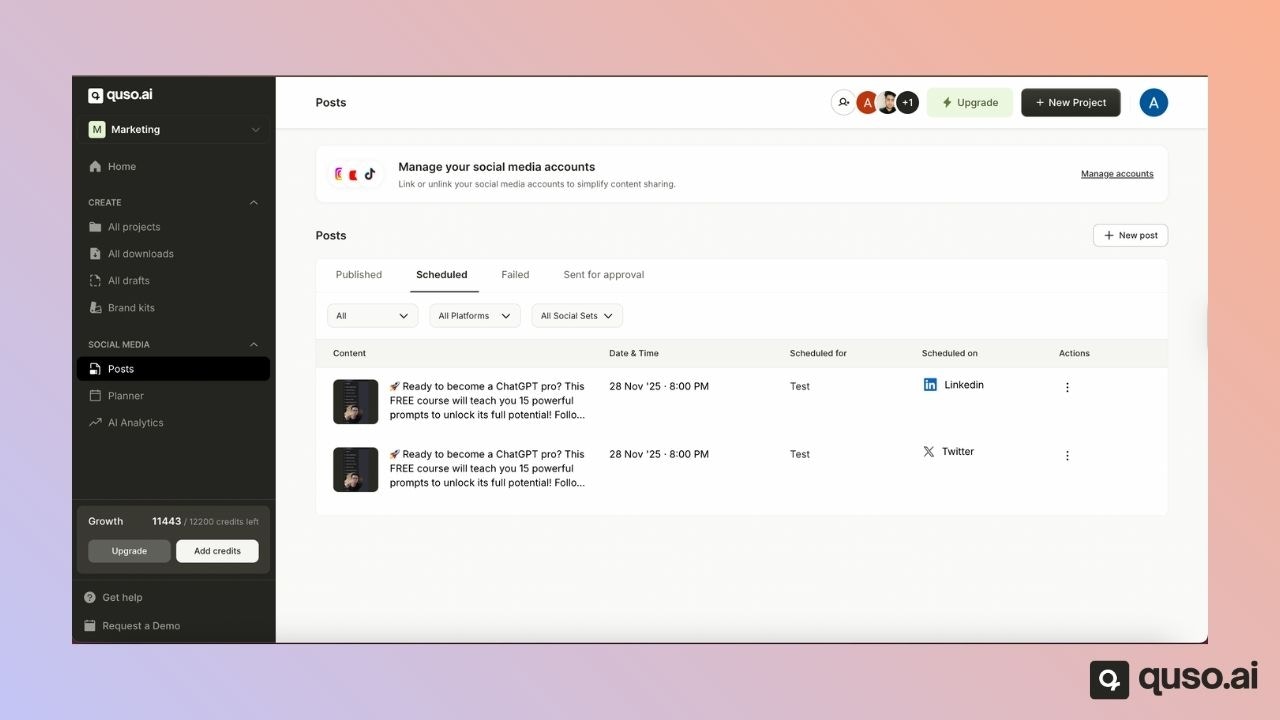
Managing Scheduled Posts
You can also delete, edit, or reschedule your scheduled posts directly from the Scheduled Posts page.If you no longer want a post to go live, simply select it and delete it before the scheduled time.